Admin
The Admin panel is where organization administrators run Yres: users and roles, announcements, security (firewall, secrets), updating environments and — per environment — the DWH settings, health checks and data warehouse logs.
The Admin section has two levels:
- Application-wide — applies to the entire organization and all of its environments (e.g. users, roles, announcements, firewall, application settings).
- Environment admin — settings and overviews that differ per environment (dev / test / acc / prod) (e.g. DWH settings, health checks, DWH logs, Azure resources). Switch environments with the environment switcher in the top right.
Not every user sees all Admin screens. Visibility depends on the role permissions (see Users & Roles). Organization admins always work within their own organization.
The full list of app screens with their route and fields is in Webapp screens.
Panel — Users & Roles
Route: /admin/panel. The central management screen with a Users table on the left and a Roles table on the right.
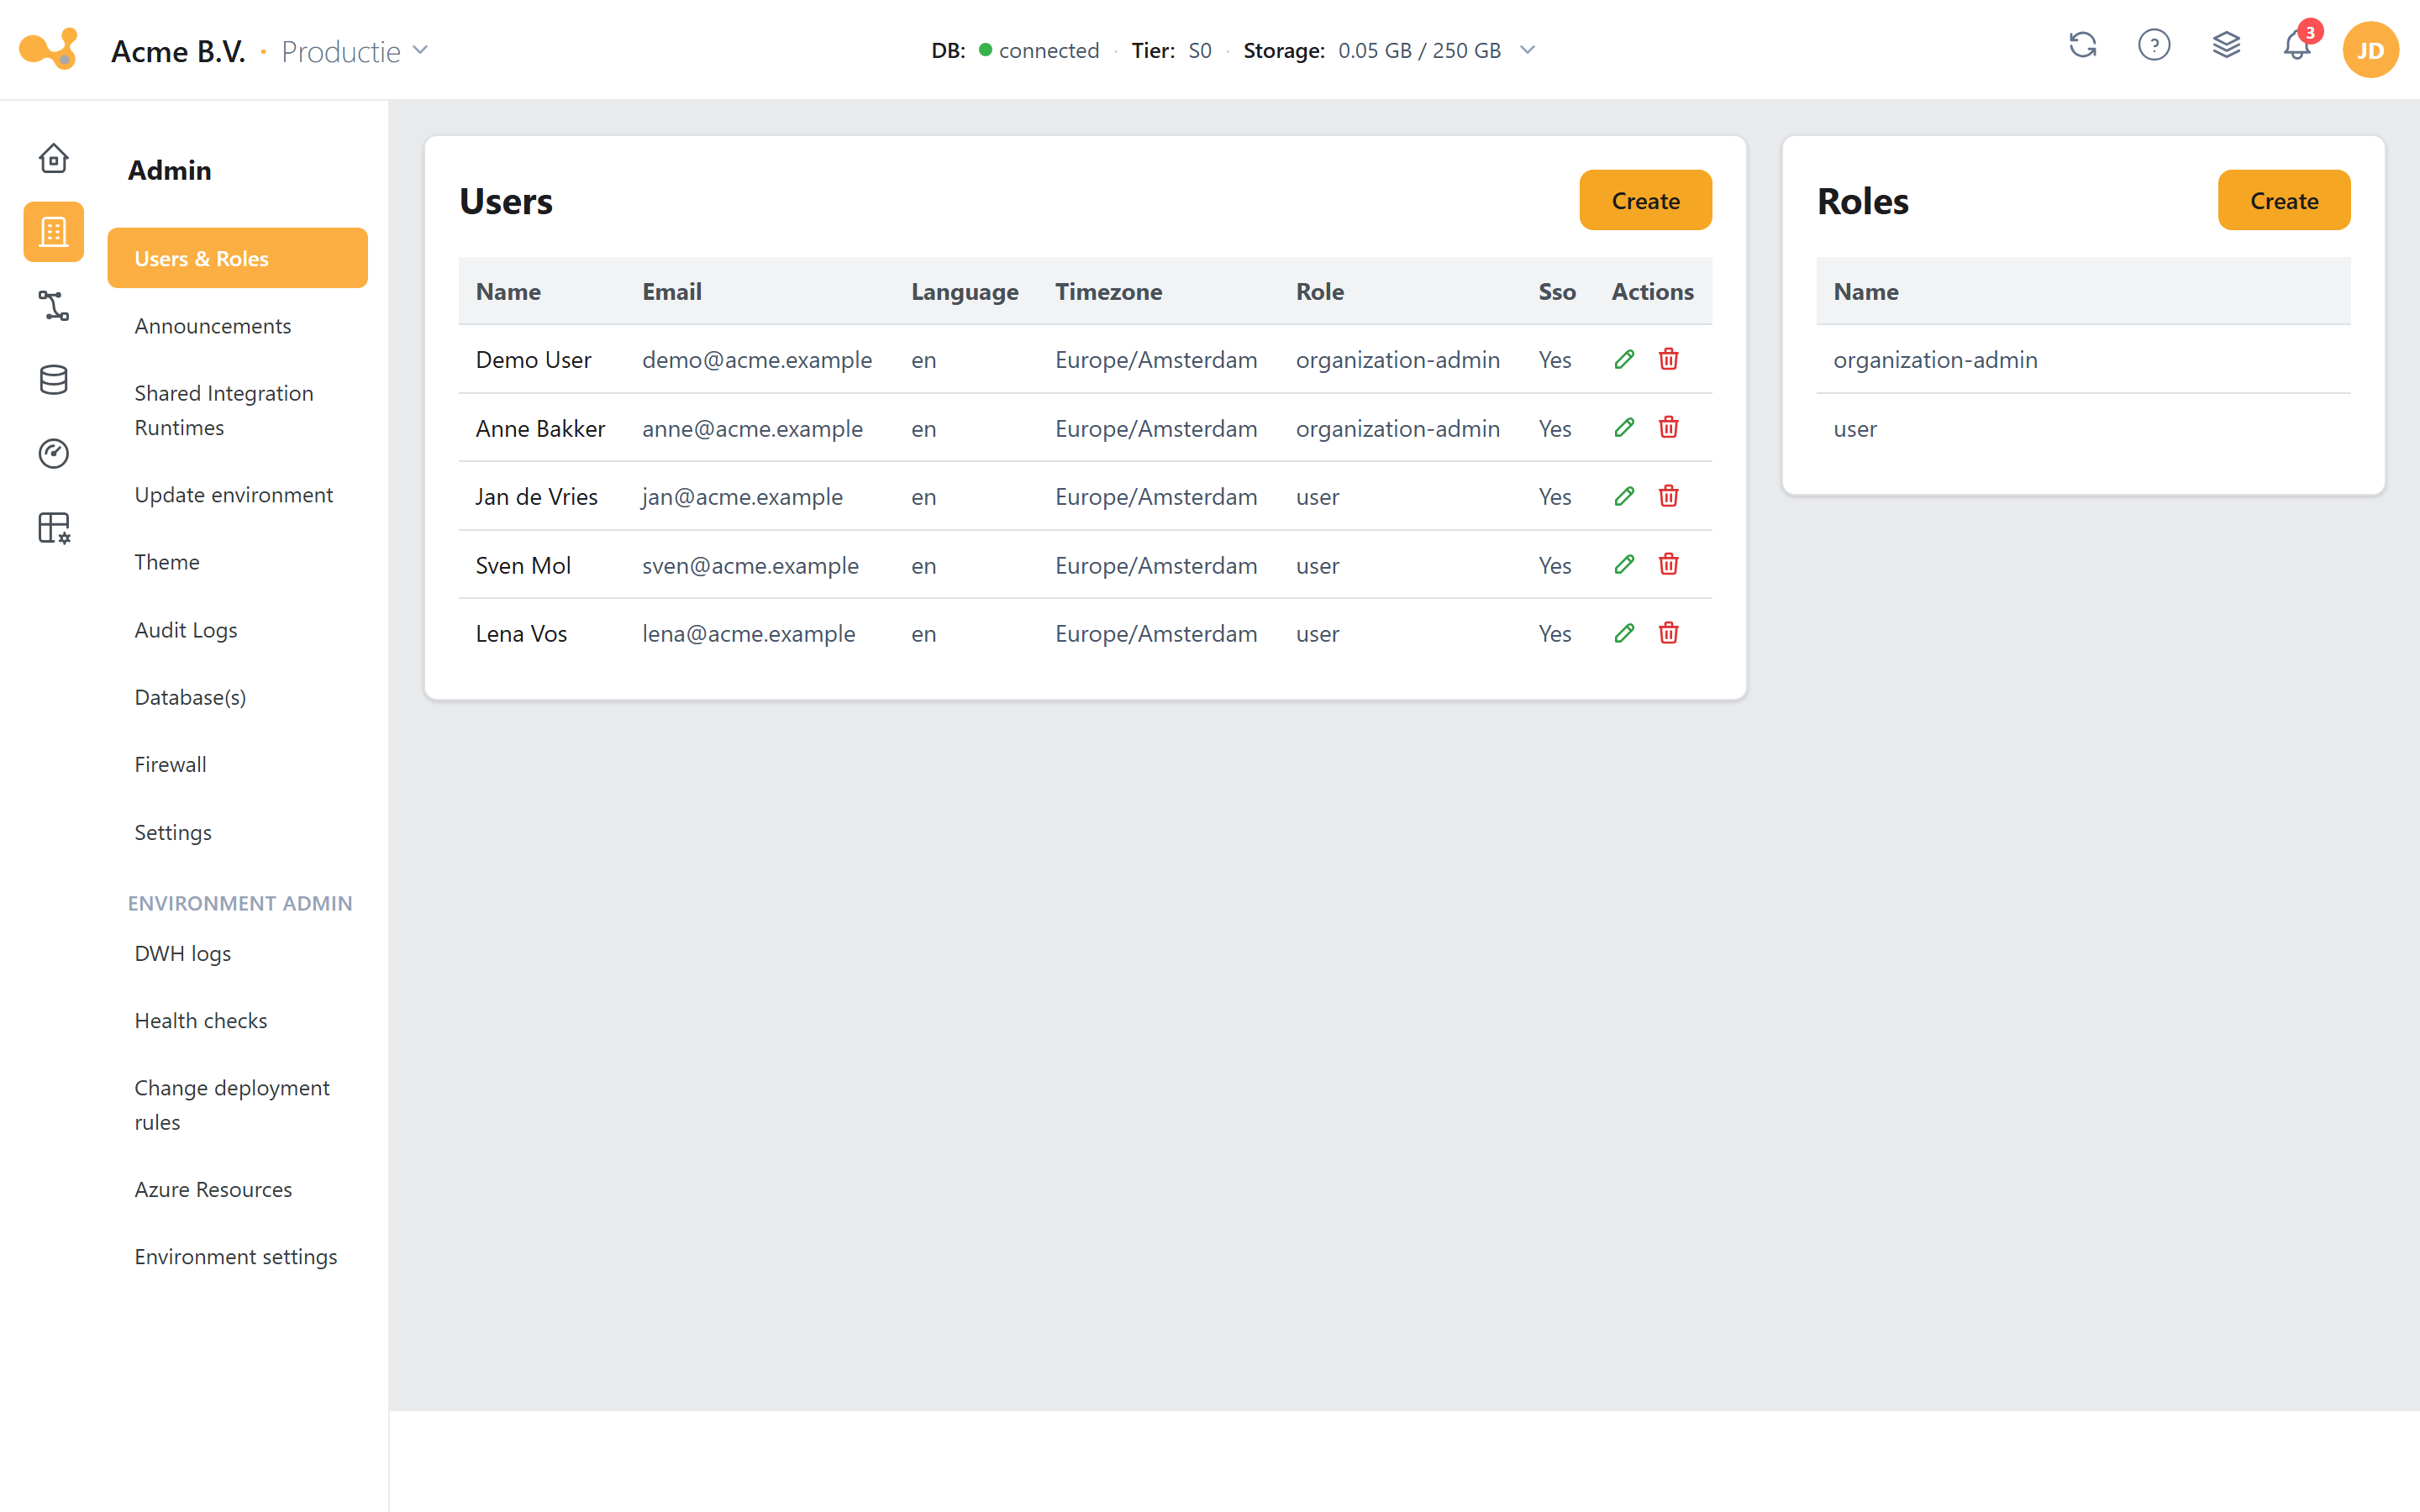
The screen consists of:
- Users table — shows
name,email,roleper user and whether SSO is active (sso). - Add user — create a user with an email, role and the choice of whether Microsoft Azure single sign-on (SSO) is required. New users receive an email with a default password, which they (together with their name) change themselves in Account settings.
- Roles table — alongside the default roles you can create your own roles.
- Permissions — roles usually follow a CRUD structure (Create / Read / Update / Delete) per permission type. Permissions that don't fit CRUD (such as building ADF code) live under "Other". You link a role you created to a user via the role dropdown.
Users
- Create with an email, role and whether SSO is required.
- The new user receives an email with a default password.
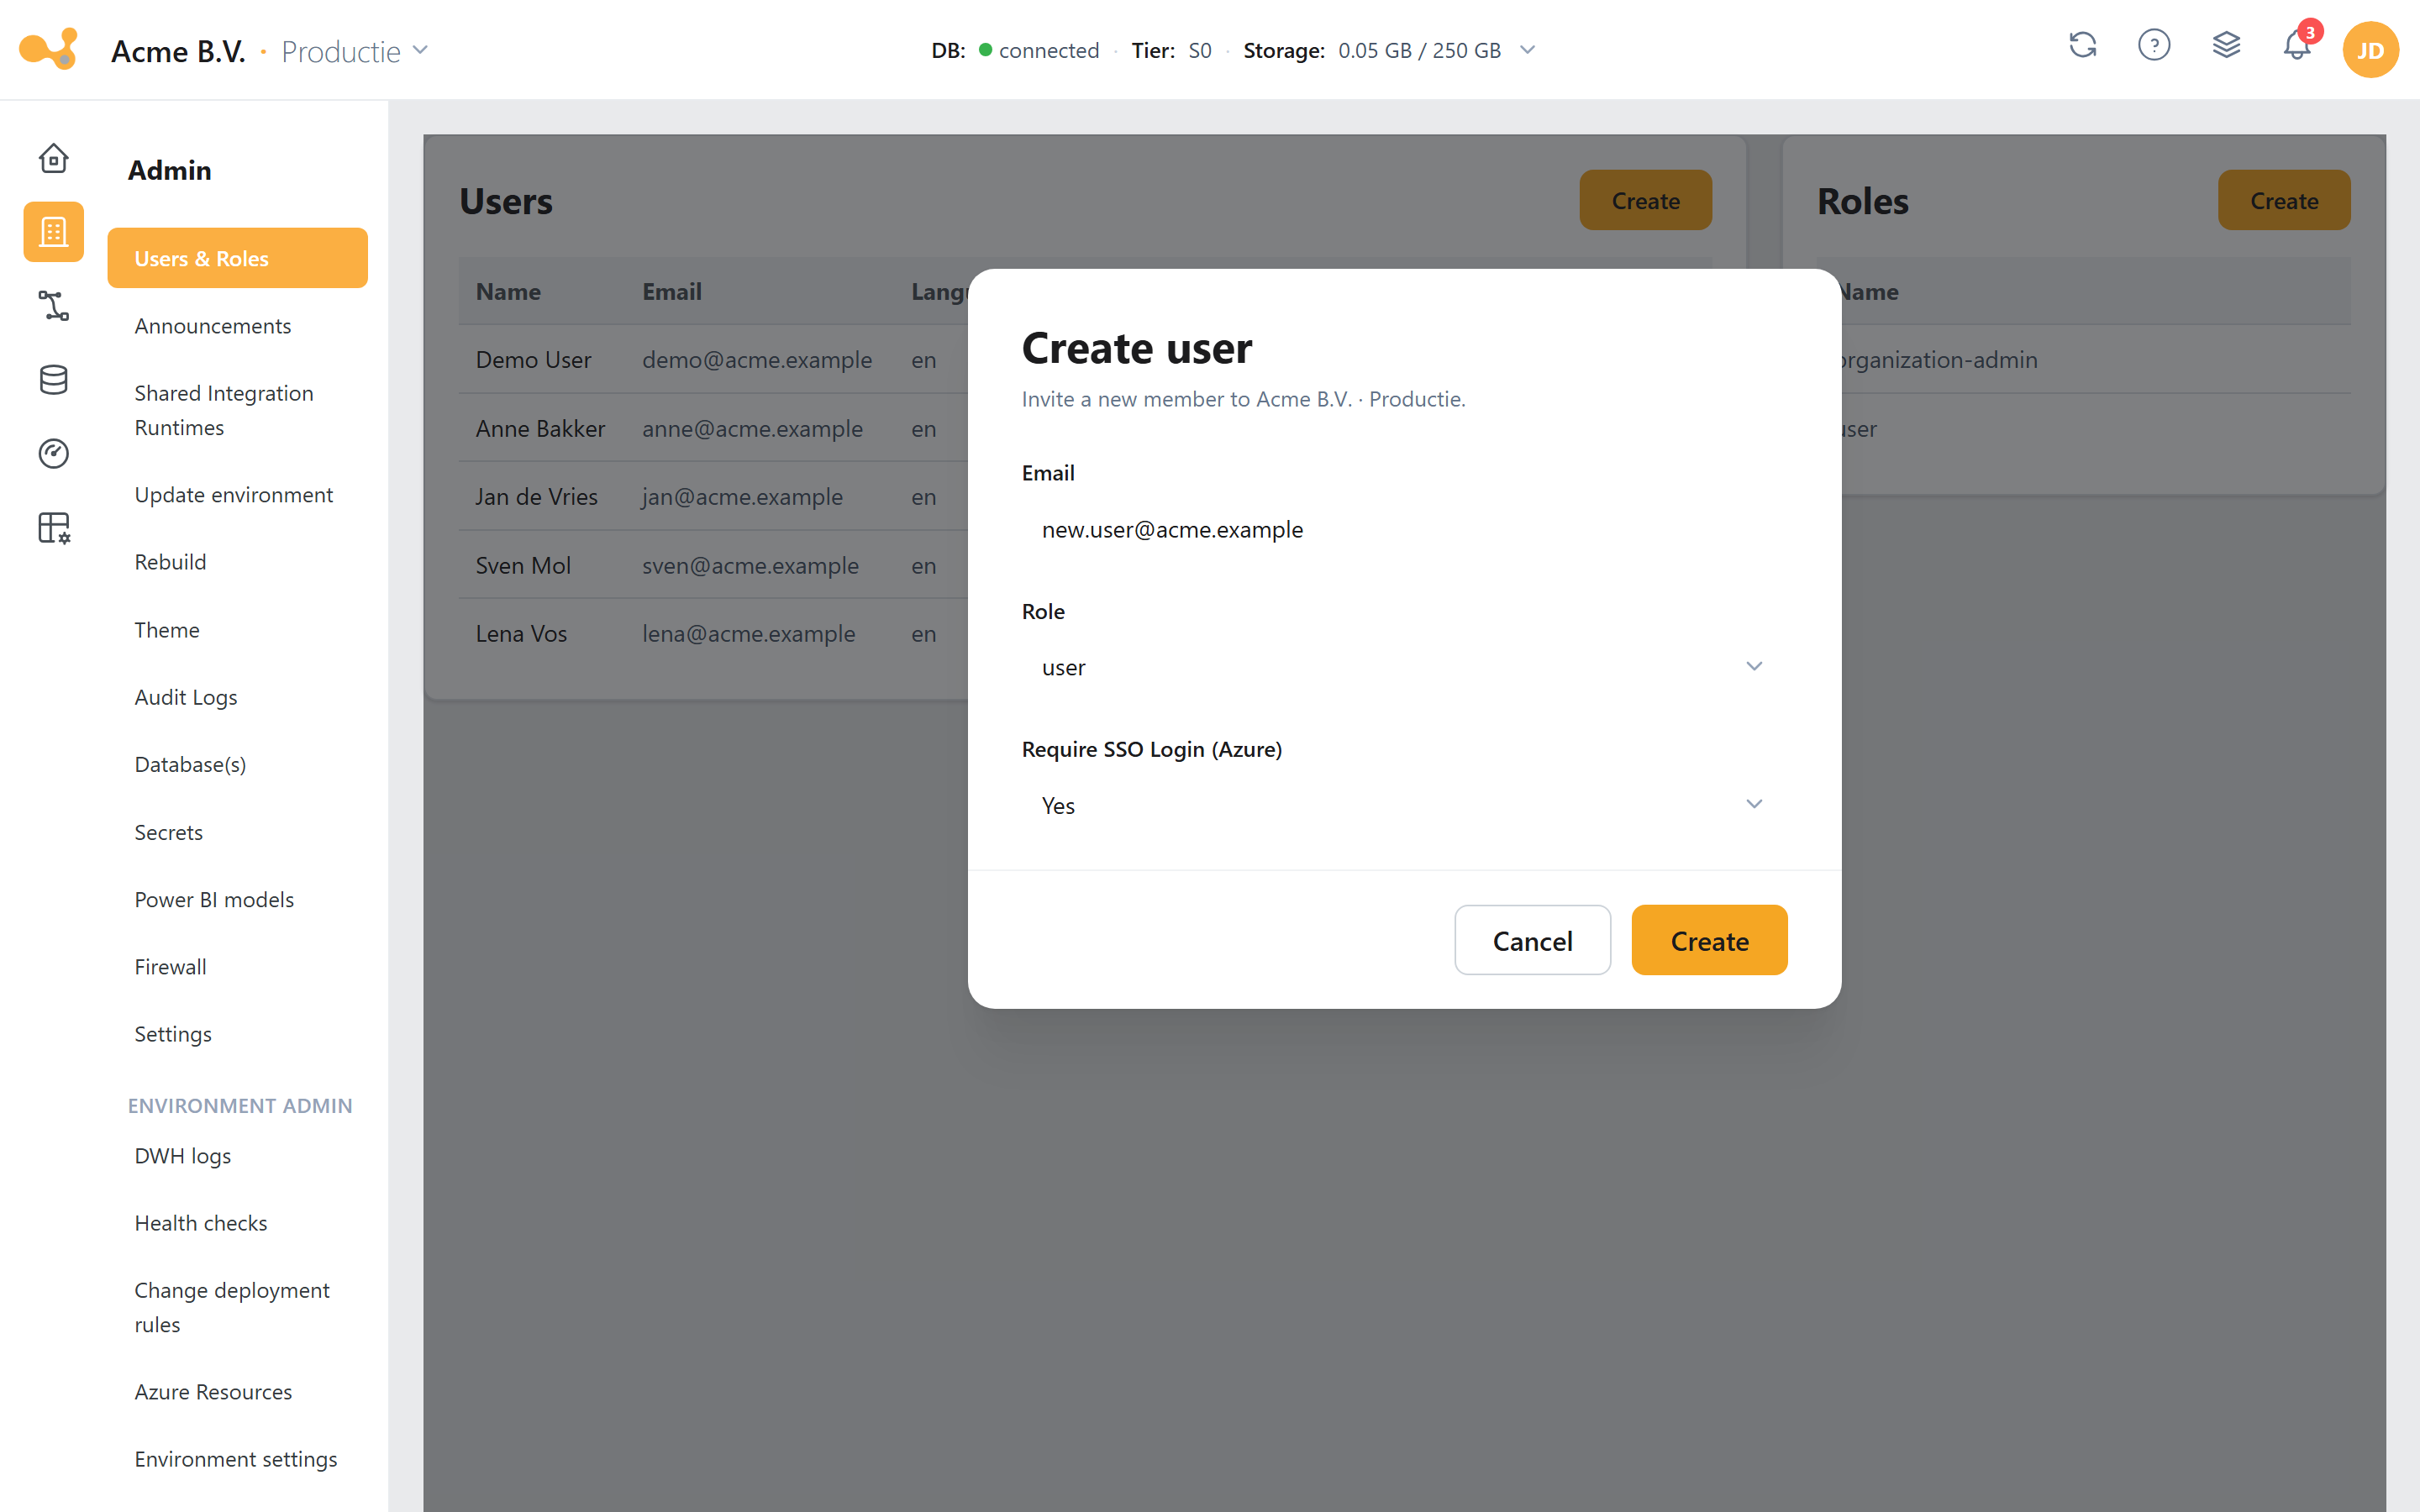 Creating a new user: email address, role and whether Microsoft Azure single sign-on is required.
Roles
- Default roles plus your own roles, typically CRUD per permission type.
- Permissions outside CRUD live under "Other".
You create your own role with the Create role wizard in three steps:
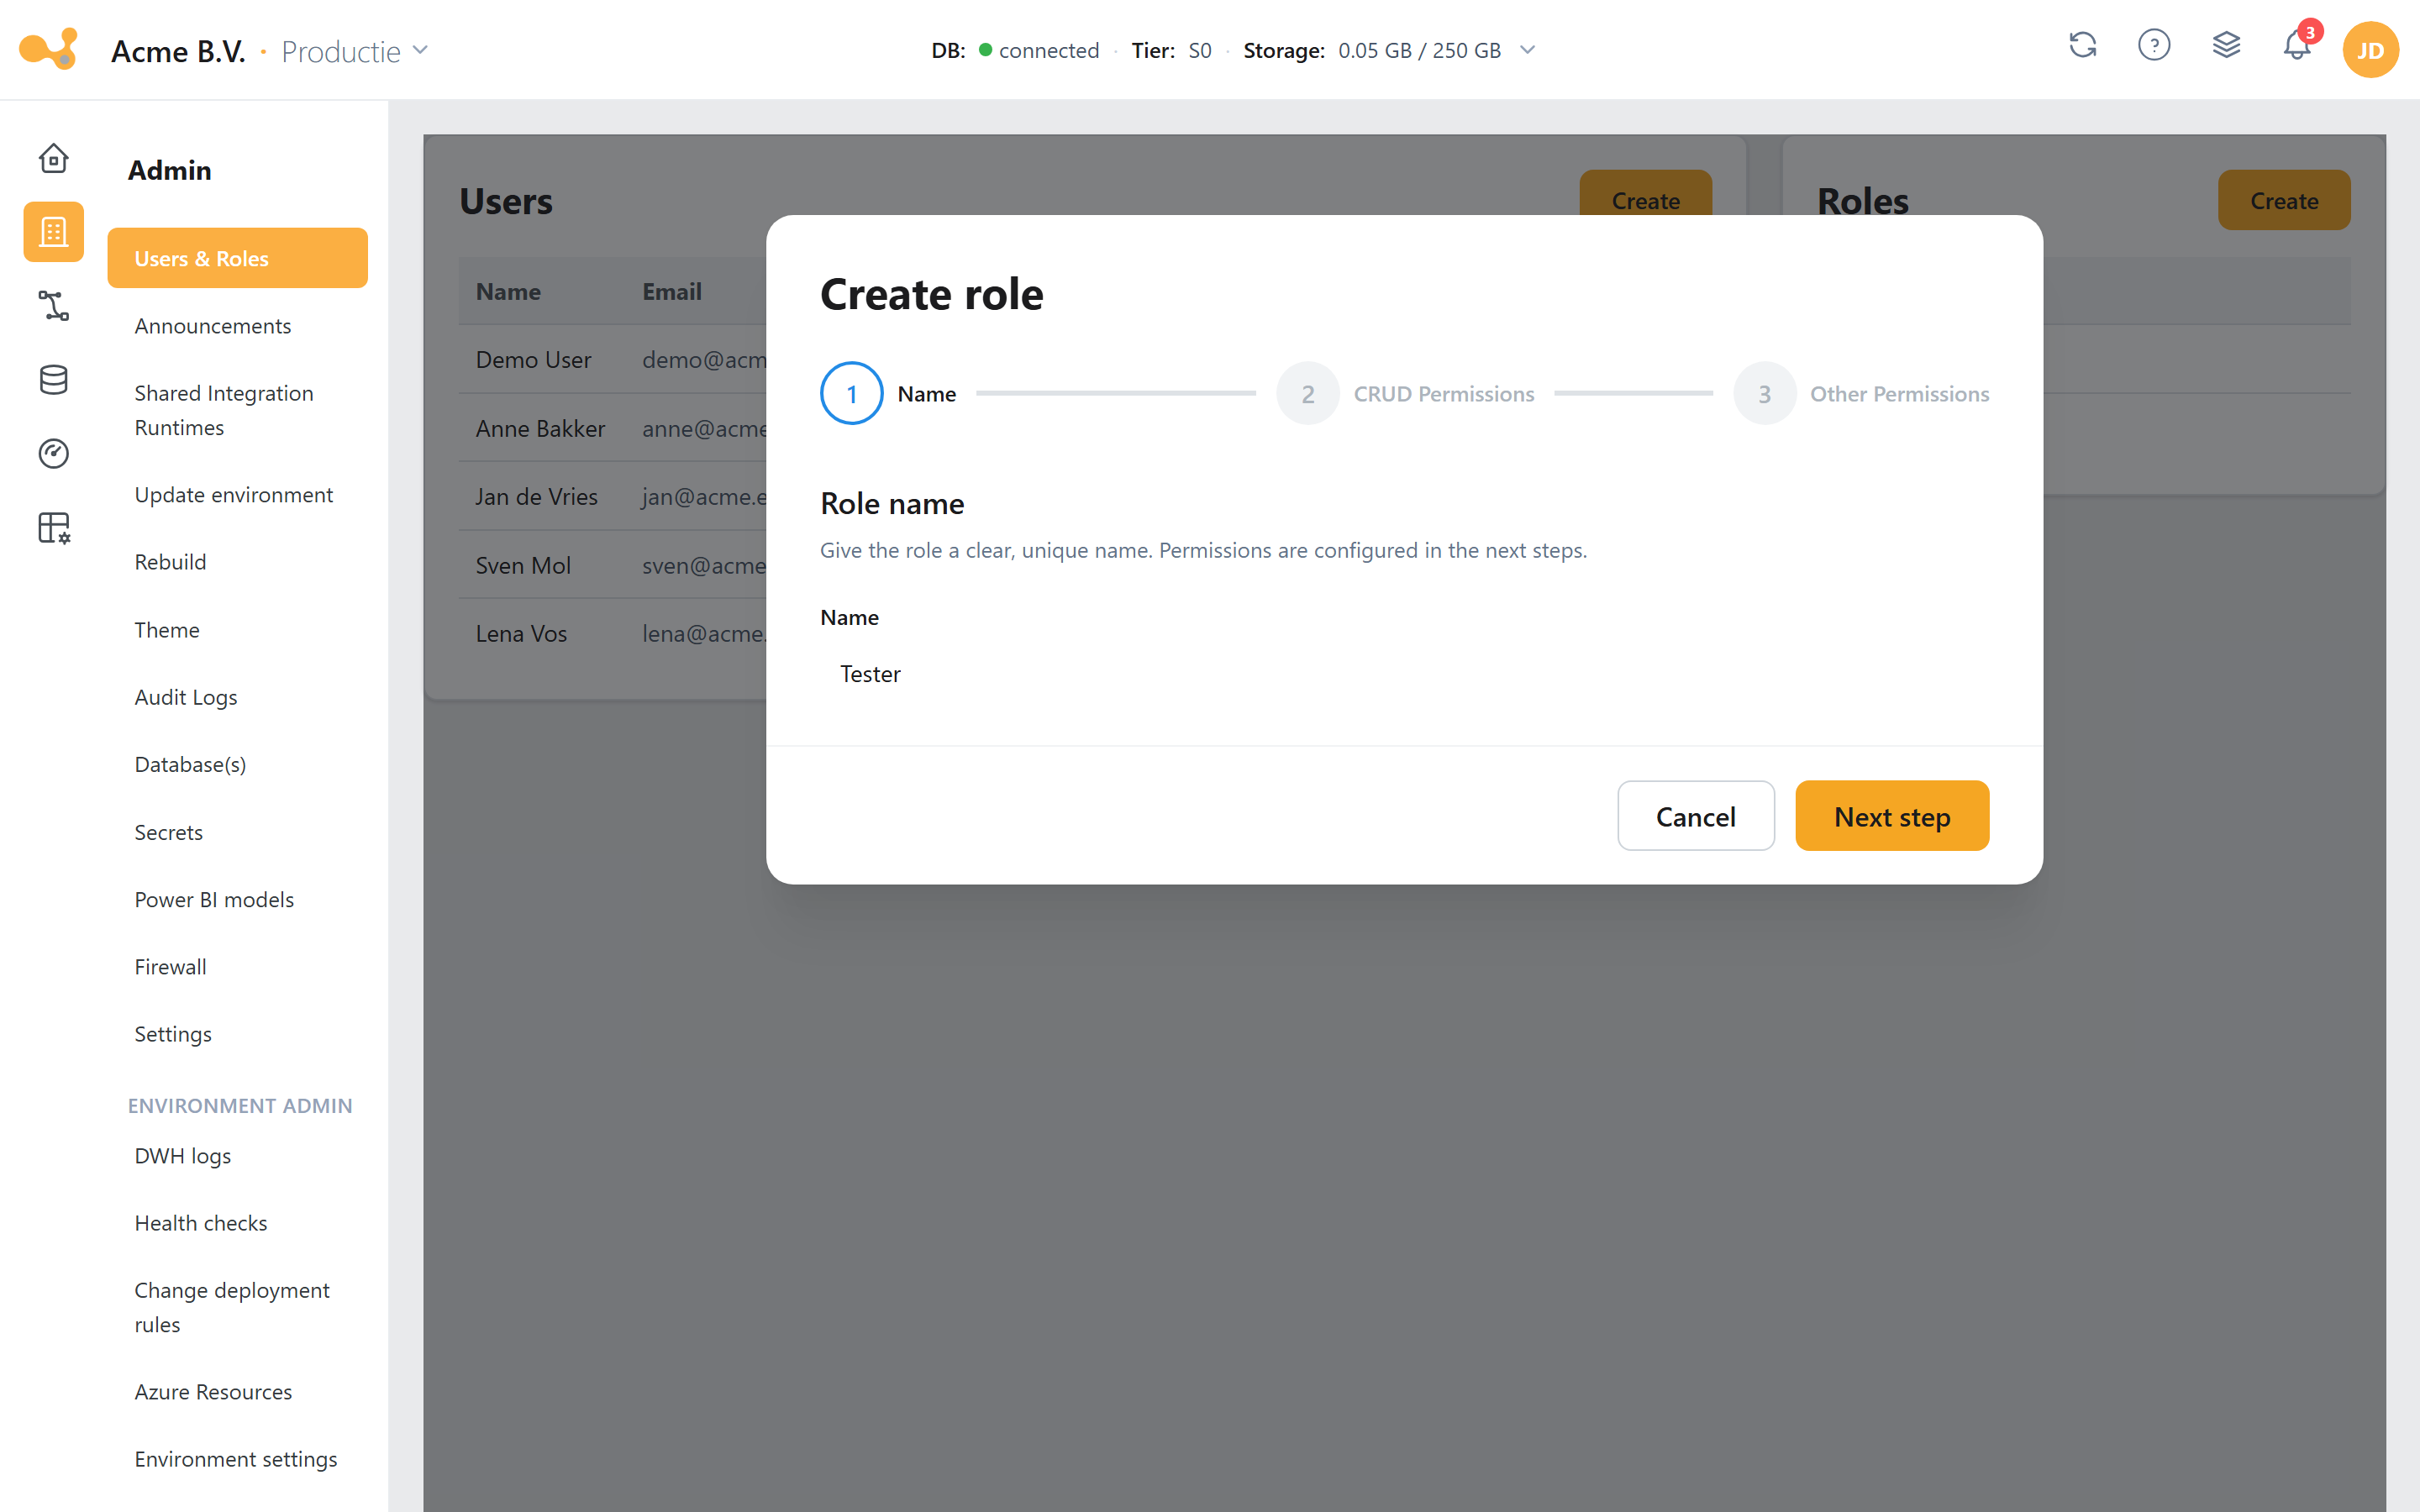 Step 1 — Name: give the role a recognizable name.
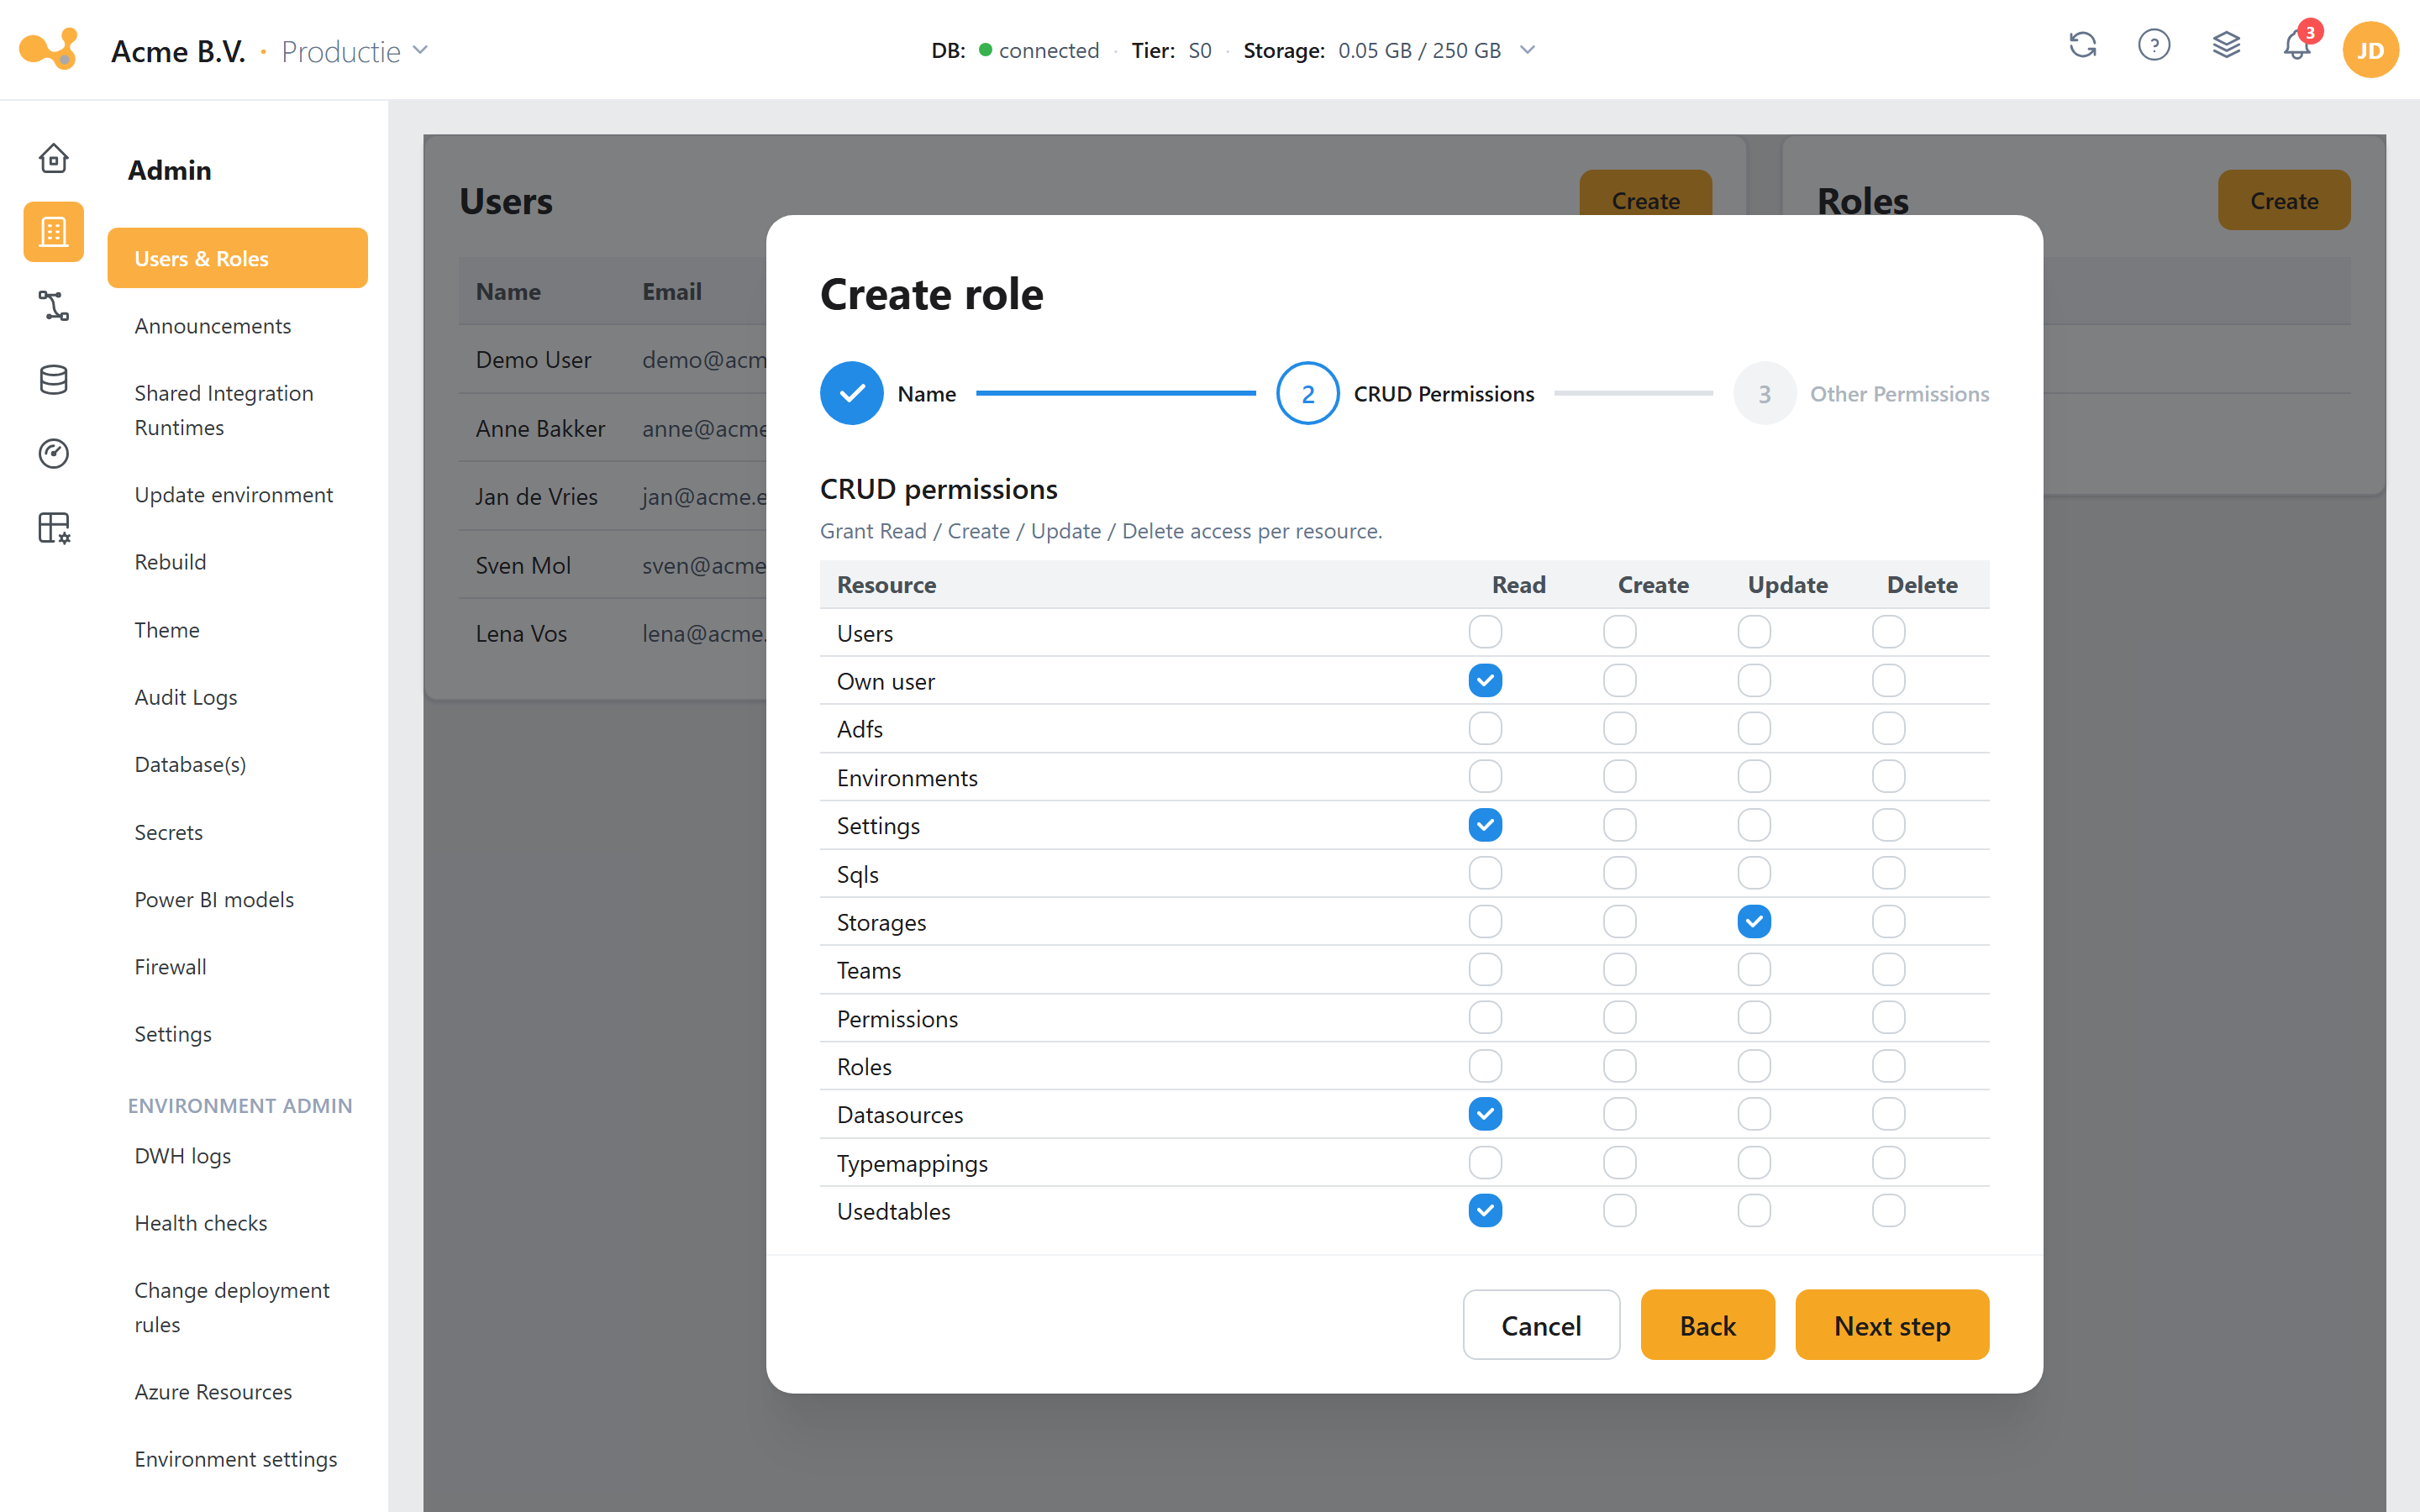 Step 2 — CRUD: tick Read/Create/Update/Delete per resource (Users, Settings, Datasources, …).
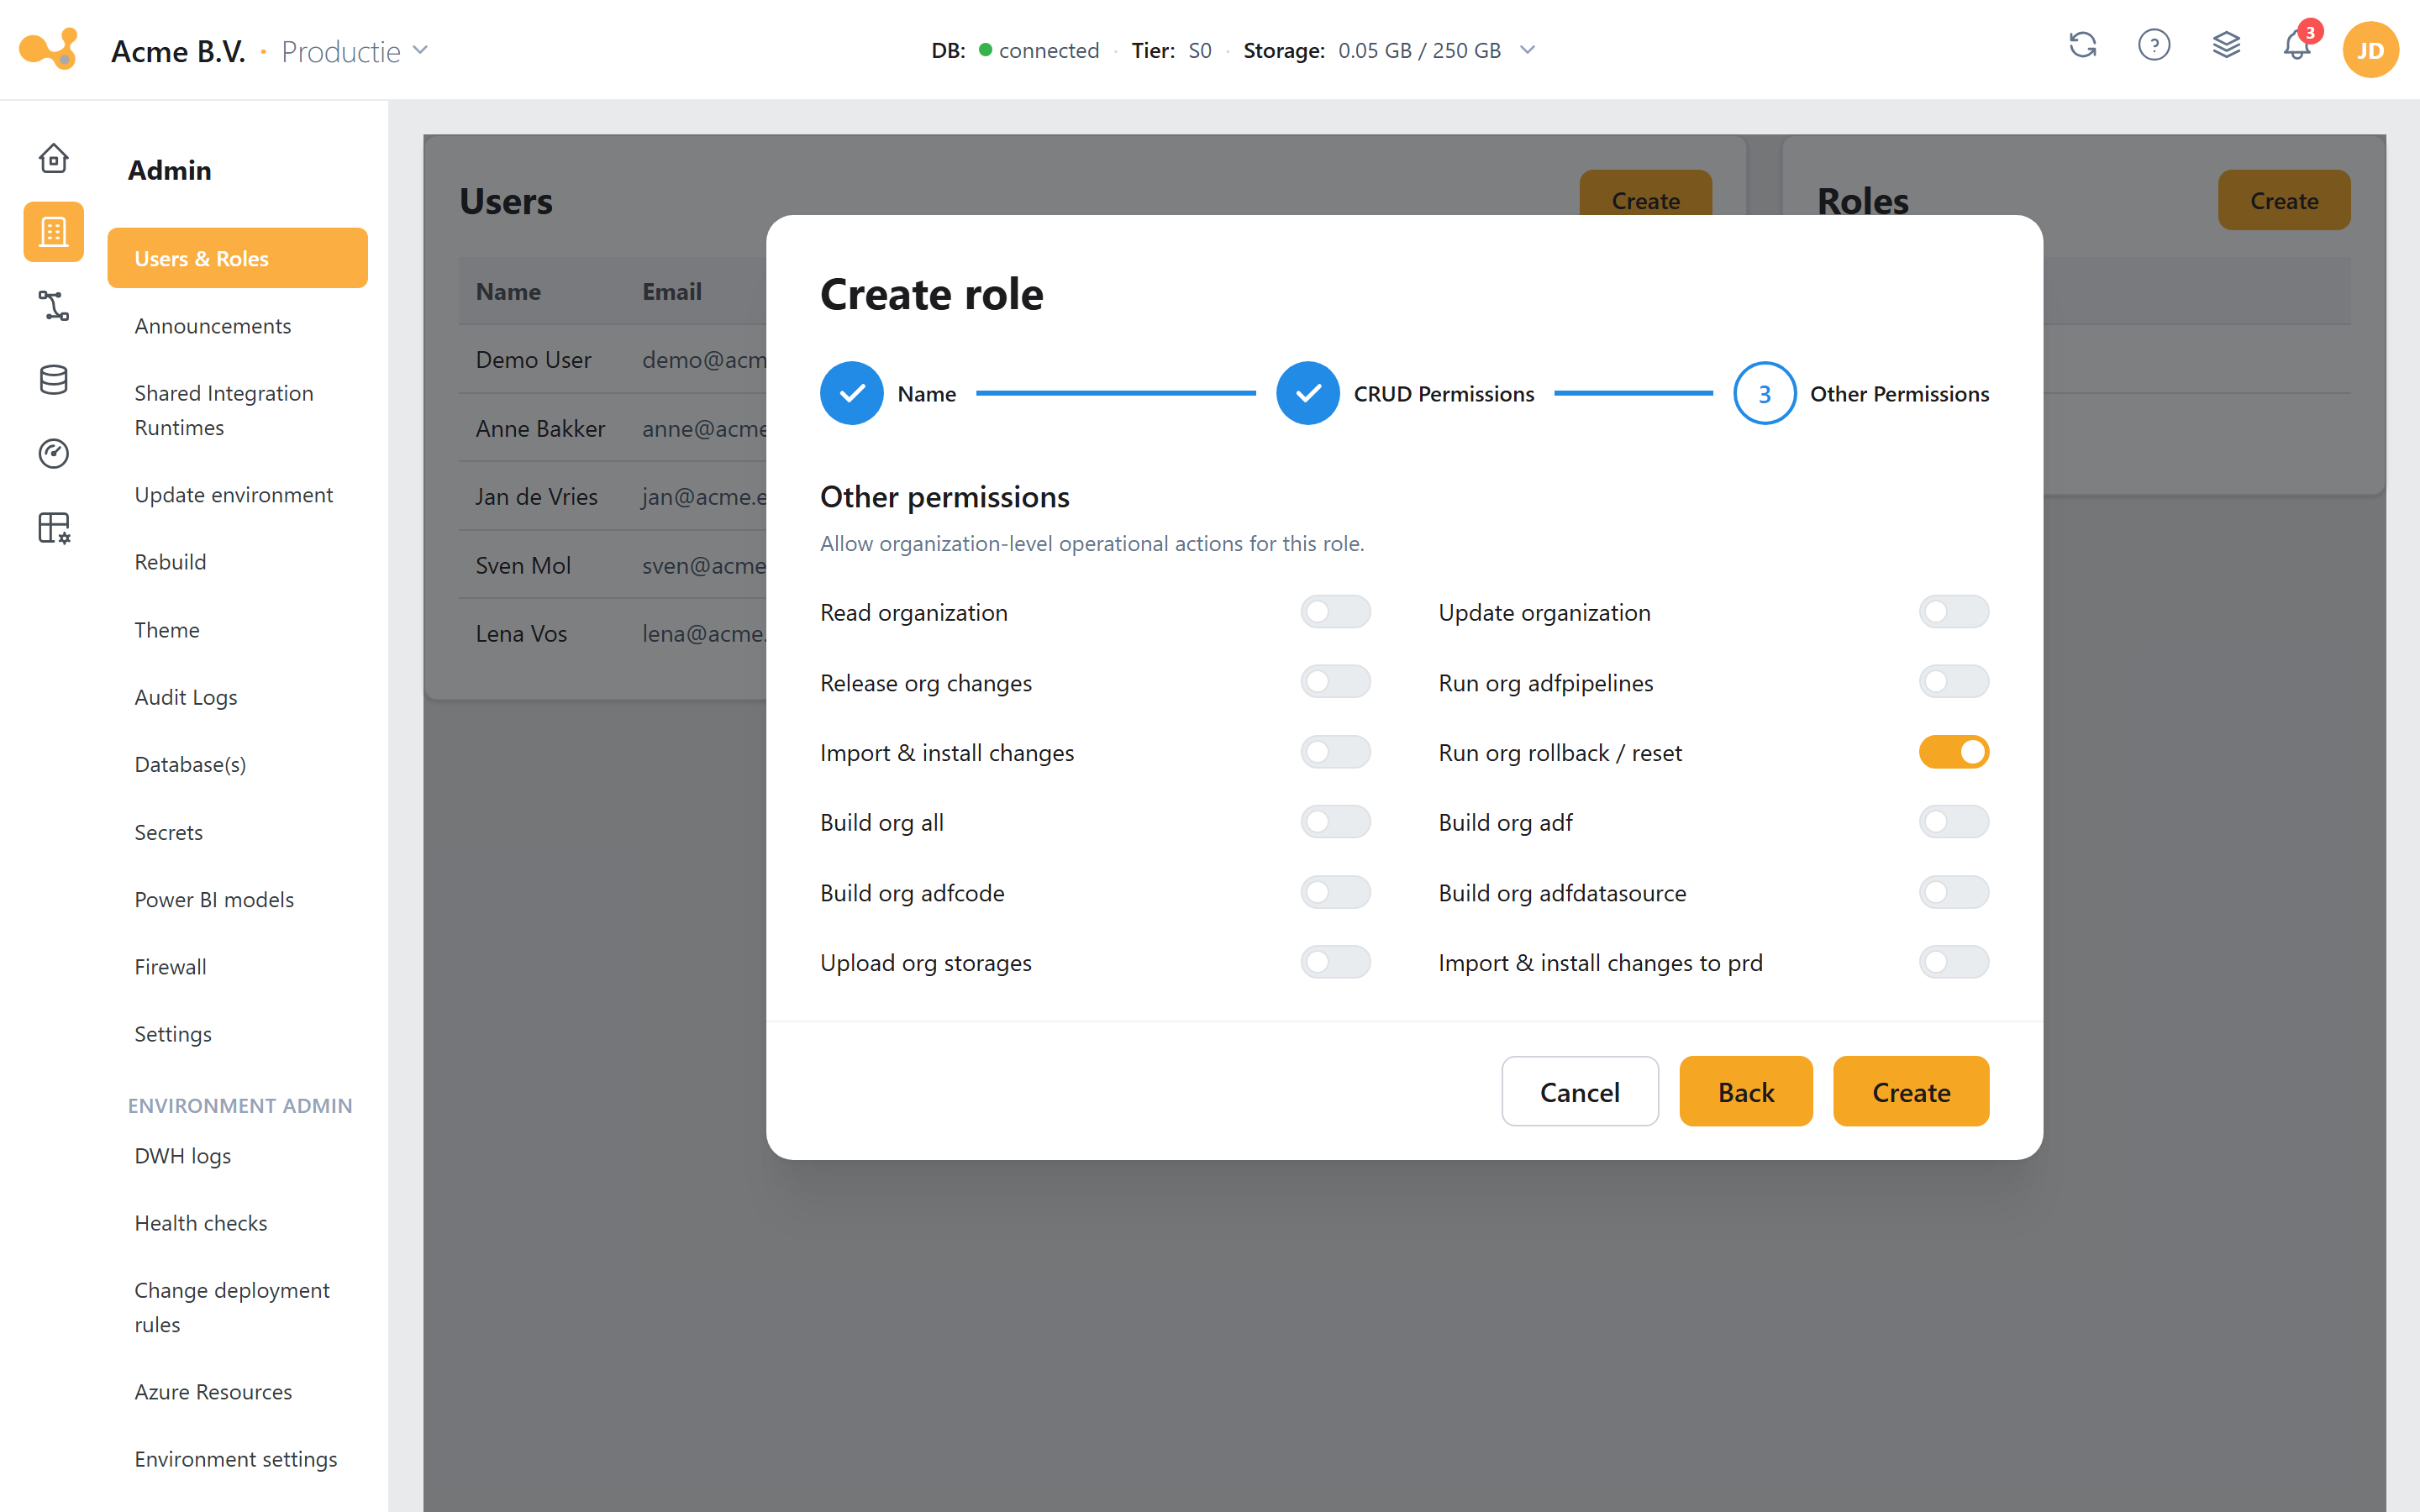 Step 3 — Other: permissions that don't fit CRUD (release changes, run pipelines, build, …).
Announcements
Route: /admin/announcements. Send messages to all users or only to those of a specific
organization (organization admins reach only their own organization). Announcements appear on the
homepage and are handy for, for example, scheduled maintenance or an upcoming release.
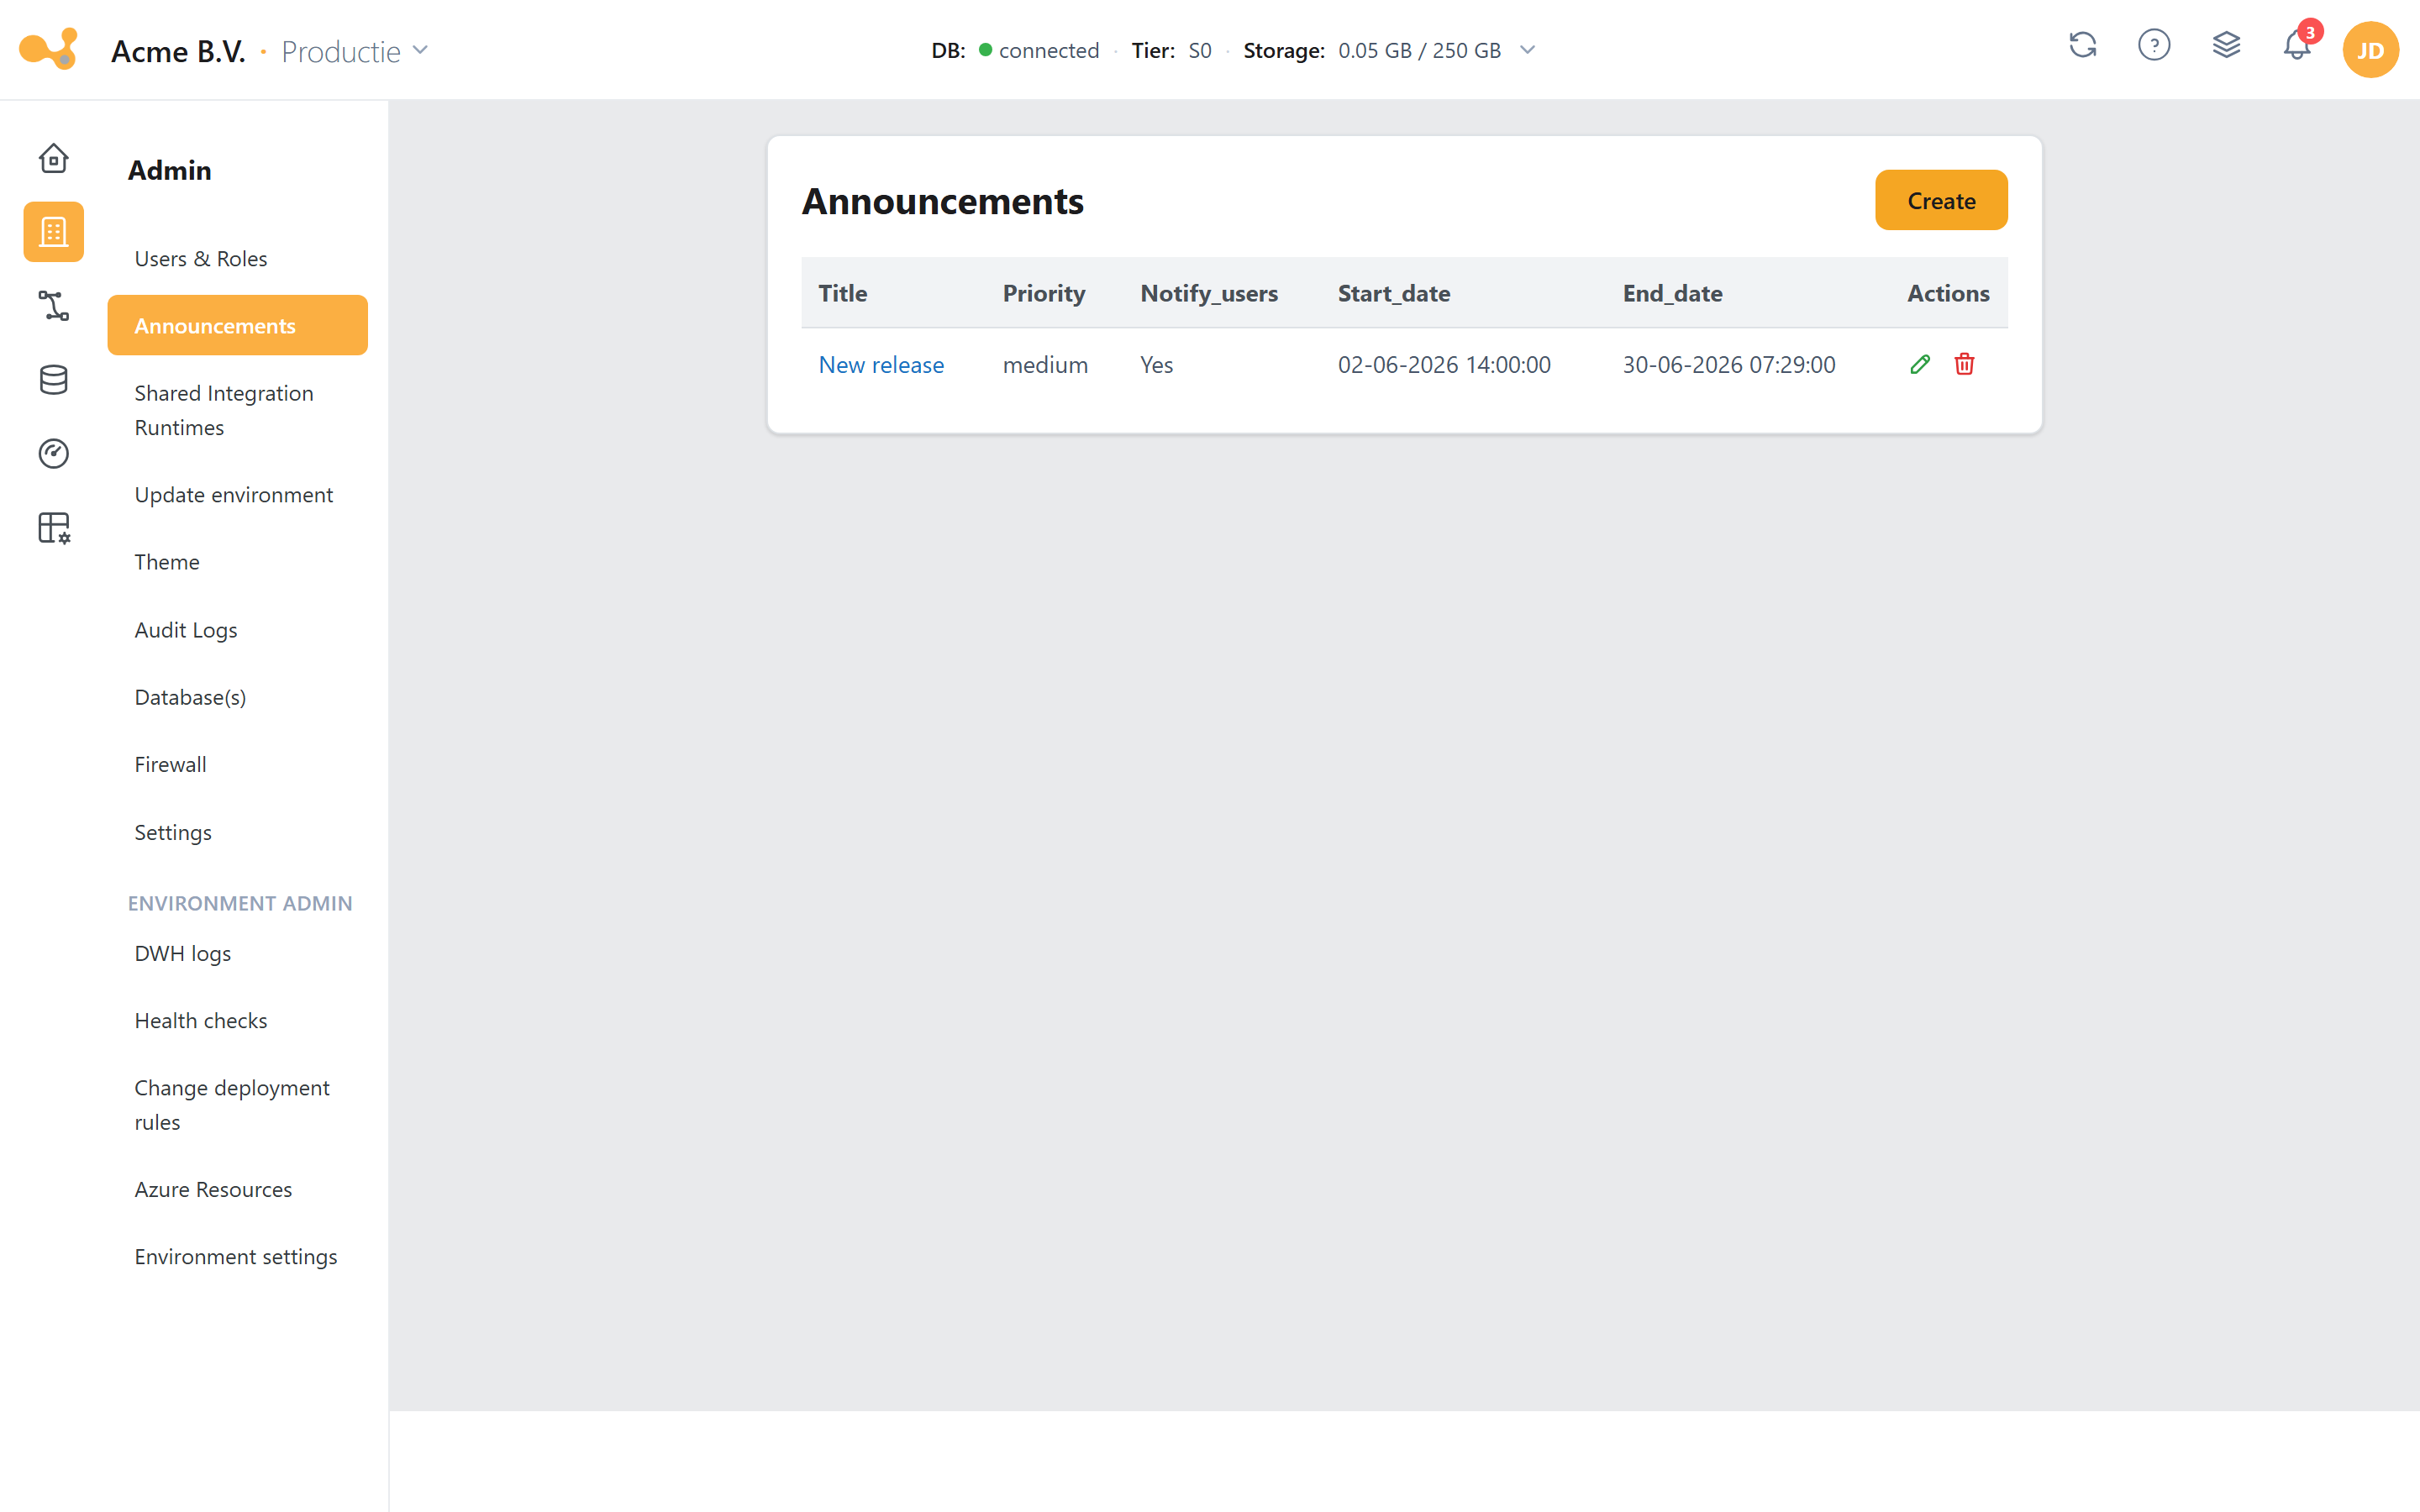
- Create — open the form to compose a new announcement.
- Body (Markdown) — the text supports Markdown (headers, lists, links).
- Start and end date — both optional. Left empty = immediately visible until the announcement is deleted.
- Notify Users — also shows the announcement in the notification tab at the top of the topbar.
- Priority — puts the announcement at the top of the list on the homepage.
Audit Logs
Route: /admin/auditlogs. Monitor actions of organization users: user-agent, client IP and extra
properties per log type. Filterable by date range, severity or user.
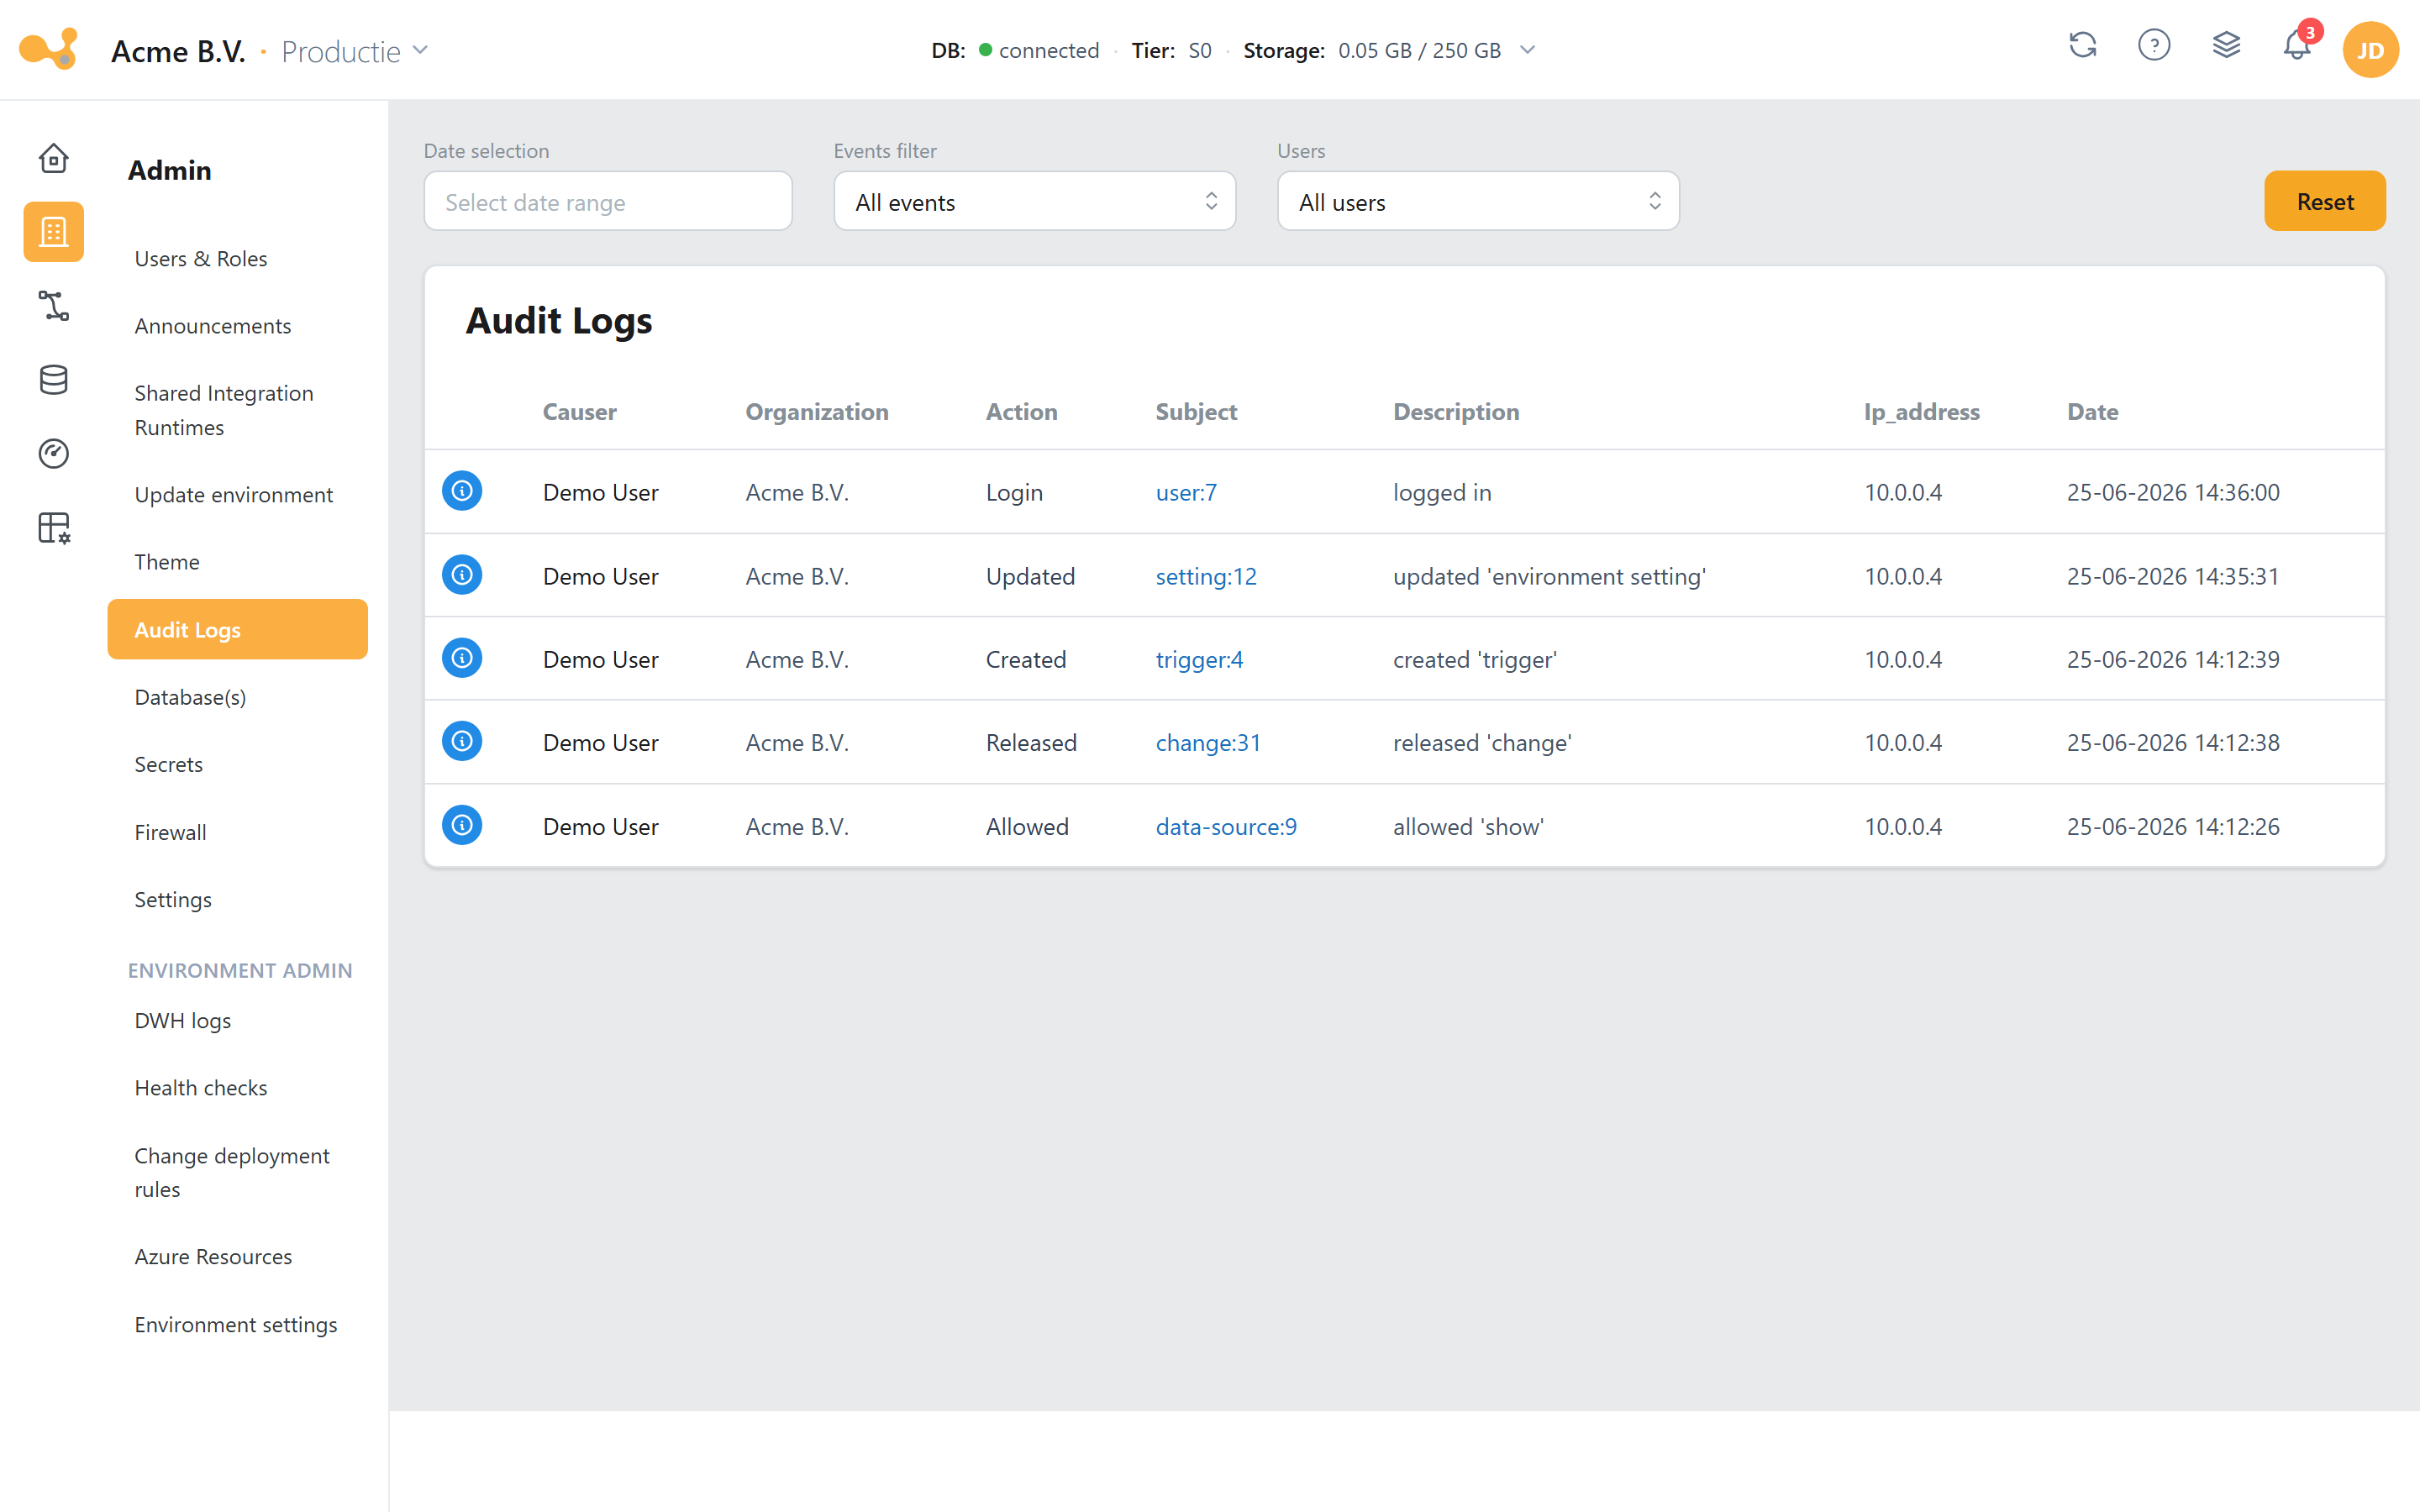
At the top are the filters (Date, Events, Users); below them a table that logs the Causer, Organization, Action, Subject, Description, IP and timestamp (created) per action, so user actions across the whole organization are traceable.
Database overview
Route: /admin/databases. View all databases that the organization uses. If you have added a custom
database, you update it here directly.
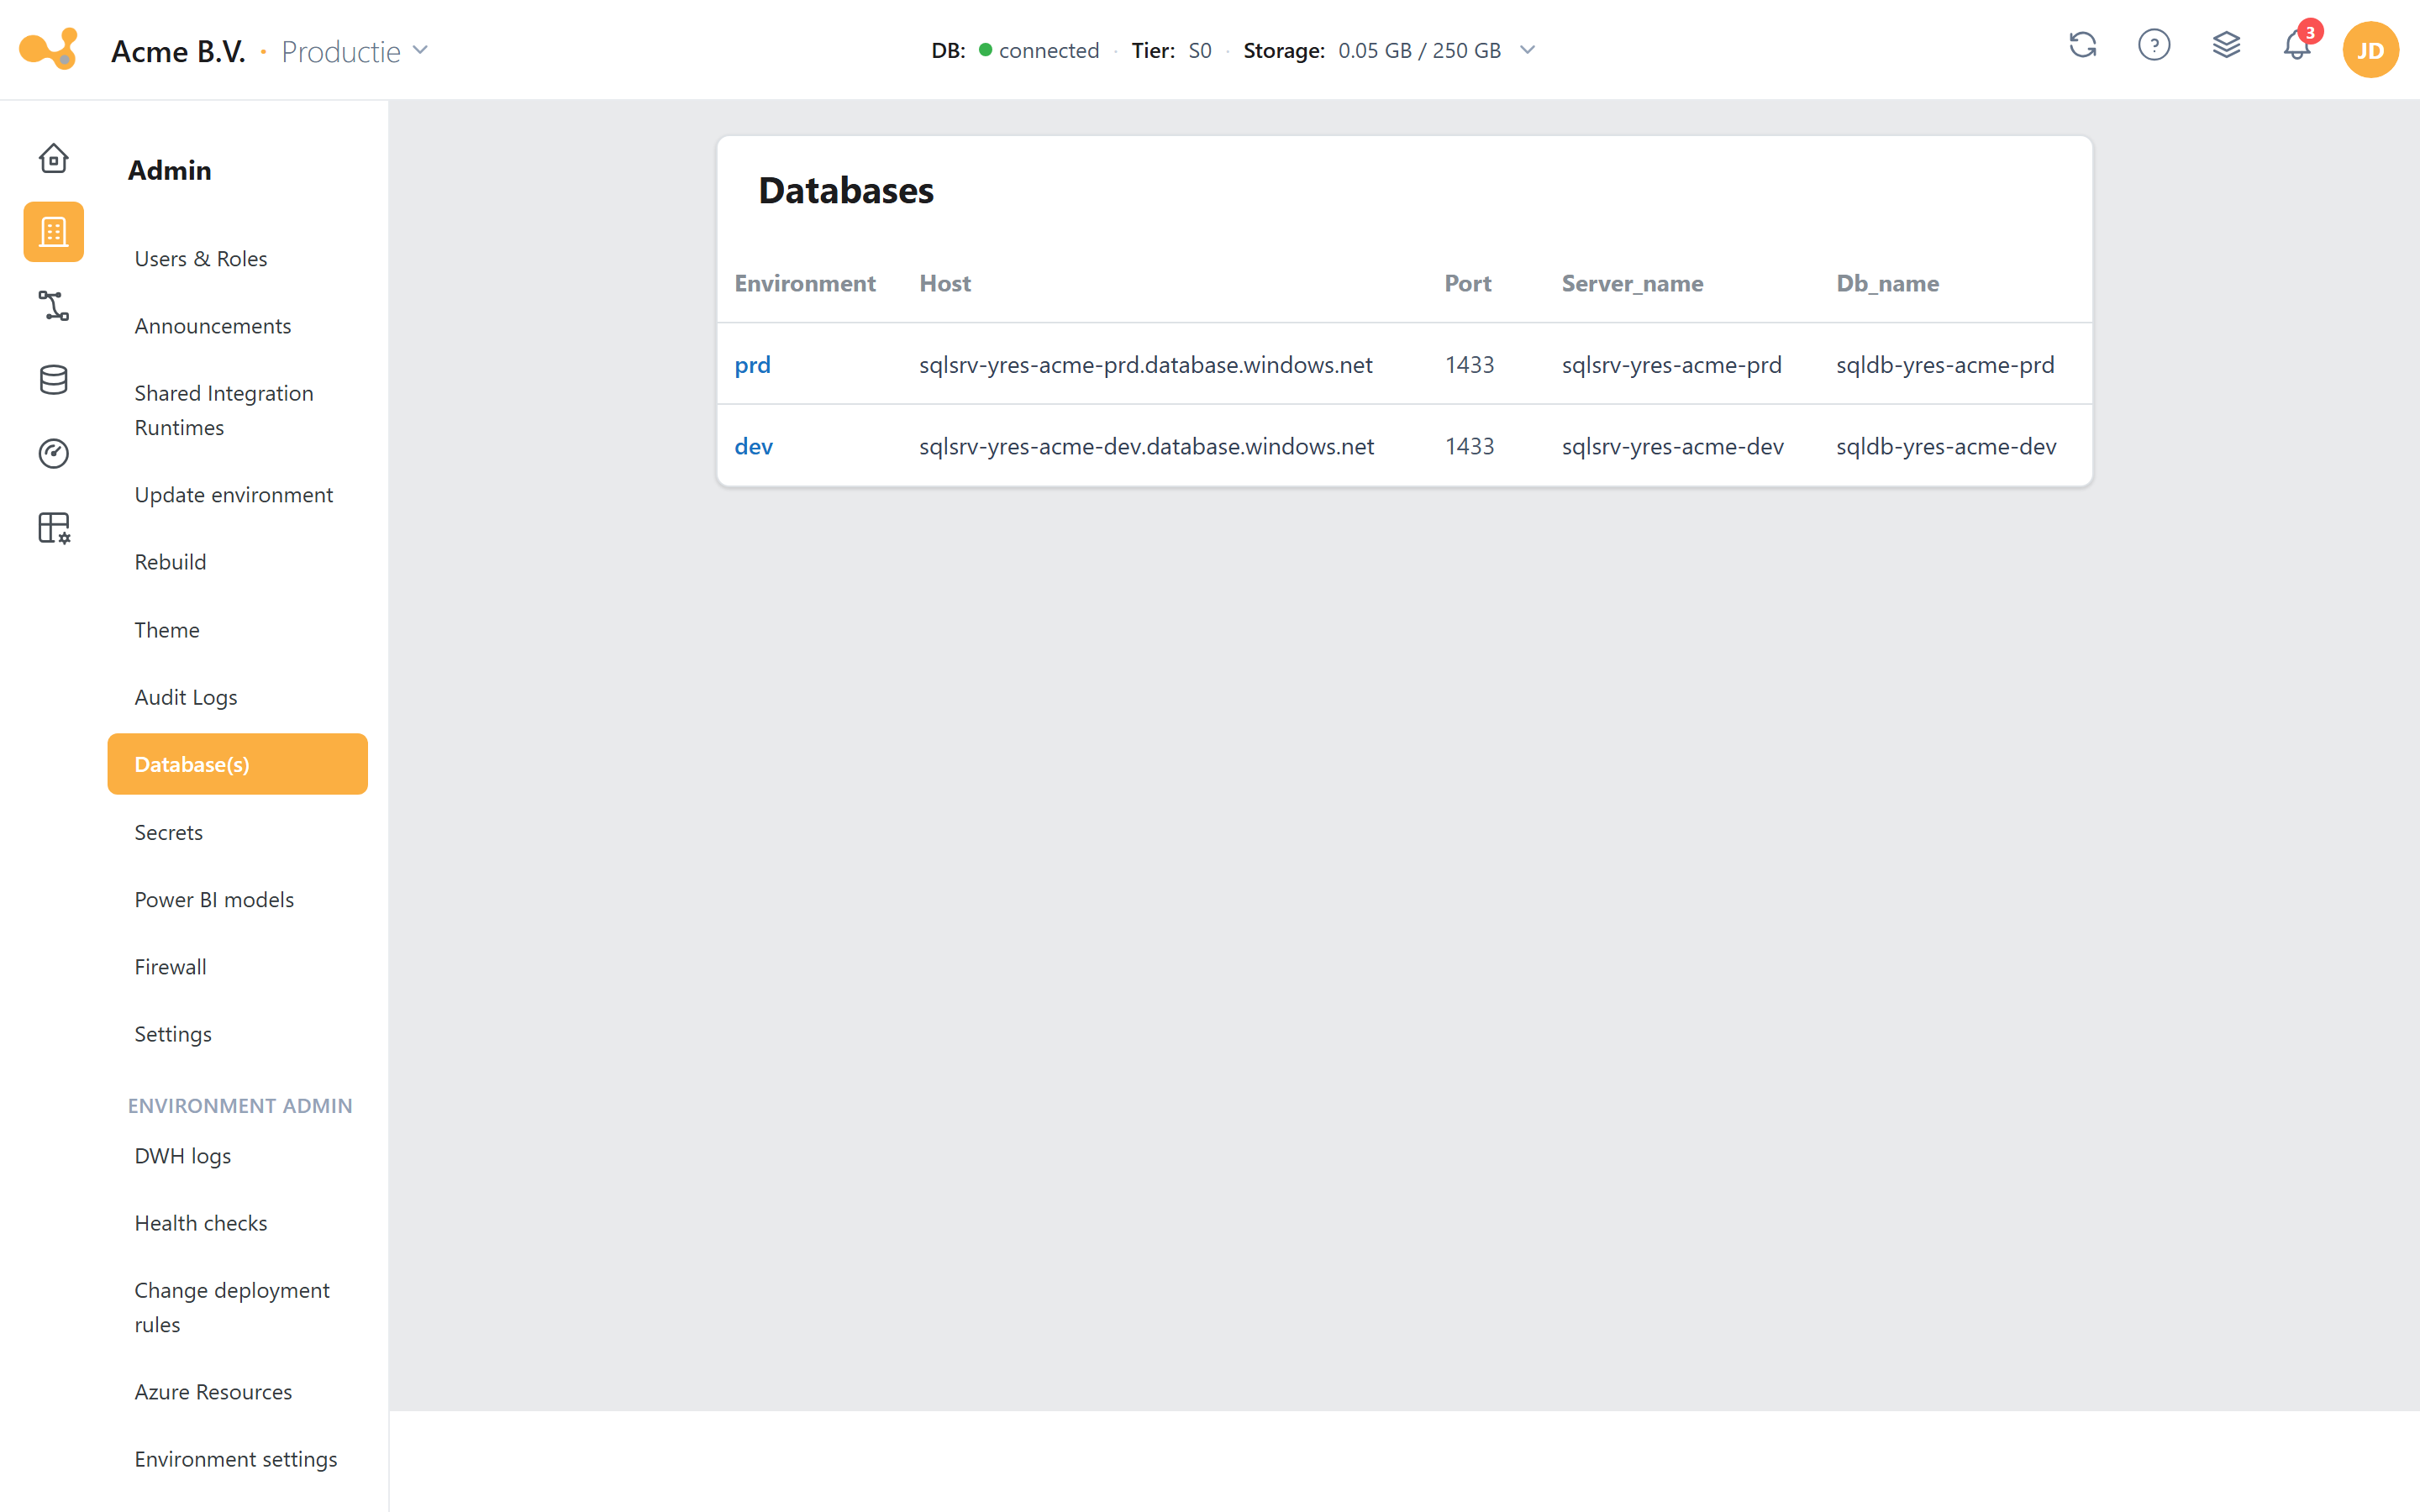
The Azure SQL databases per environment, with host, port, server and database name.
Firewall
Route: /admin/firewall. Allow or deny access per IP address, so admins decide from where Yres
may be accessed. This improves security by restricting network access.
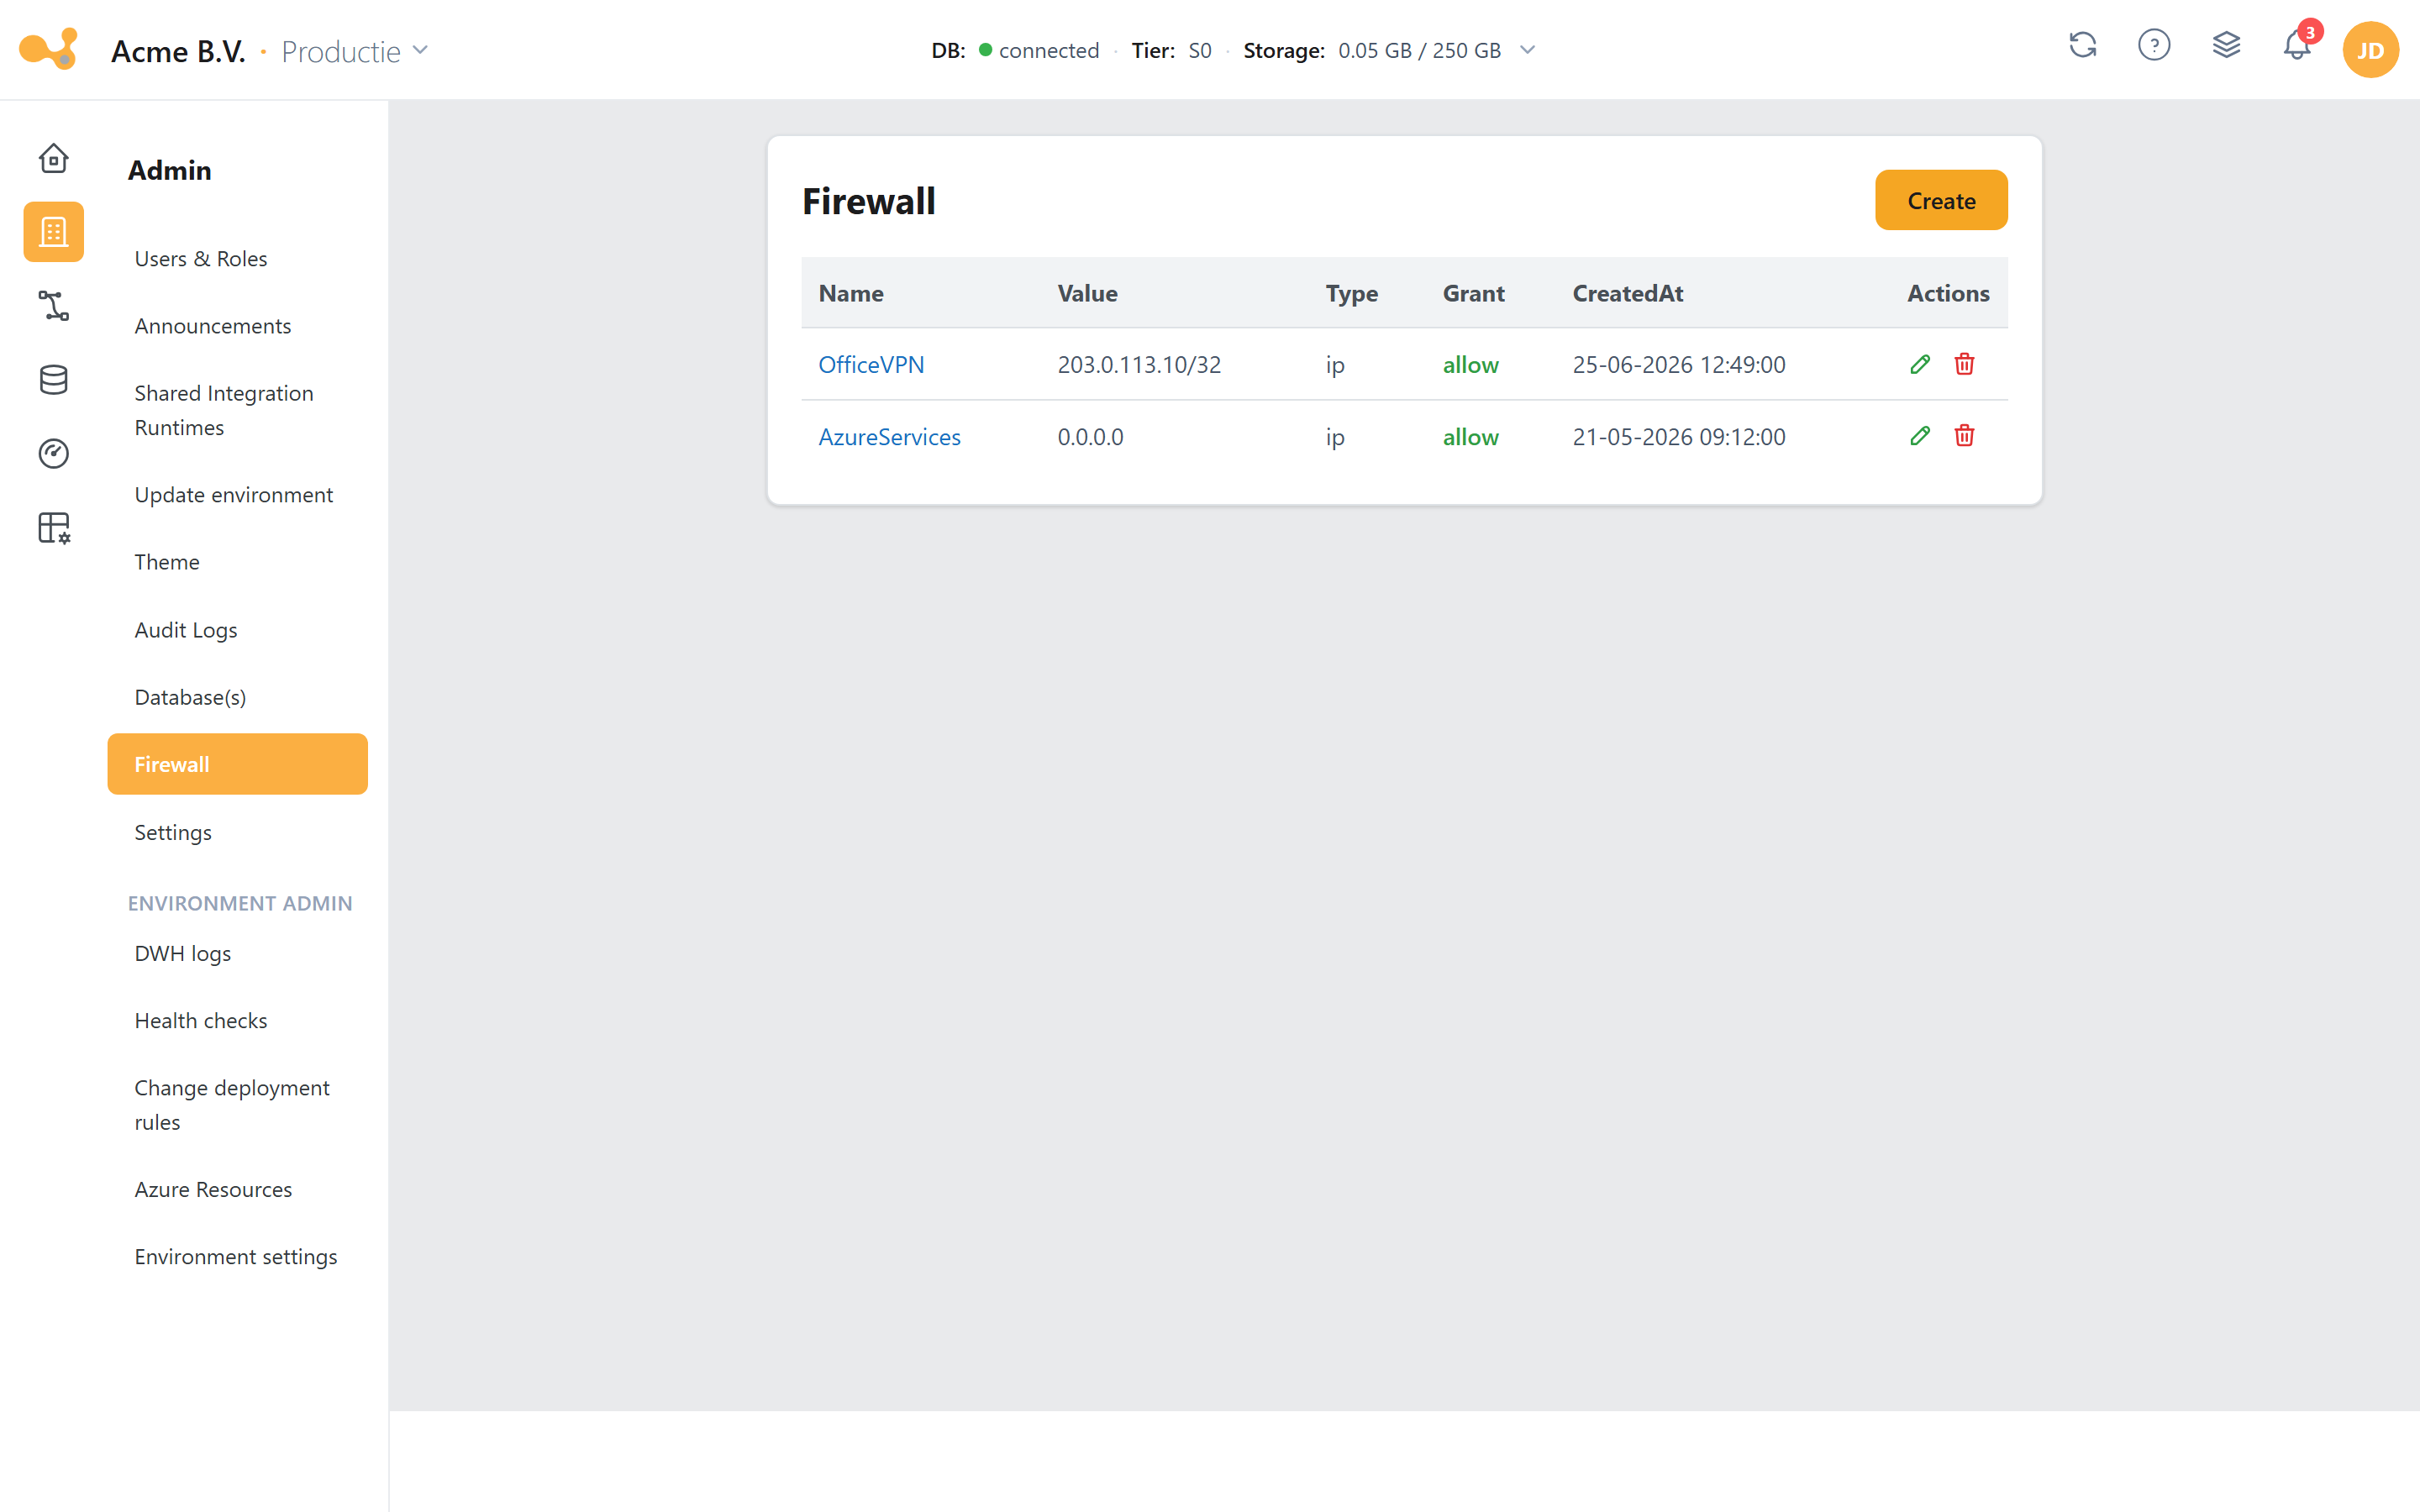
- Create — add an IP rule.
- IP address / CIDR + label — record the range and give it a recognizable name.
- Allow or Deny — decide whether the range gets access or is blocked.
PowerBI Models
Route: /admin/powerBiCredentials (and the models view). Manage unified models per environment, so the
right models are called — for example during a refresh via the master pipeline.
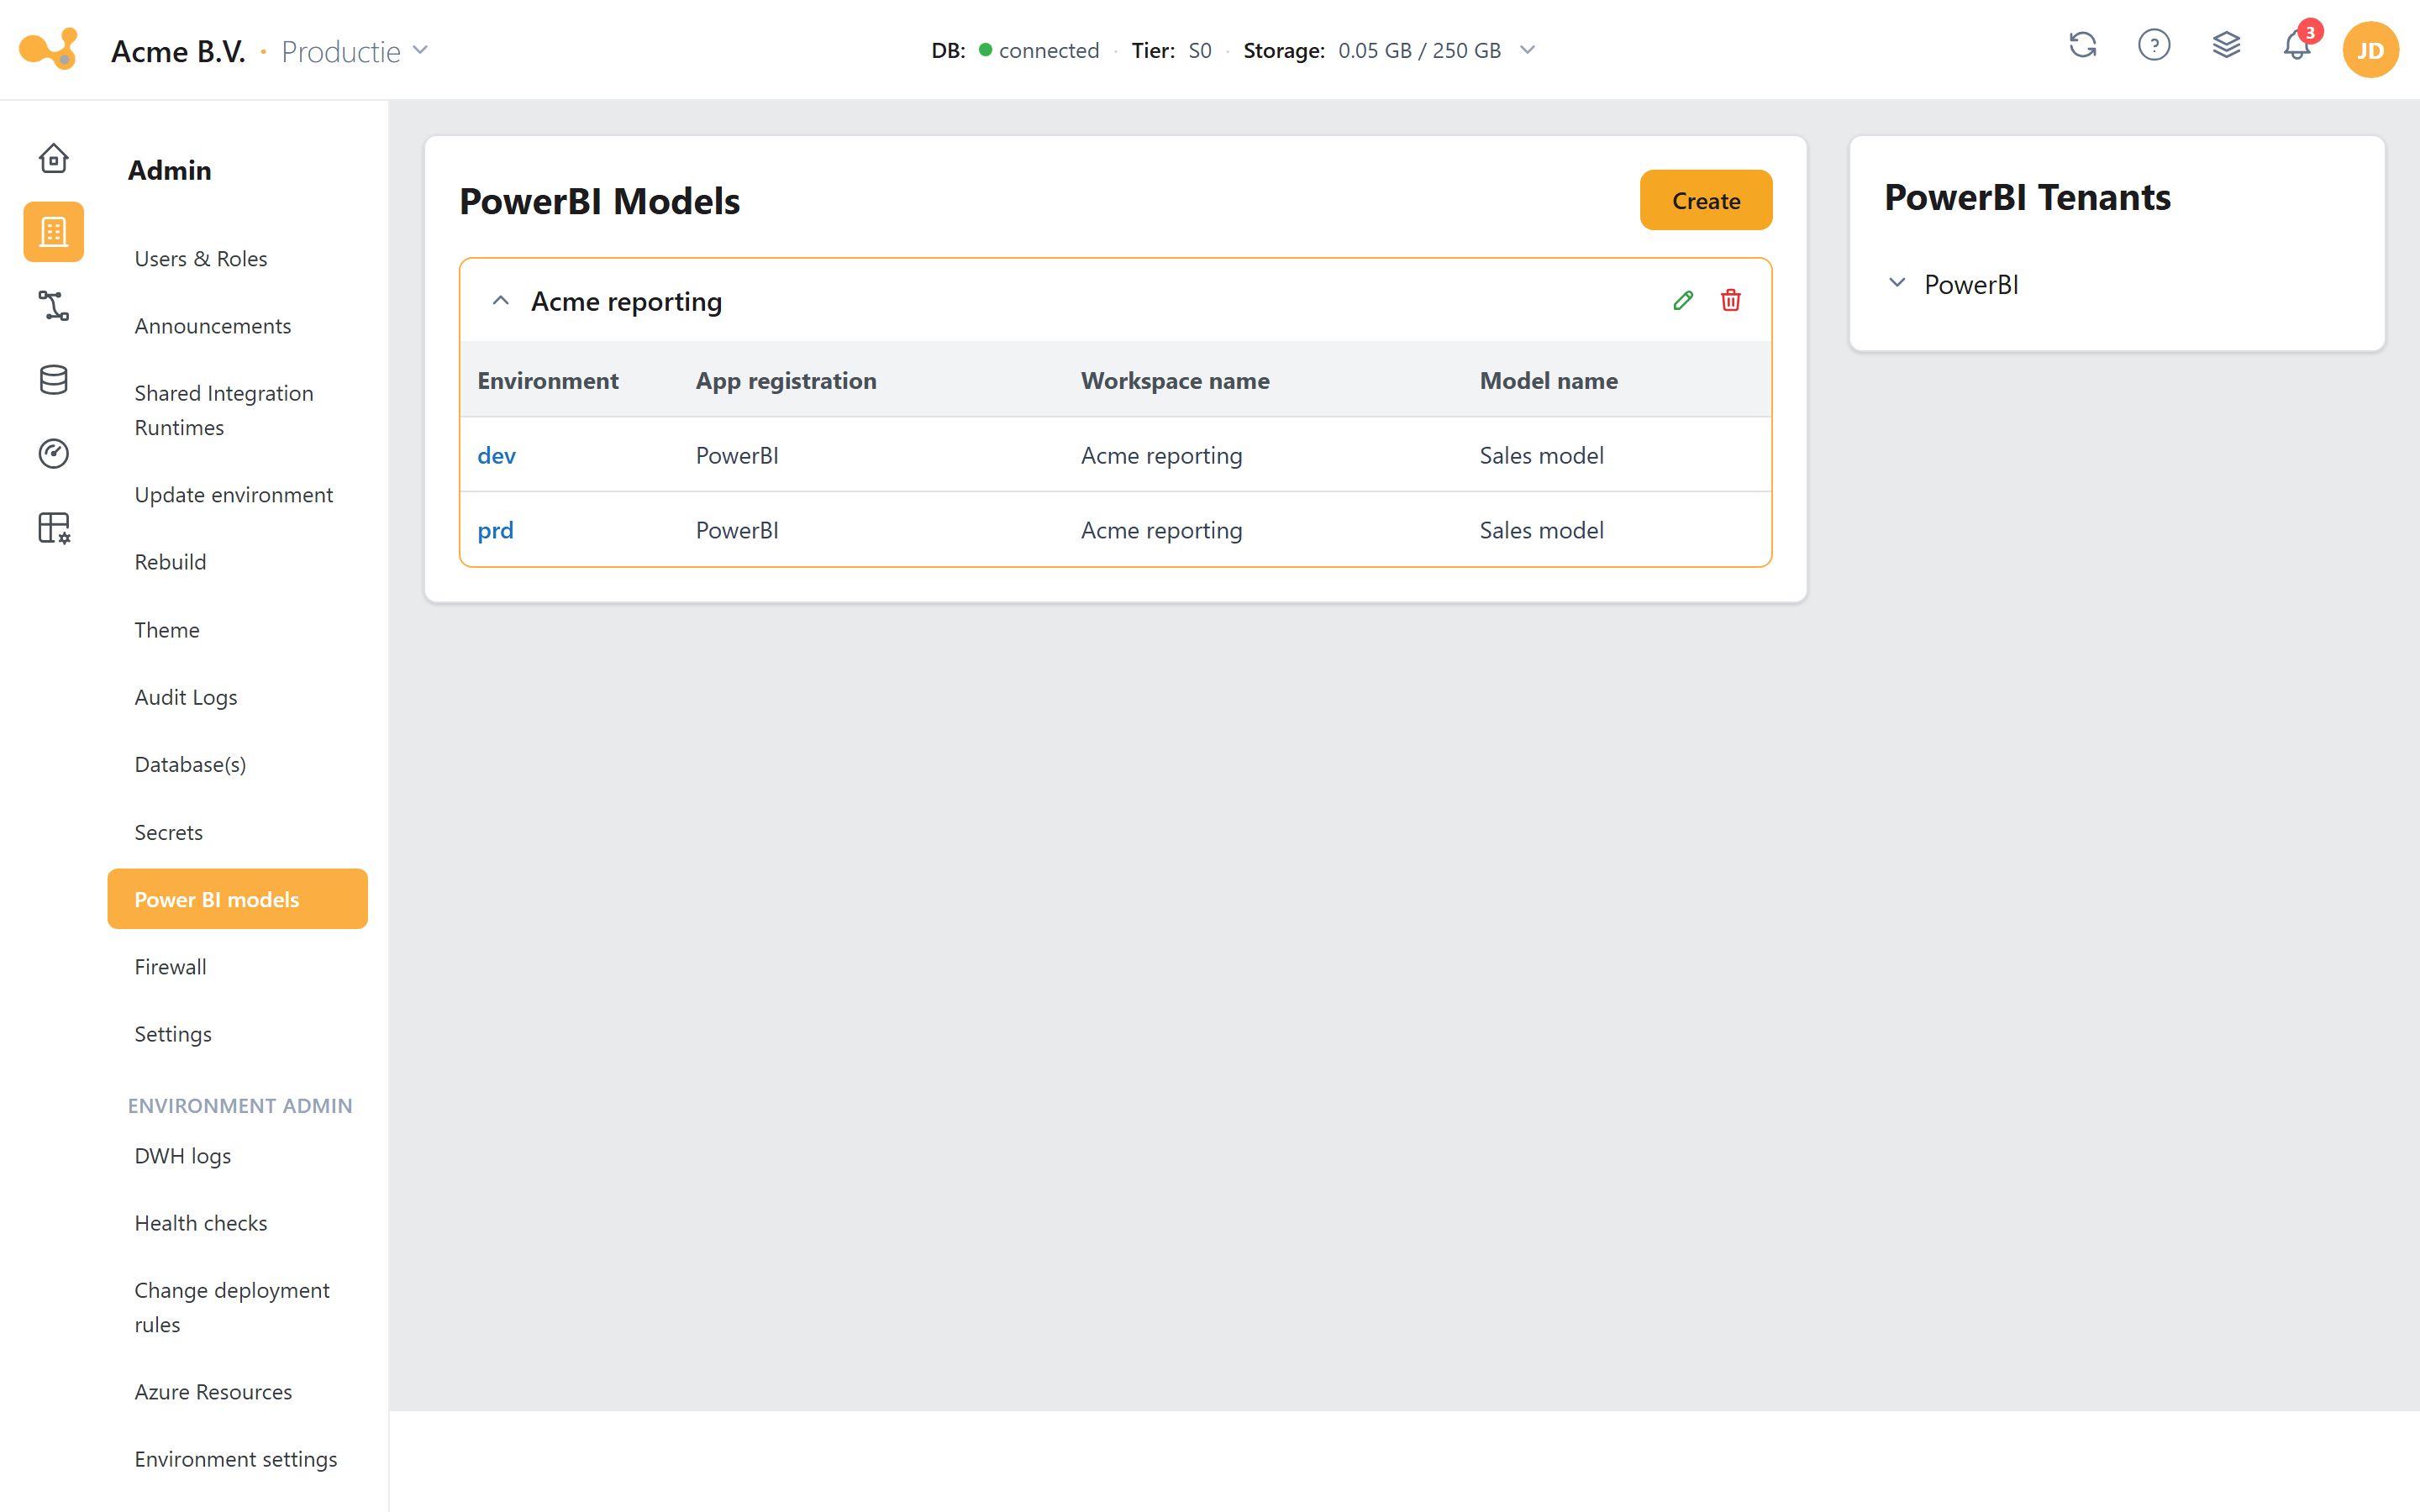
Link Power BI workspaces and models per environment via an app registration, for the embedded BI dashboard.
Setup: first add a data source of type PowerBI (see data source requirements). After that the tenant appears in the tenants section and you can retrieve the associated workspaces and models. The expiry date is shown per credential set.
Rebuild
Route: /admin/rebuild. Reset data to factory settings — for the entire organization or only the Azure
Data Factory.
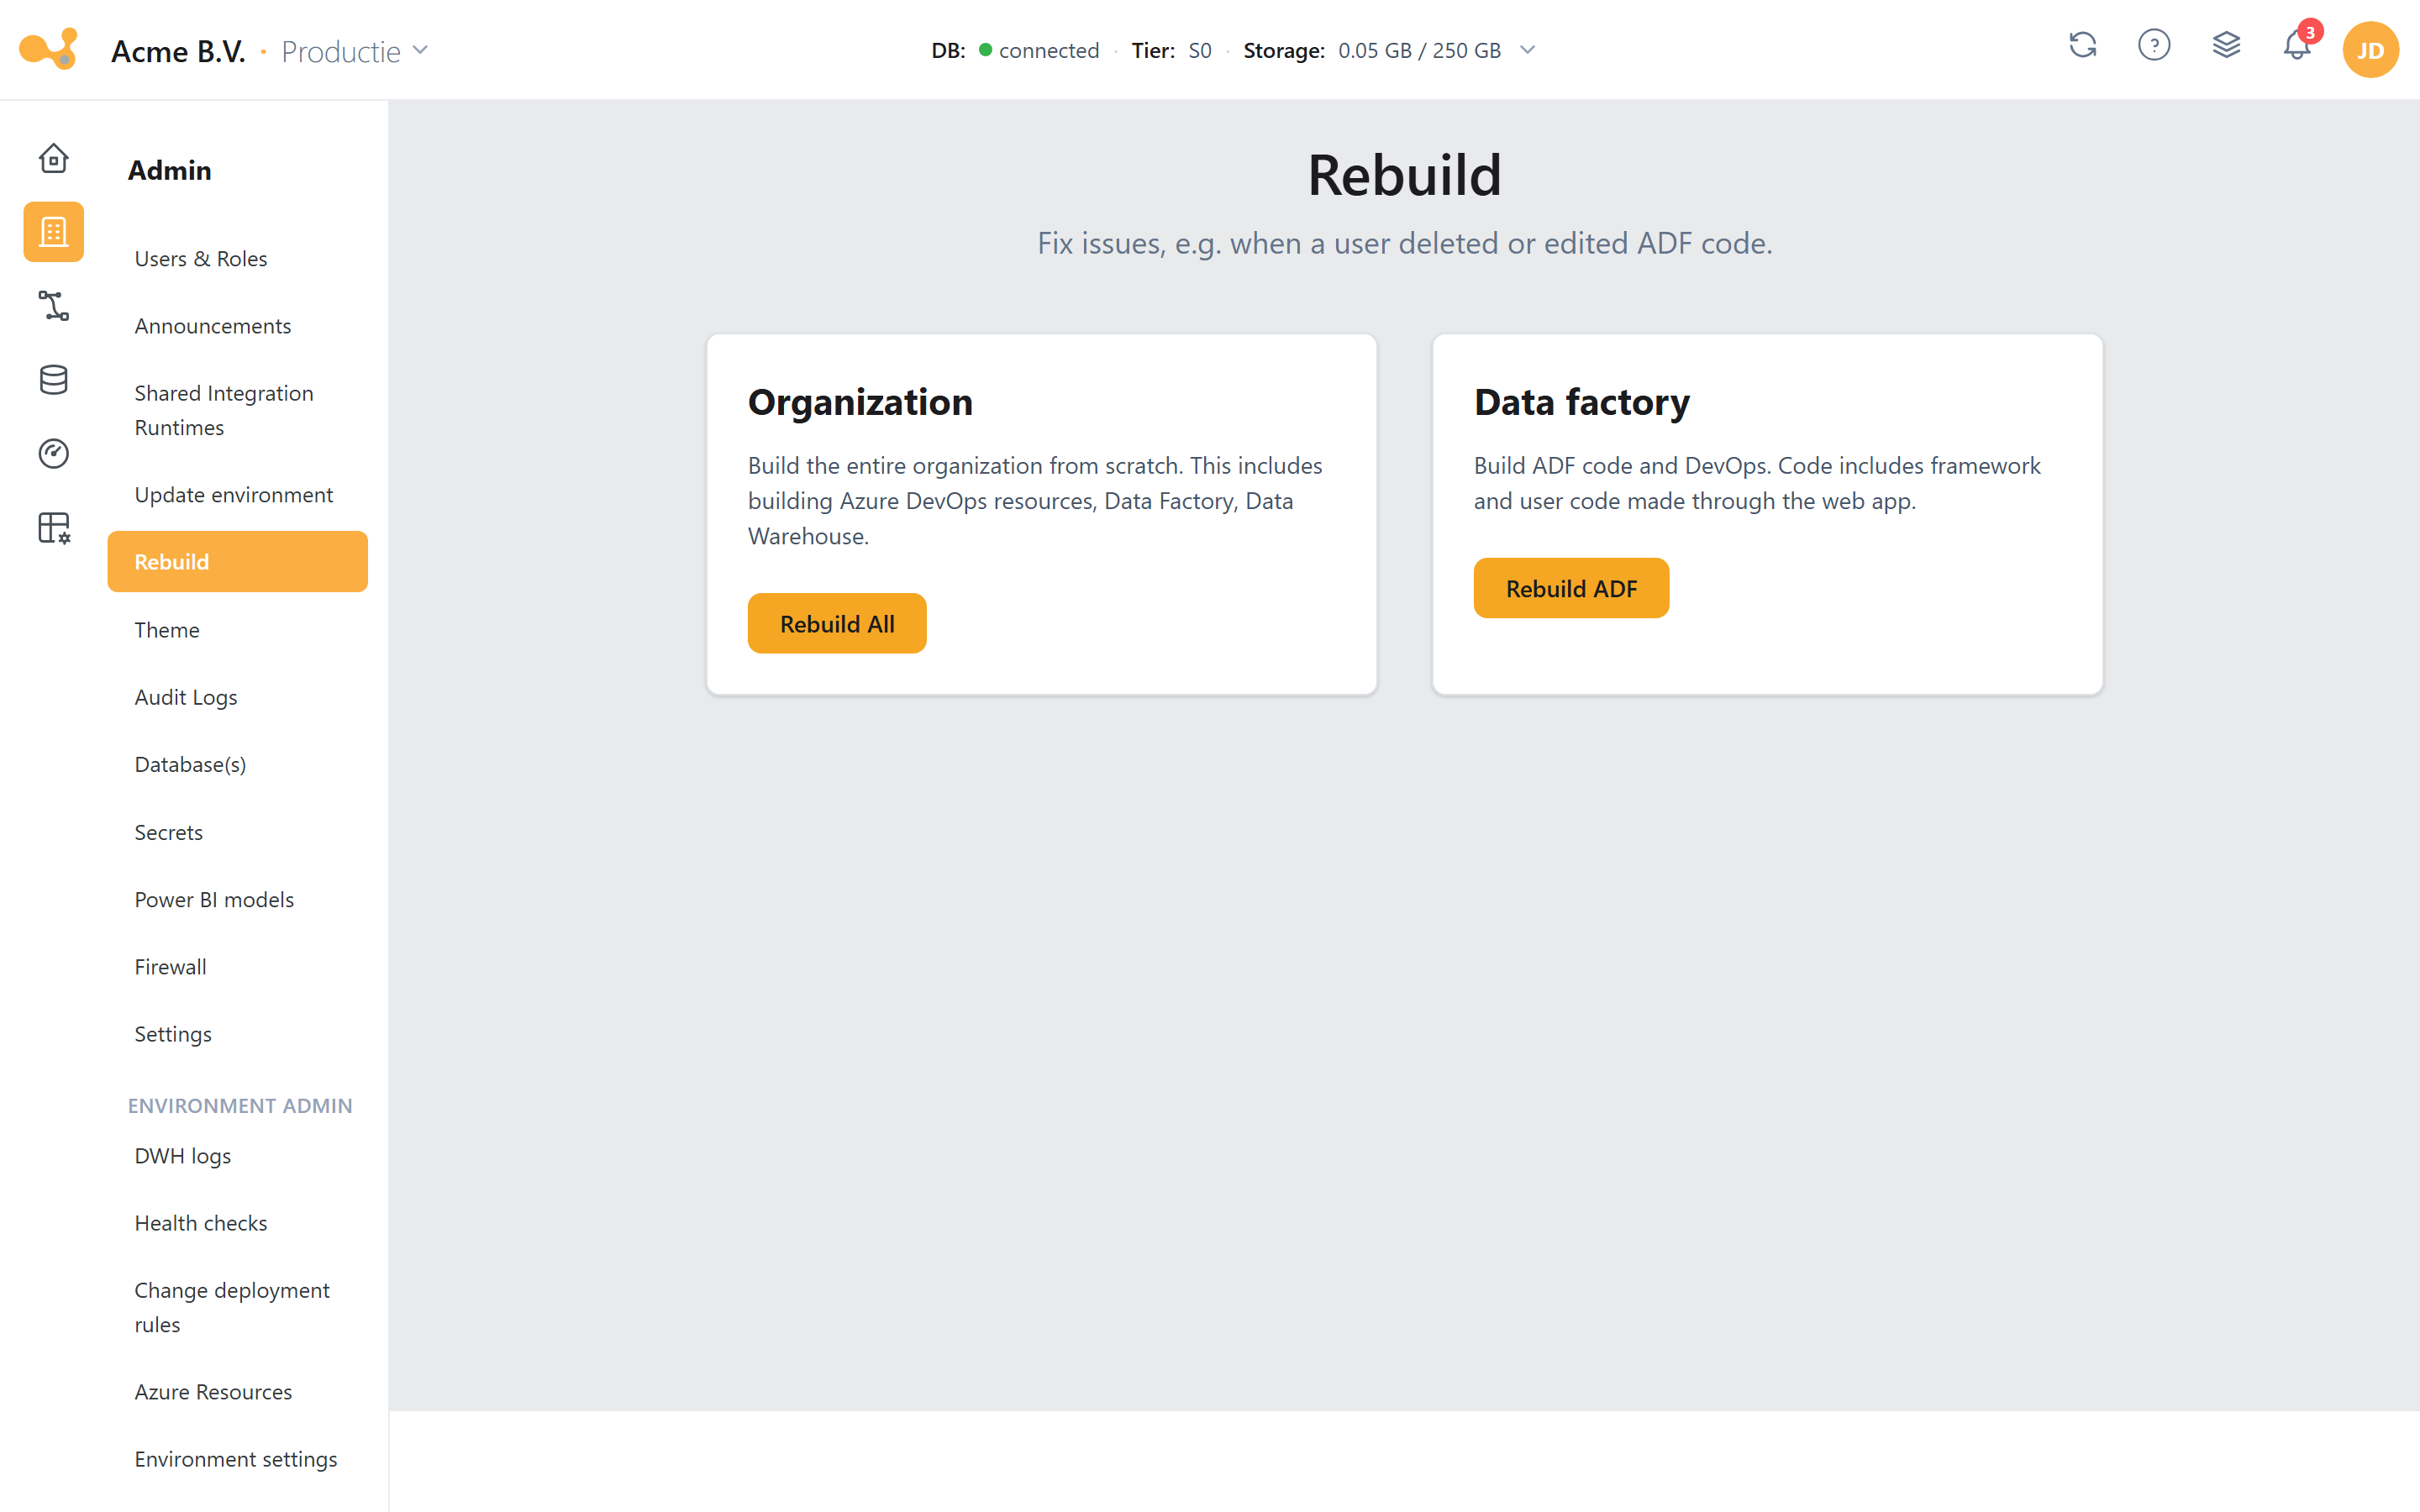
Two actions: Rebuild All resets the whole organization and Rebuild ADF resets only the data factory.
Use Rebuild ADF when someone manually edited or deleted ADF code: Yres rebuilds the data factory from the known configuration and so repairs the drift.
Rebuild overwrites all configuration that was not done via the Yres frontend. Use this with great care.
Settings (entire application)
Route: /admin/settings. Applies to all environments of the organization. Includes, among other things, the number of
parallel processes with which sources are loaded into the database and/or the Data Lake (an integer
between 1 and 50).
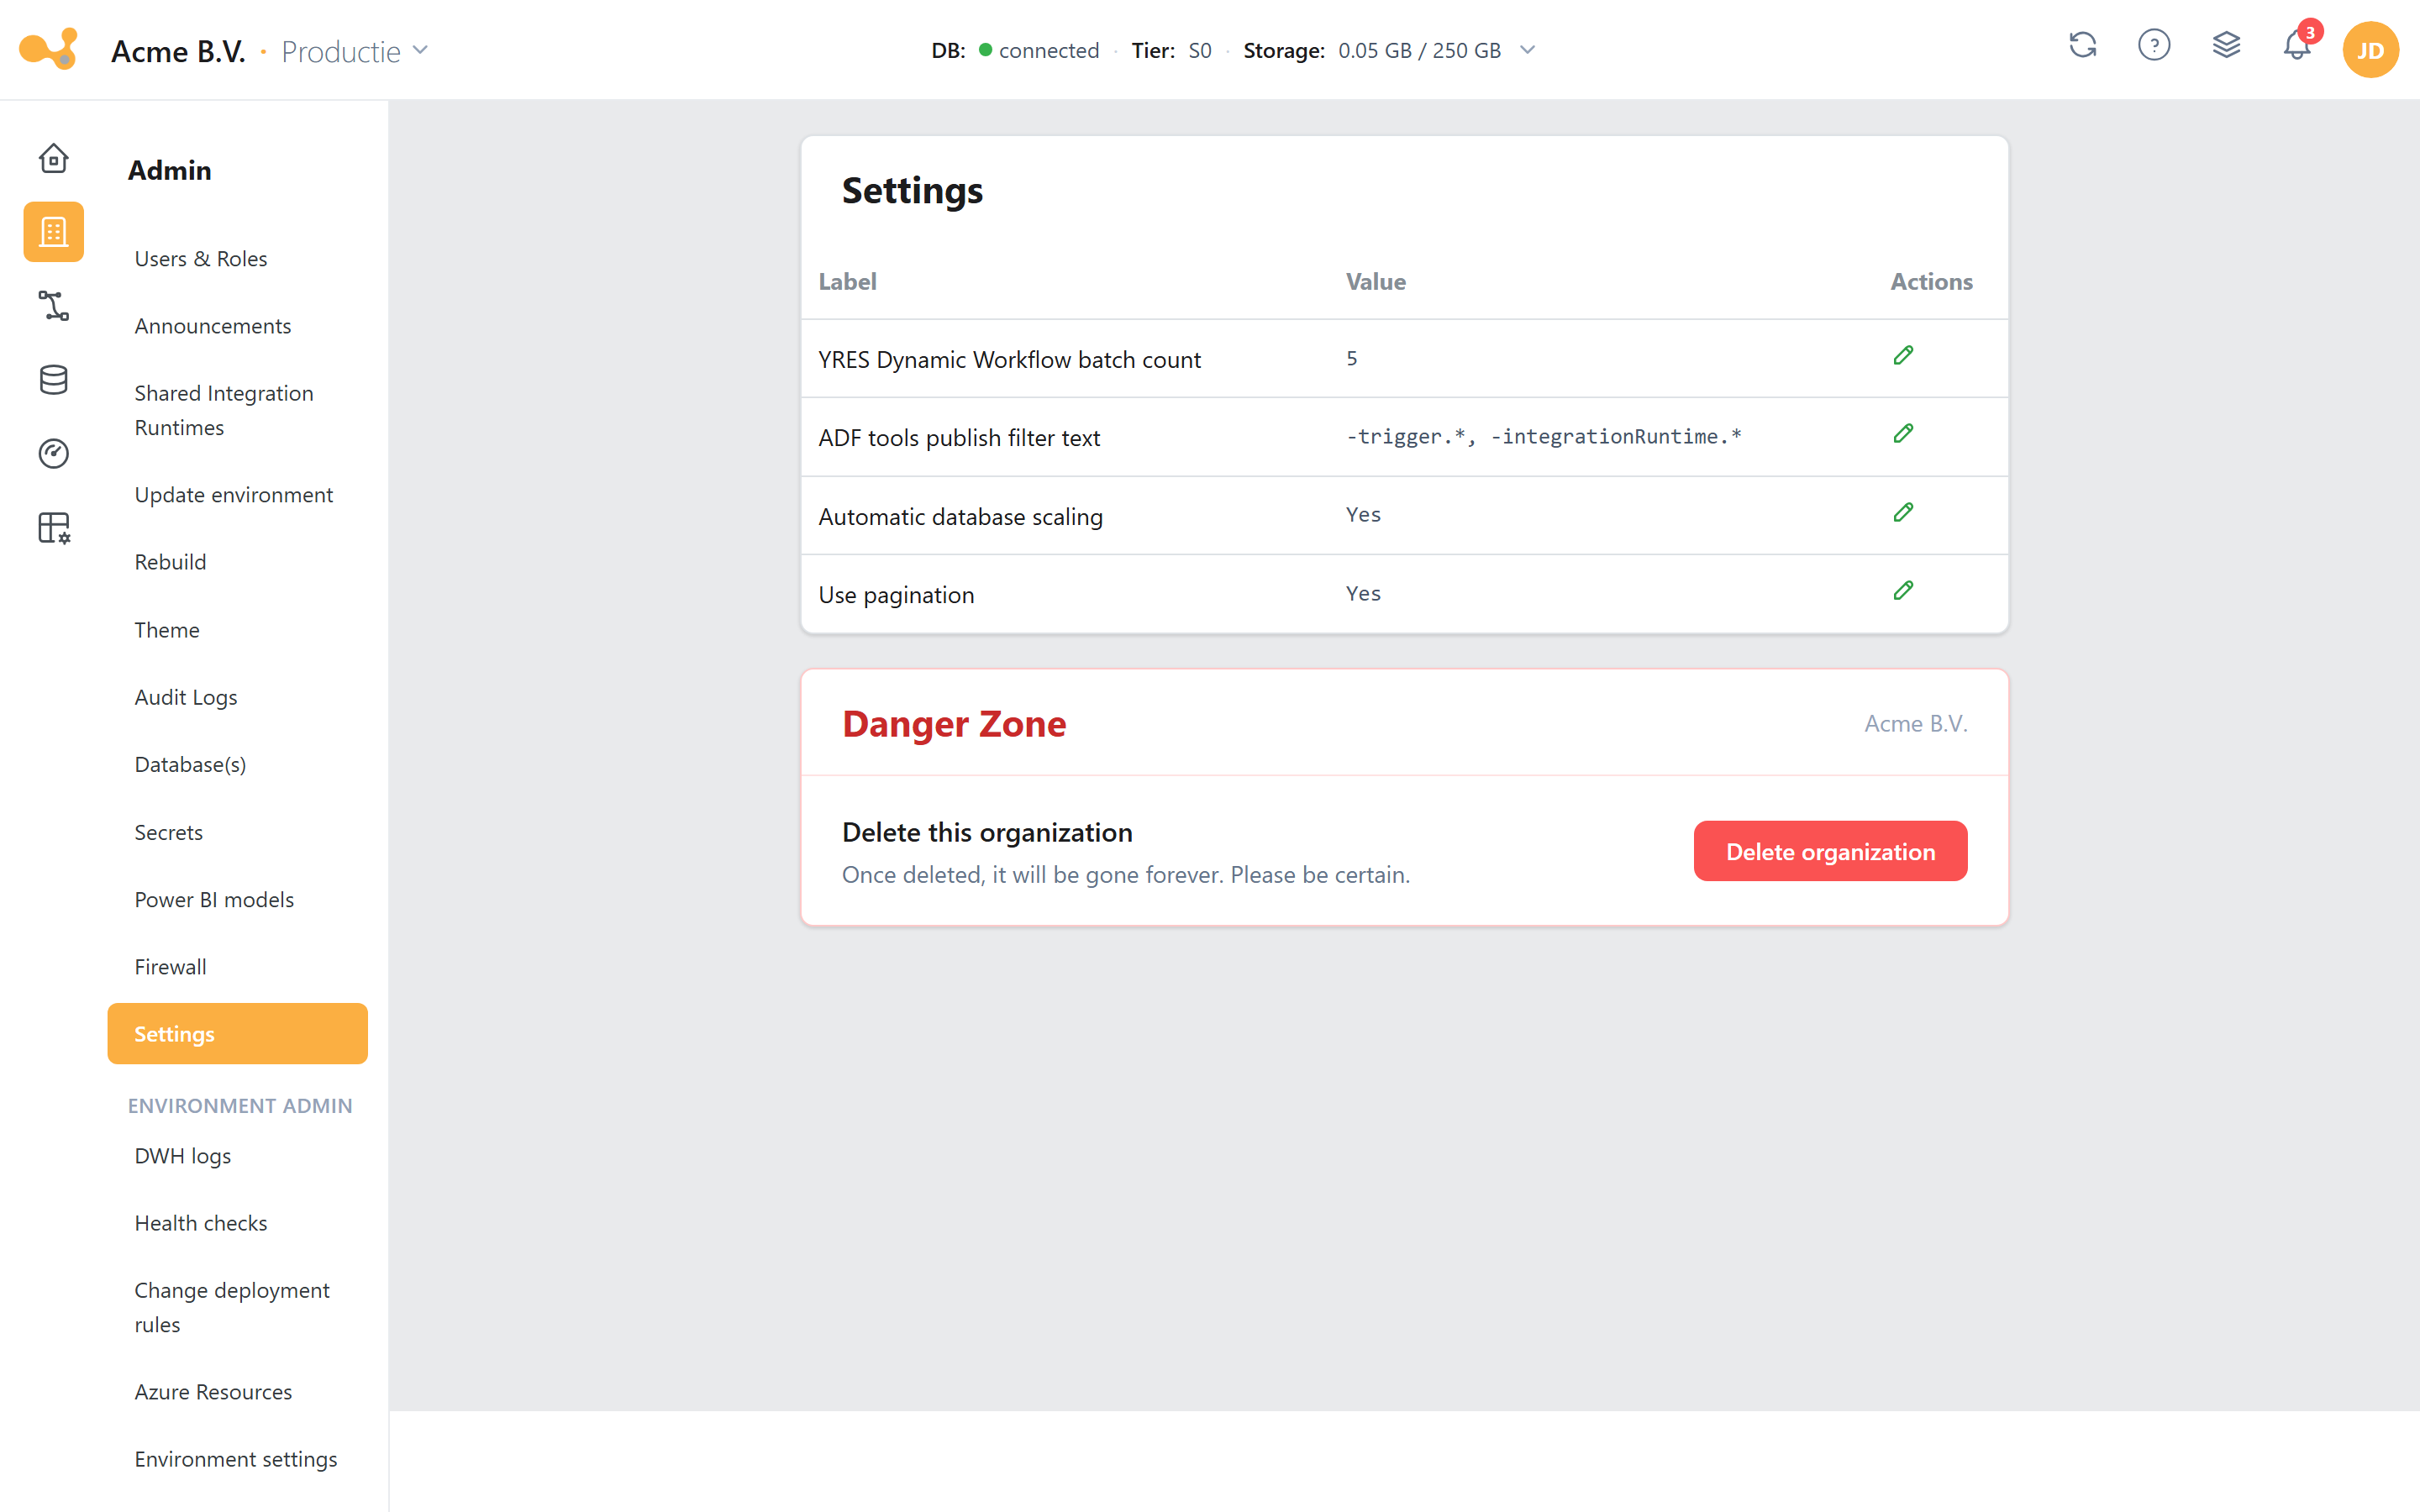
Organization-wide, tunable values (Label/Value) such as the Dynamic Workflow batch count and the ADF publish filter text, plus a Danger Zone for destructive actions.
Each setting is a Label/Value pair — among others the batch count for the Dynamic Workflow and the publish filter text Yres uses to decide which ADF objects get published.
Below the settings is the Danger Zone. Here you cancel the subscription by deleting the organization. This does not affect your Azure environment — it only removes the organization from the Yres portal.
"Settings" here is application-wide. The per-environment DWH settings (service tier, schema names, pagination) live under Environment Settings and apply only to the selected environment.
Secrets
Route: /admin/secrets. View the secrets in the associated Azure Key Vault, with their scope and any
expiry date. With the right permission you can update a value. Yres never stores credentials in the
frontend; they always live in the customer's Key Vault.
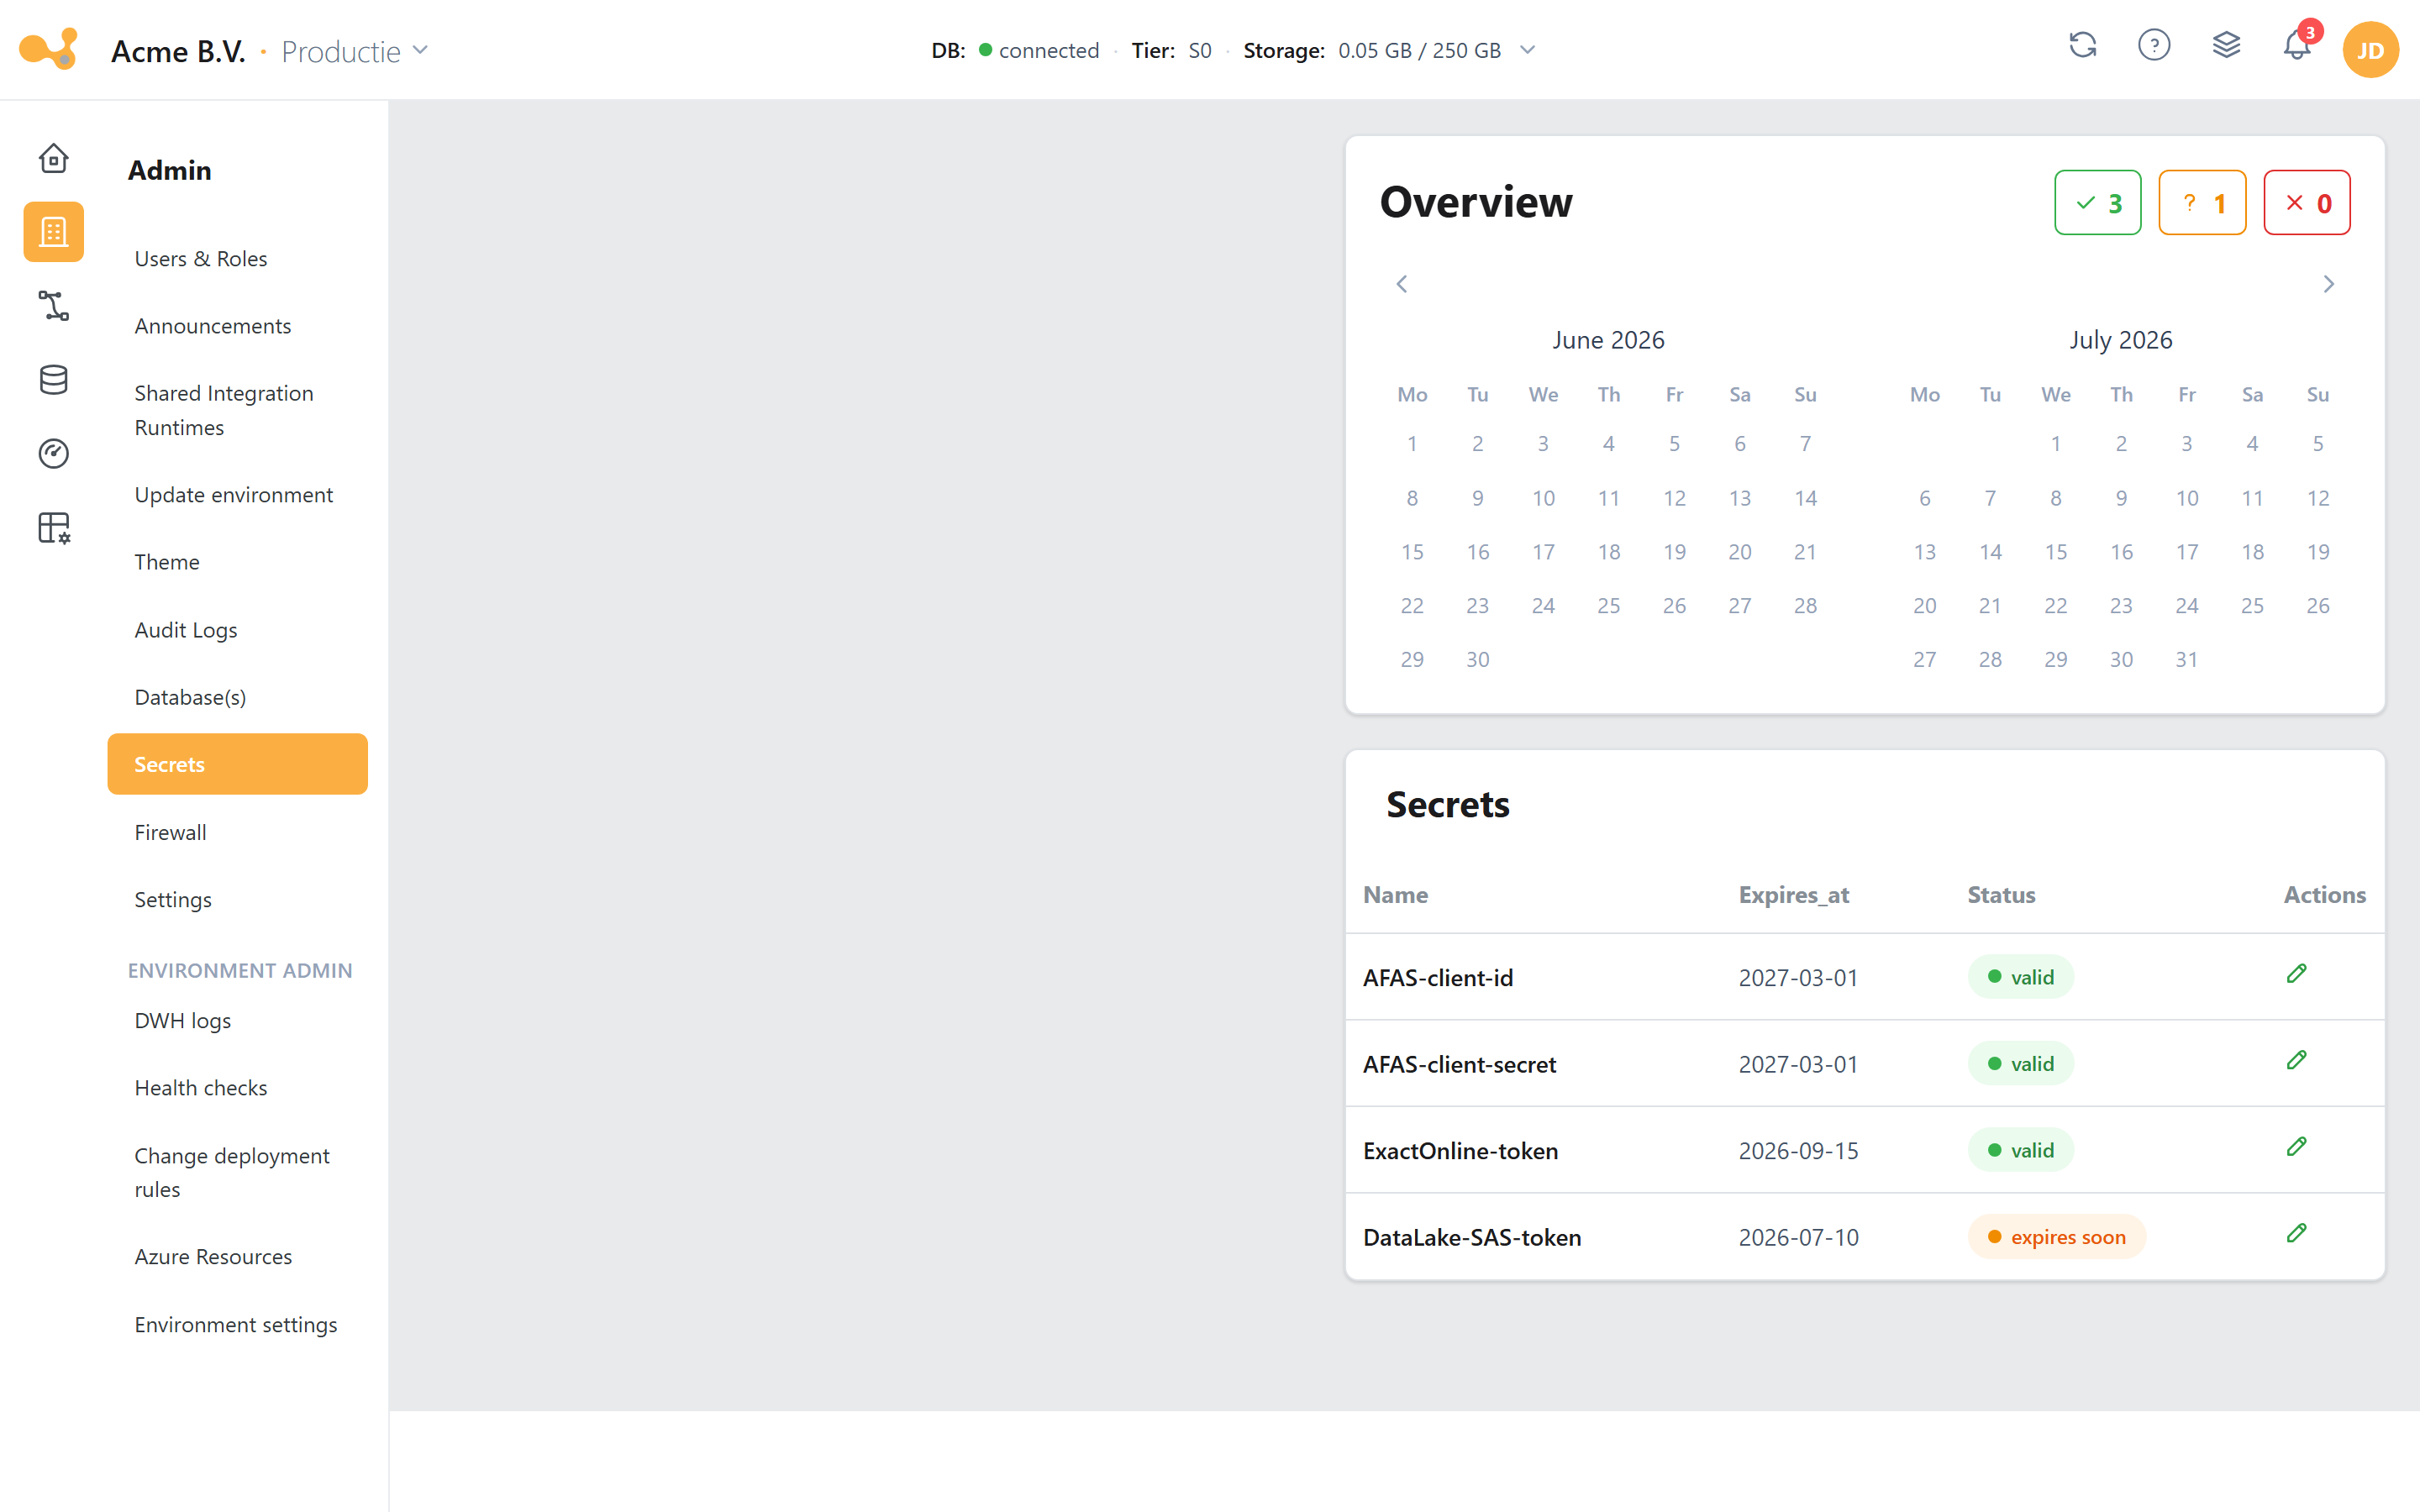
An expiry overview (calendar) at the top and below it a table of the stored secrets — Name,
Expires_at and Status (valid / expires-soon). These are the source credentials in the Key Vault;
Yres warns before they expire.
Shared integration runtimes
Route: /admin/shared-integration-runtimes (available from version 1.55). Manage self-hosted
integration runtimes for ADF. An IR requires a name and description. After creating it, you download
the Microsoft IR tool via the info icon and register the runtime with the keys shown.
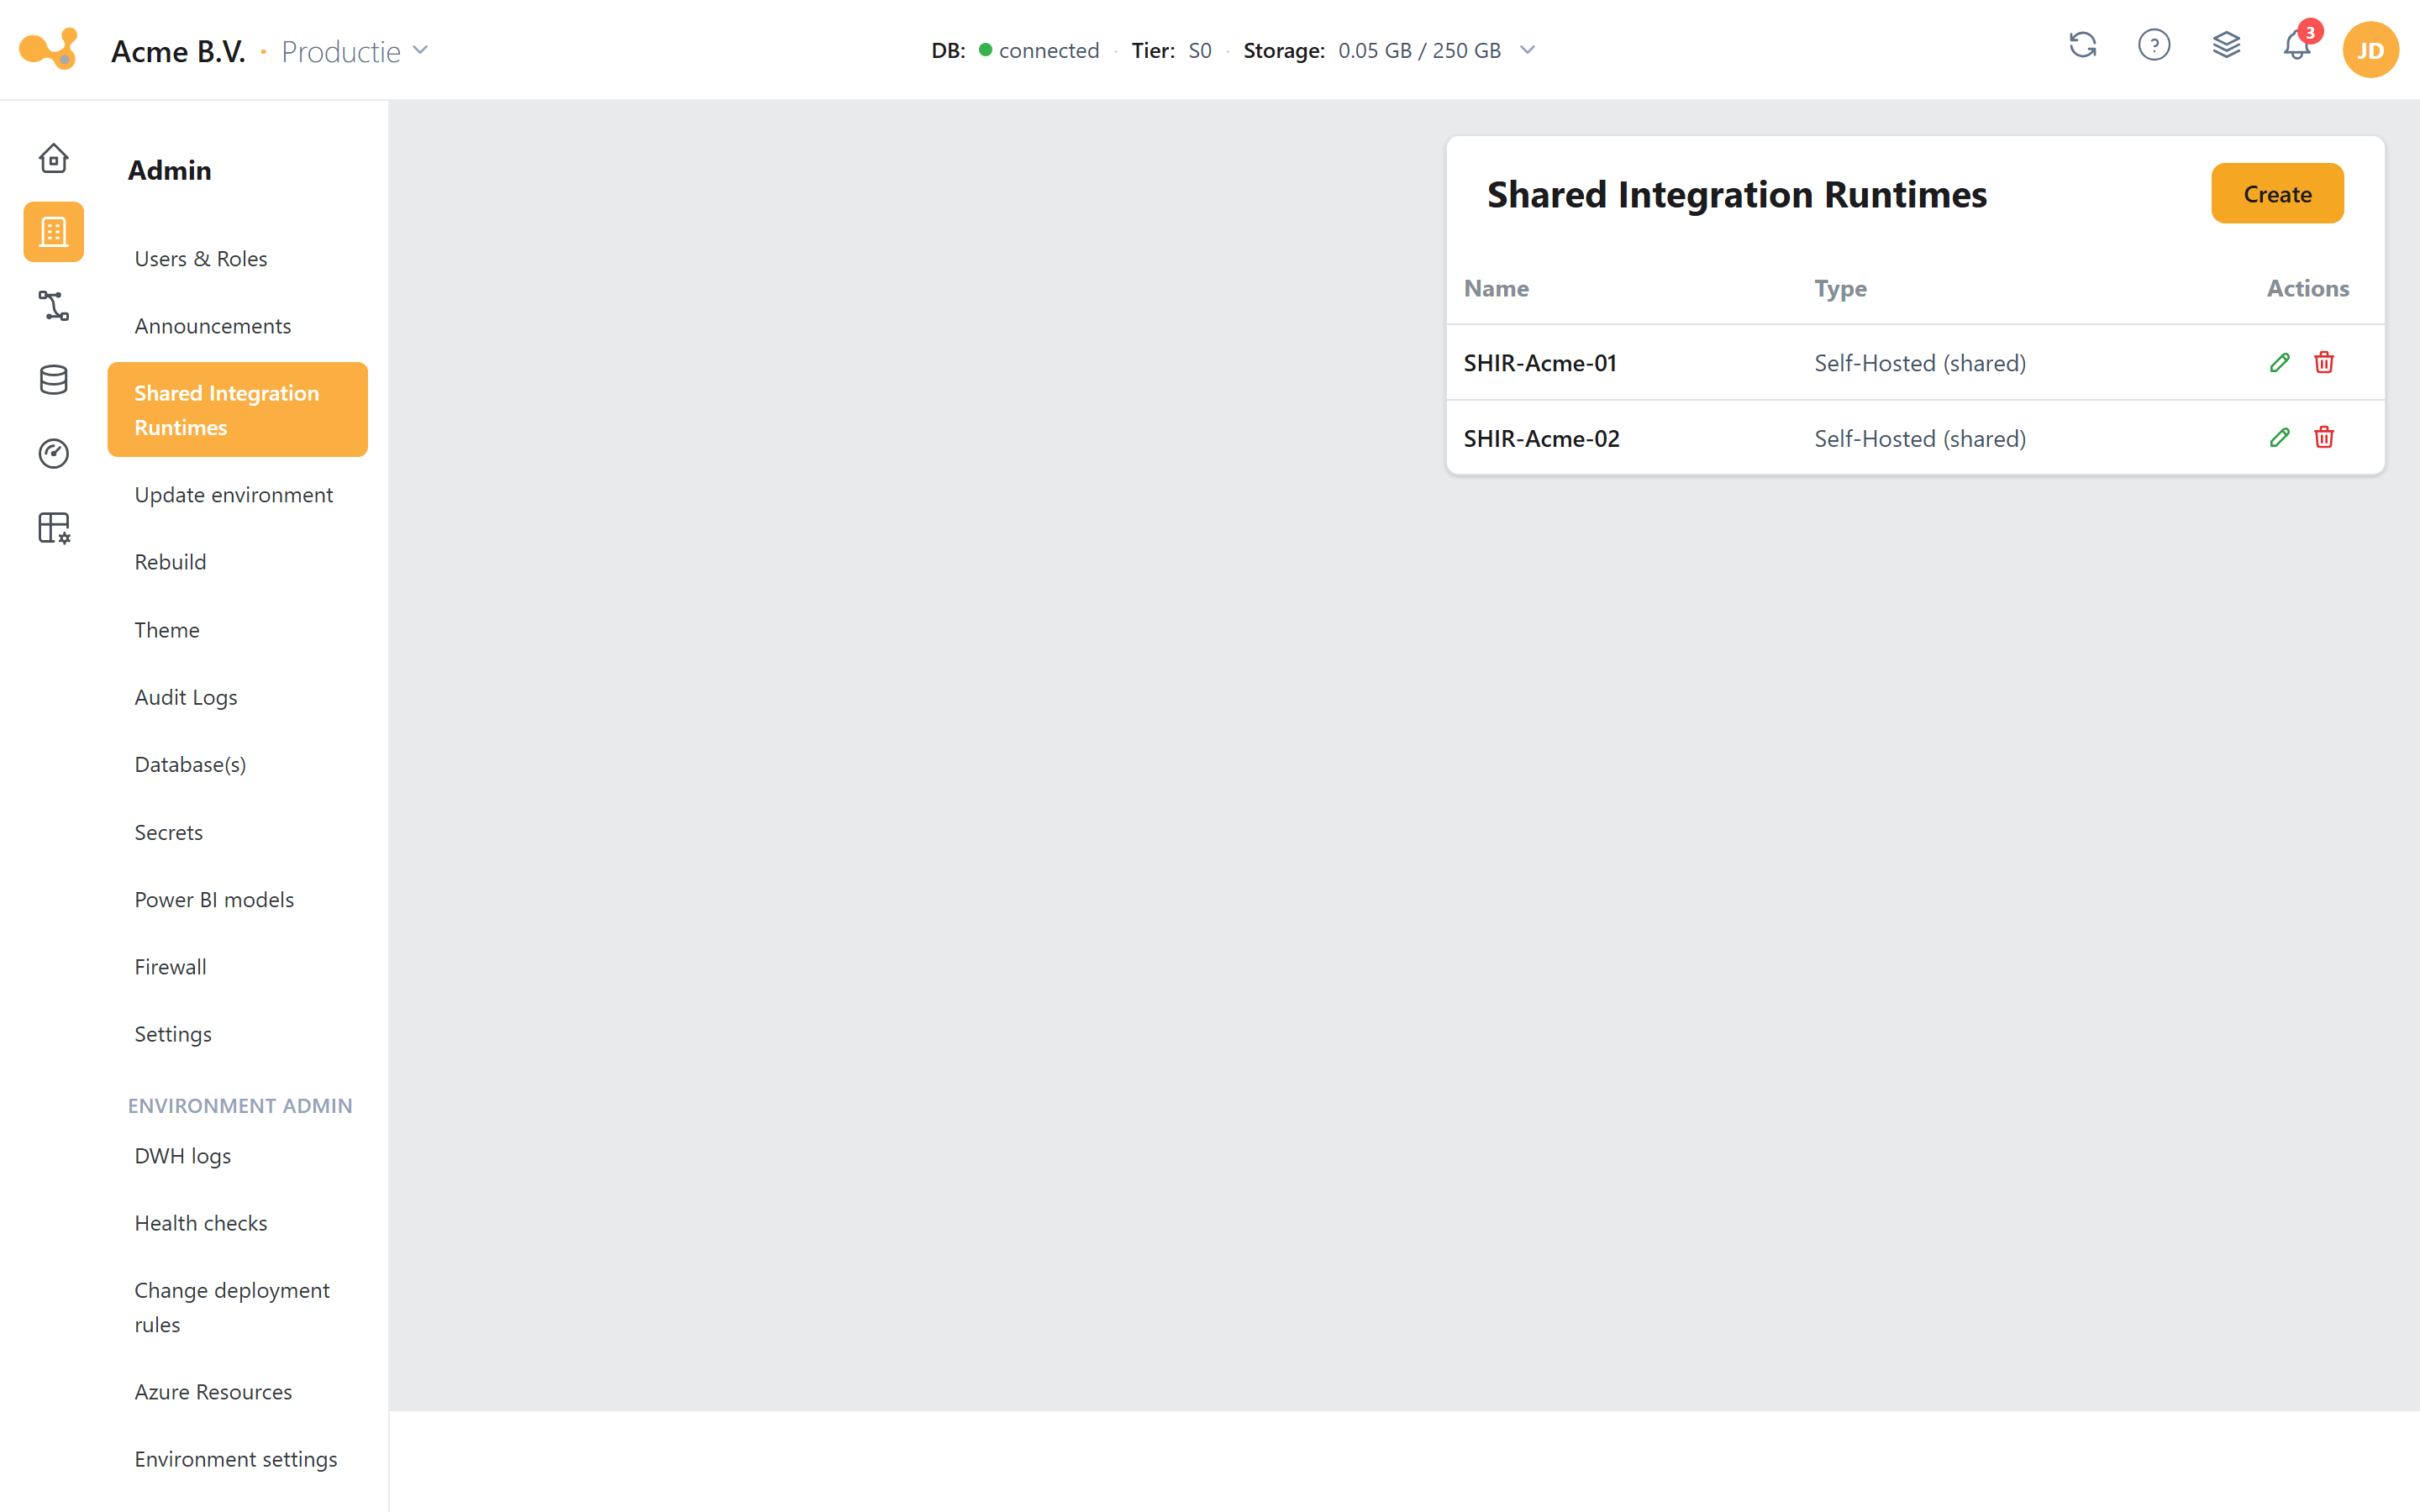
Self-hosted integration runtimes shared across environments and sources.
Creating a shared integration runtime cannot be undone.
Update Environment
Route: /admin/environments. Update each environment to the latest Yres version. This starts a deployment
(CI/CD pipeline) for the selected environment.
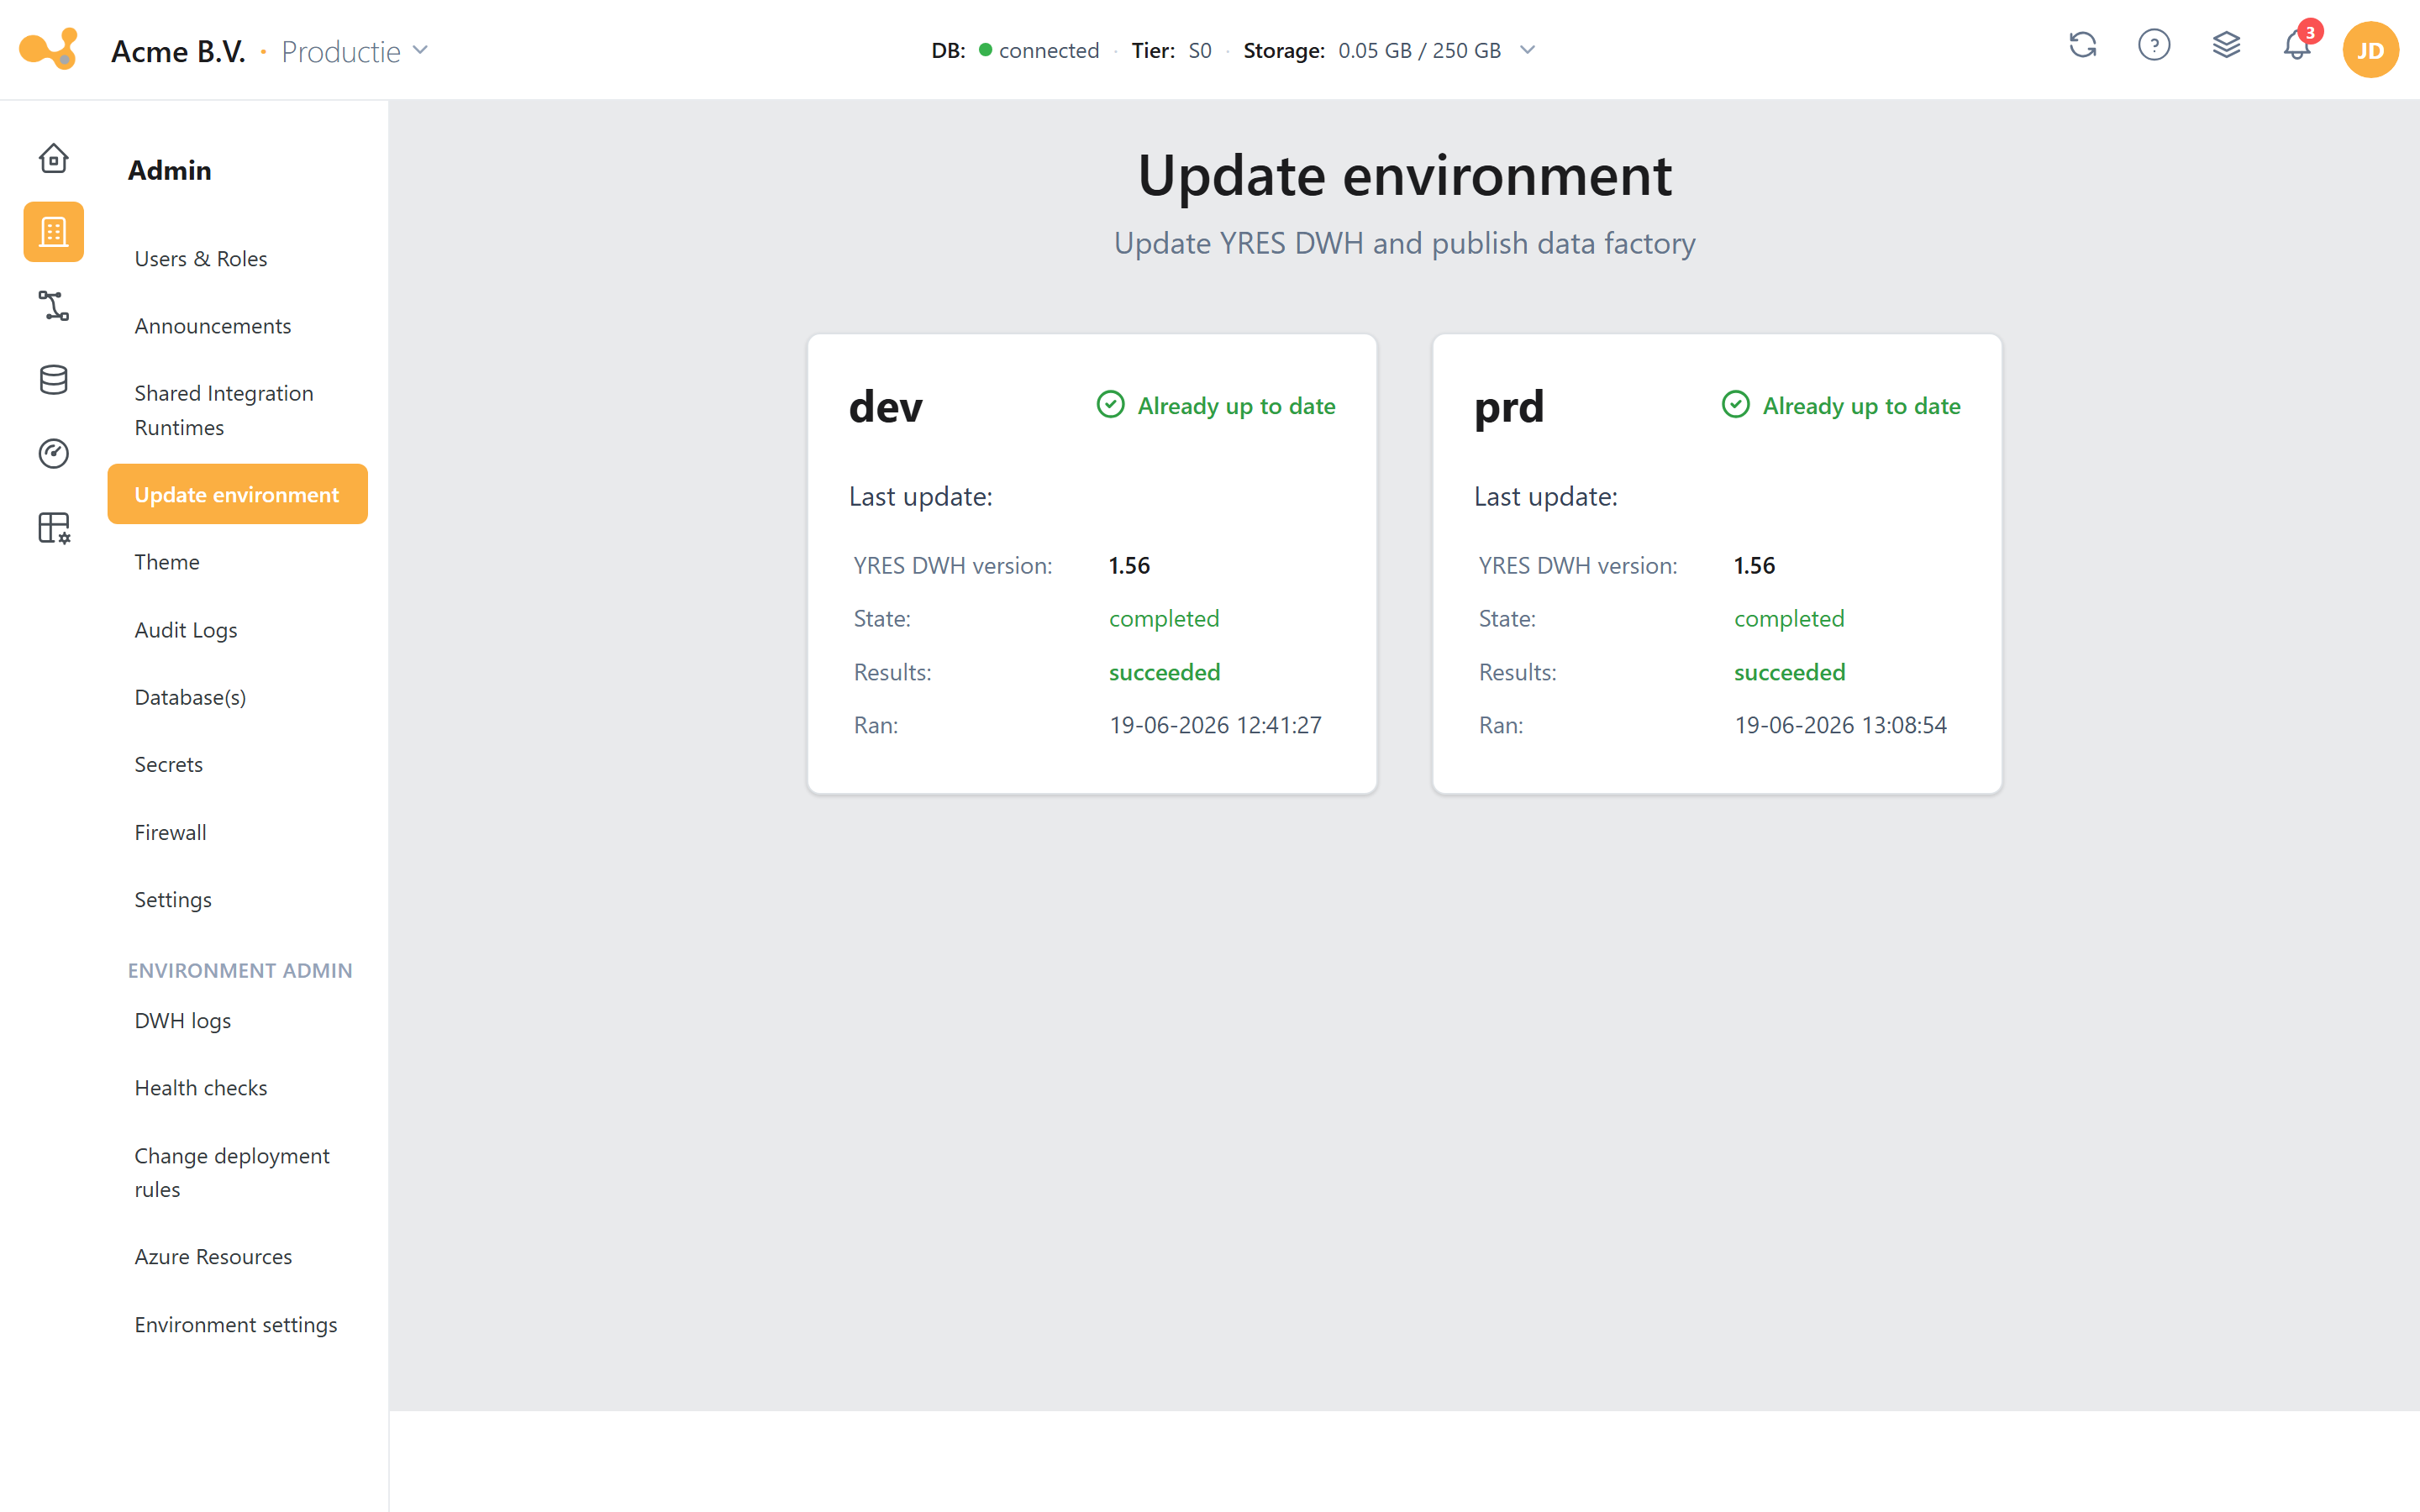
Per environment (dev / prd) a card shows the current YRES DWH version and, when there is nothing to do, the "Already up to date" state. Updating updates the DWH and republishes the data factory.
- Card per environment — each environment (Development, Test, Production) has its own card.
- Version + last CI/CD — shows the current DWH version and the State / Result / Ran date of the last deployment.
- Ordering — update in order: a non-dev environment shows "update the previous environment first" until the earlier environments are up to date.
- Deploy confirmation — when updating, Yres temporarily resets the database service tier to the default tier; after confirmation the deployment status screen follows.
Test a new version first on dev (and possibly test) before updating prod. See the
release notes for the contents of an update.
Theme
Route: /admin/theme. White-label Yres per organization: upload a custom icon and login background, choose a
brand color, set blur and pick the default mode (light / dark / system).
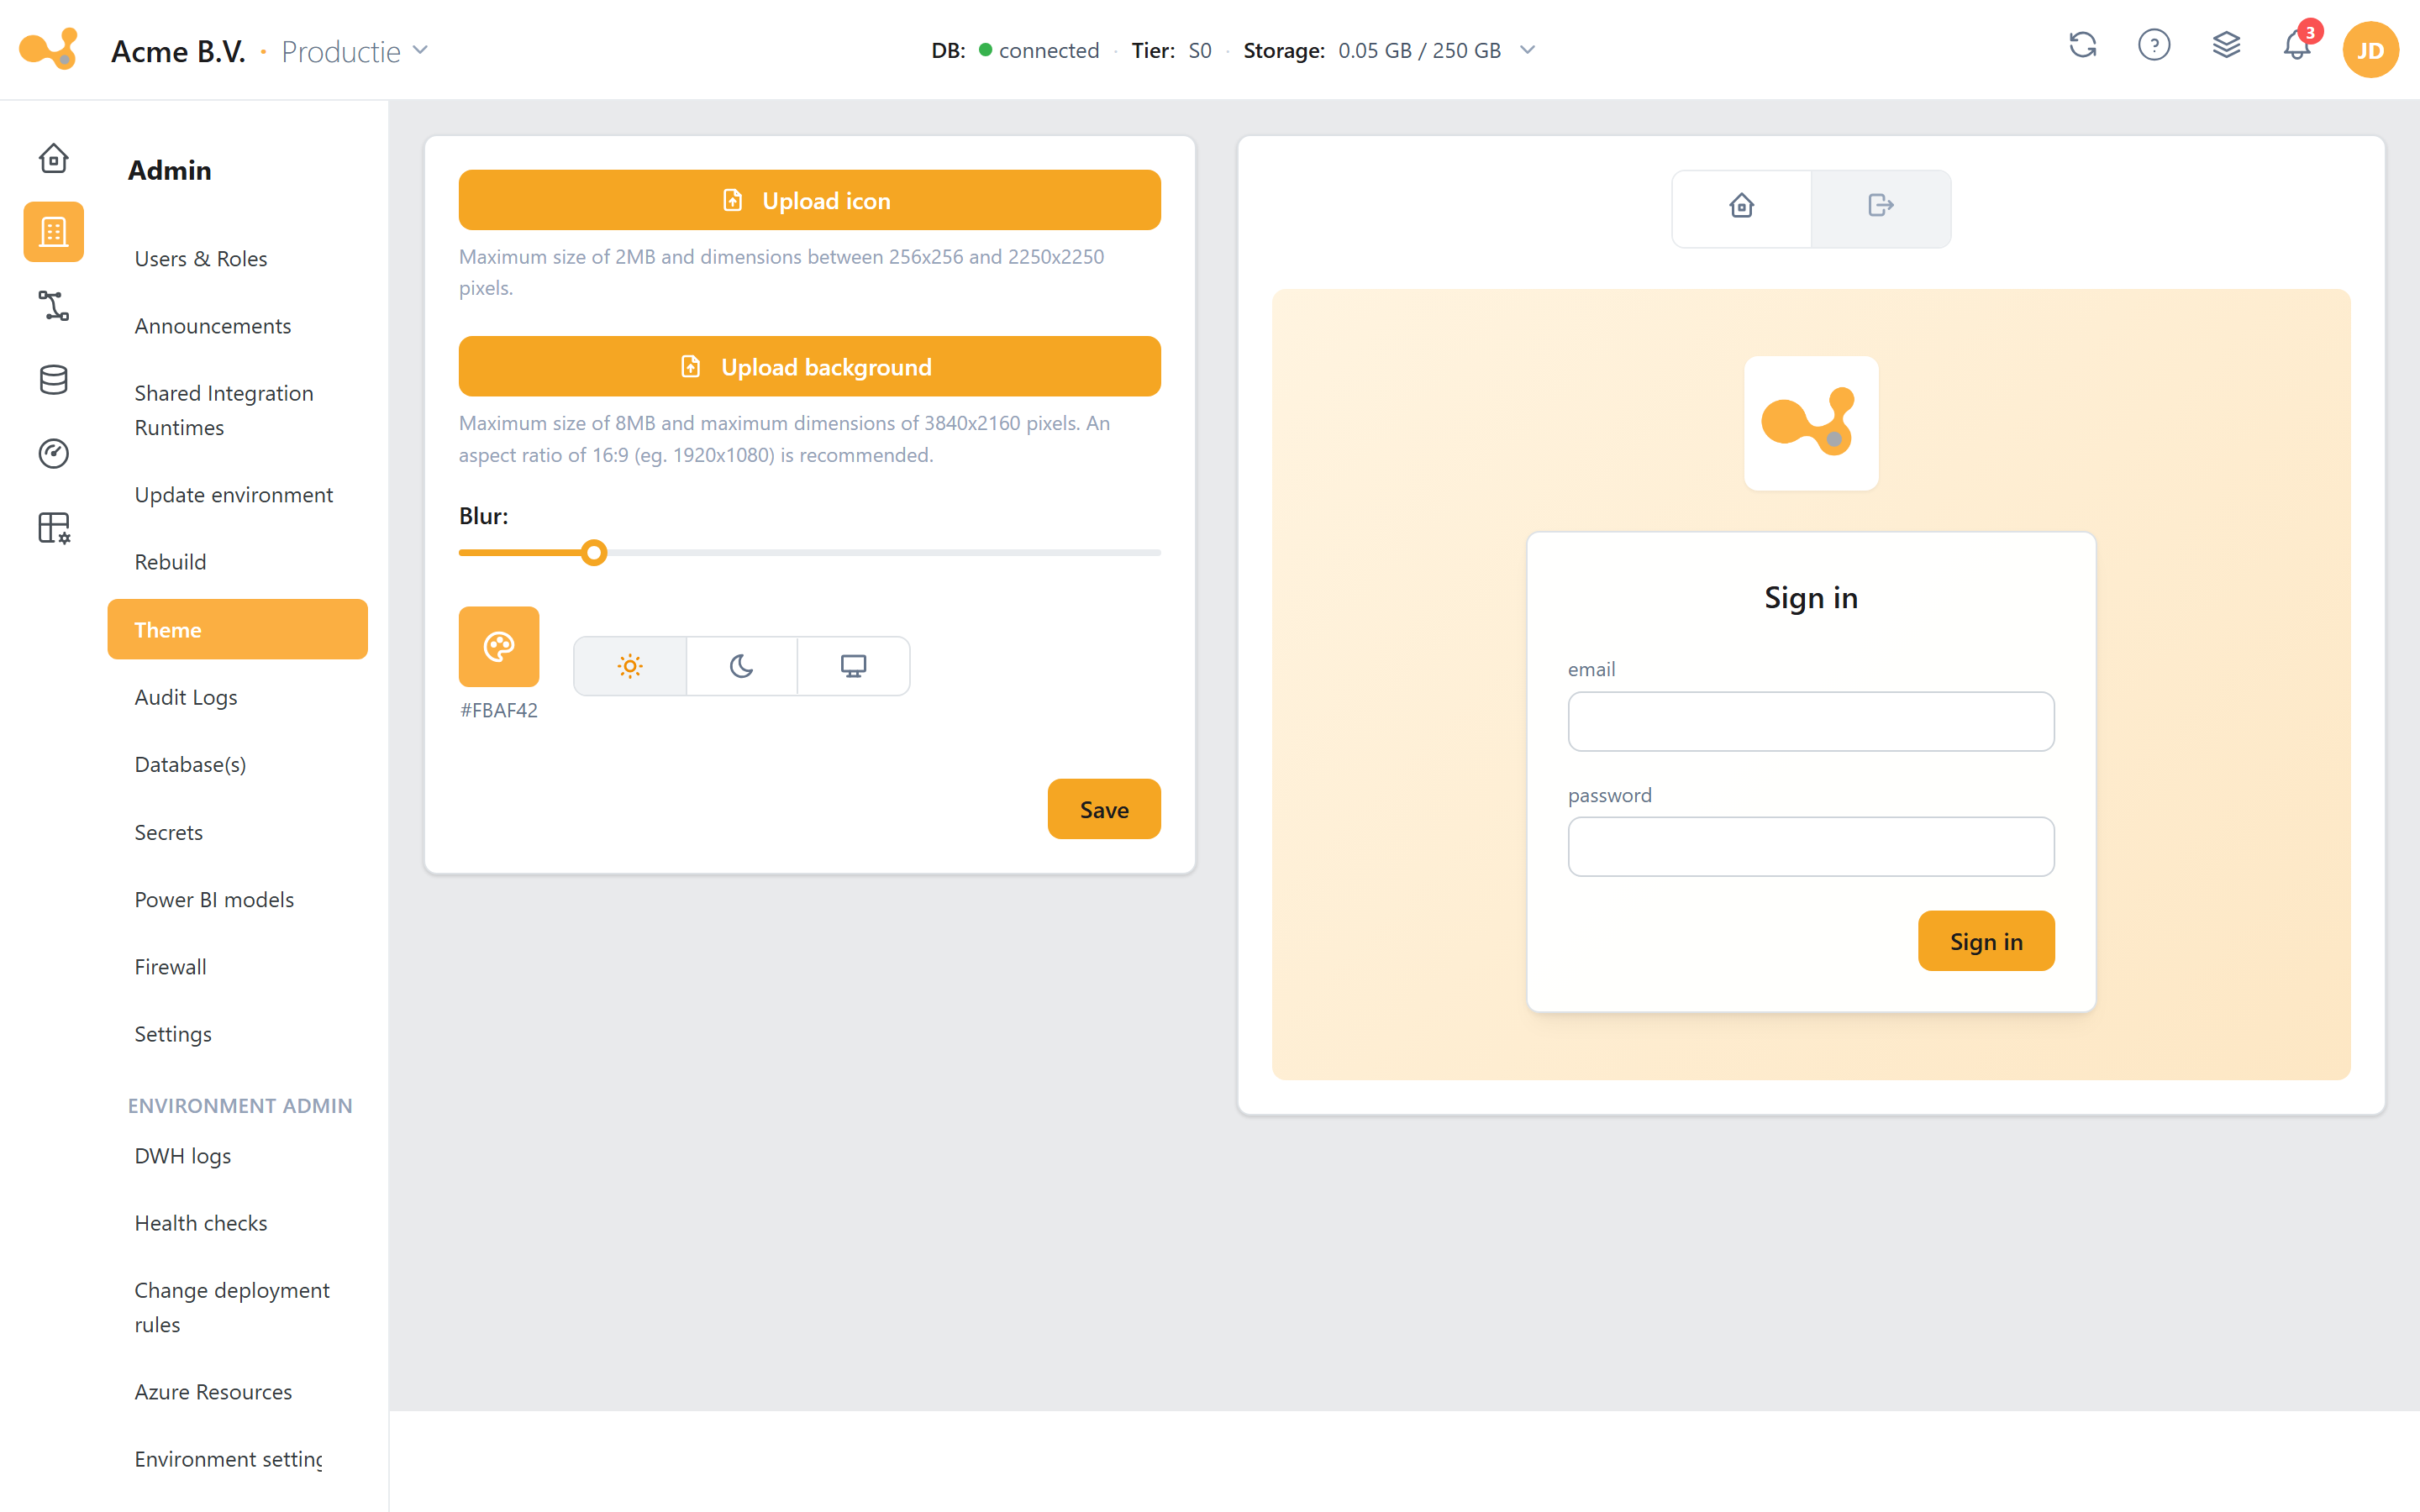
Upload a custom icon + login background, set a brand color, blur and light/dark/system mode; a live preview of the login page shows the result. Per-organization white-labeling.
Environment admin (environment-specific)
The following screens apply per environment. Switch environments with the environment switcher in the top right before you change anything.
Azure Resources
Route: /admin/azure/resources. Overview of the linked Azure resources: name, type, location and a
direct hyperlink to the resource.
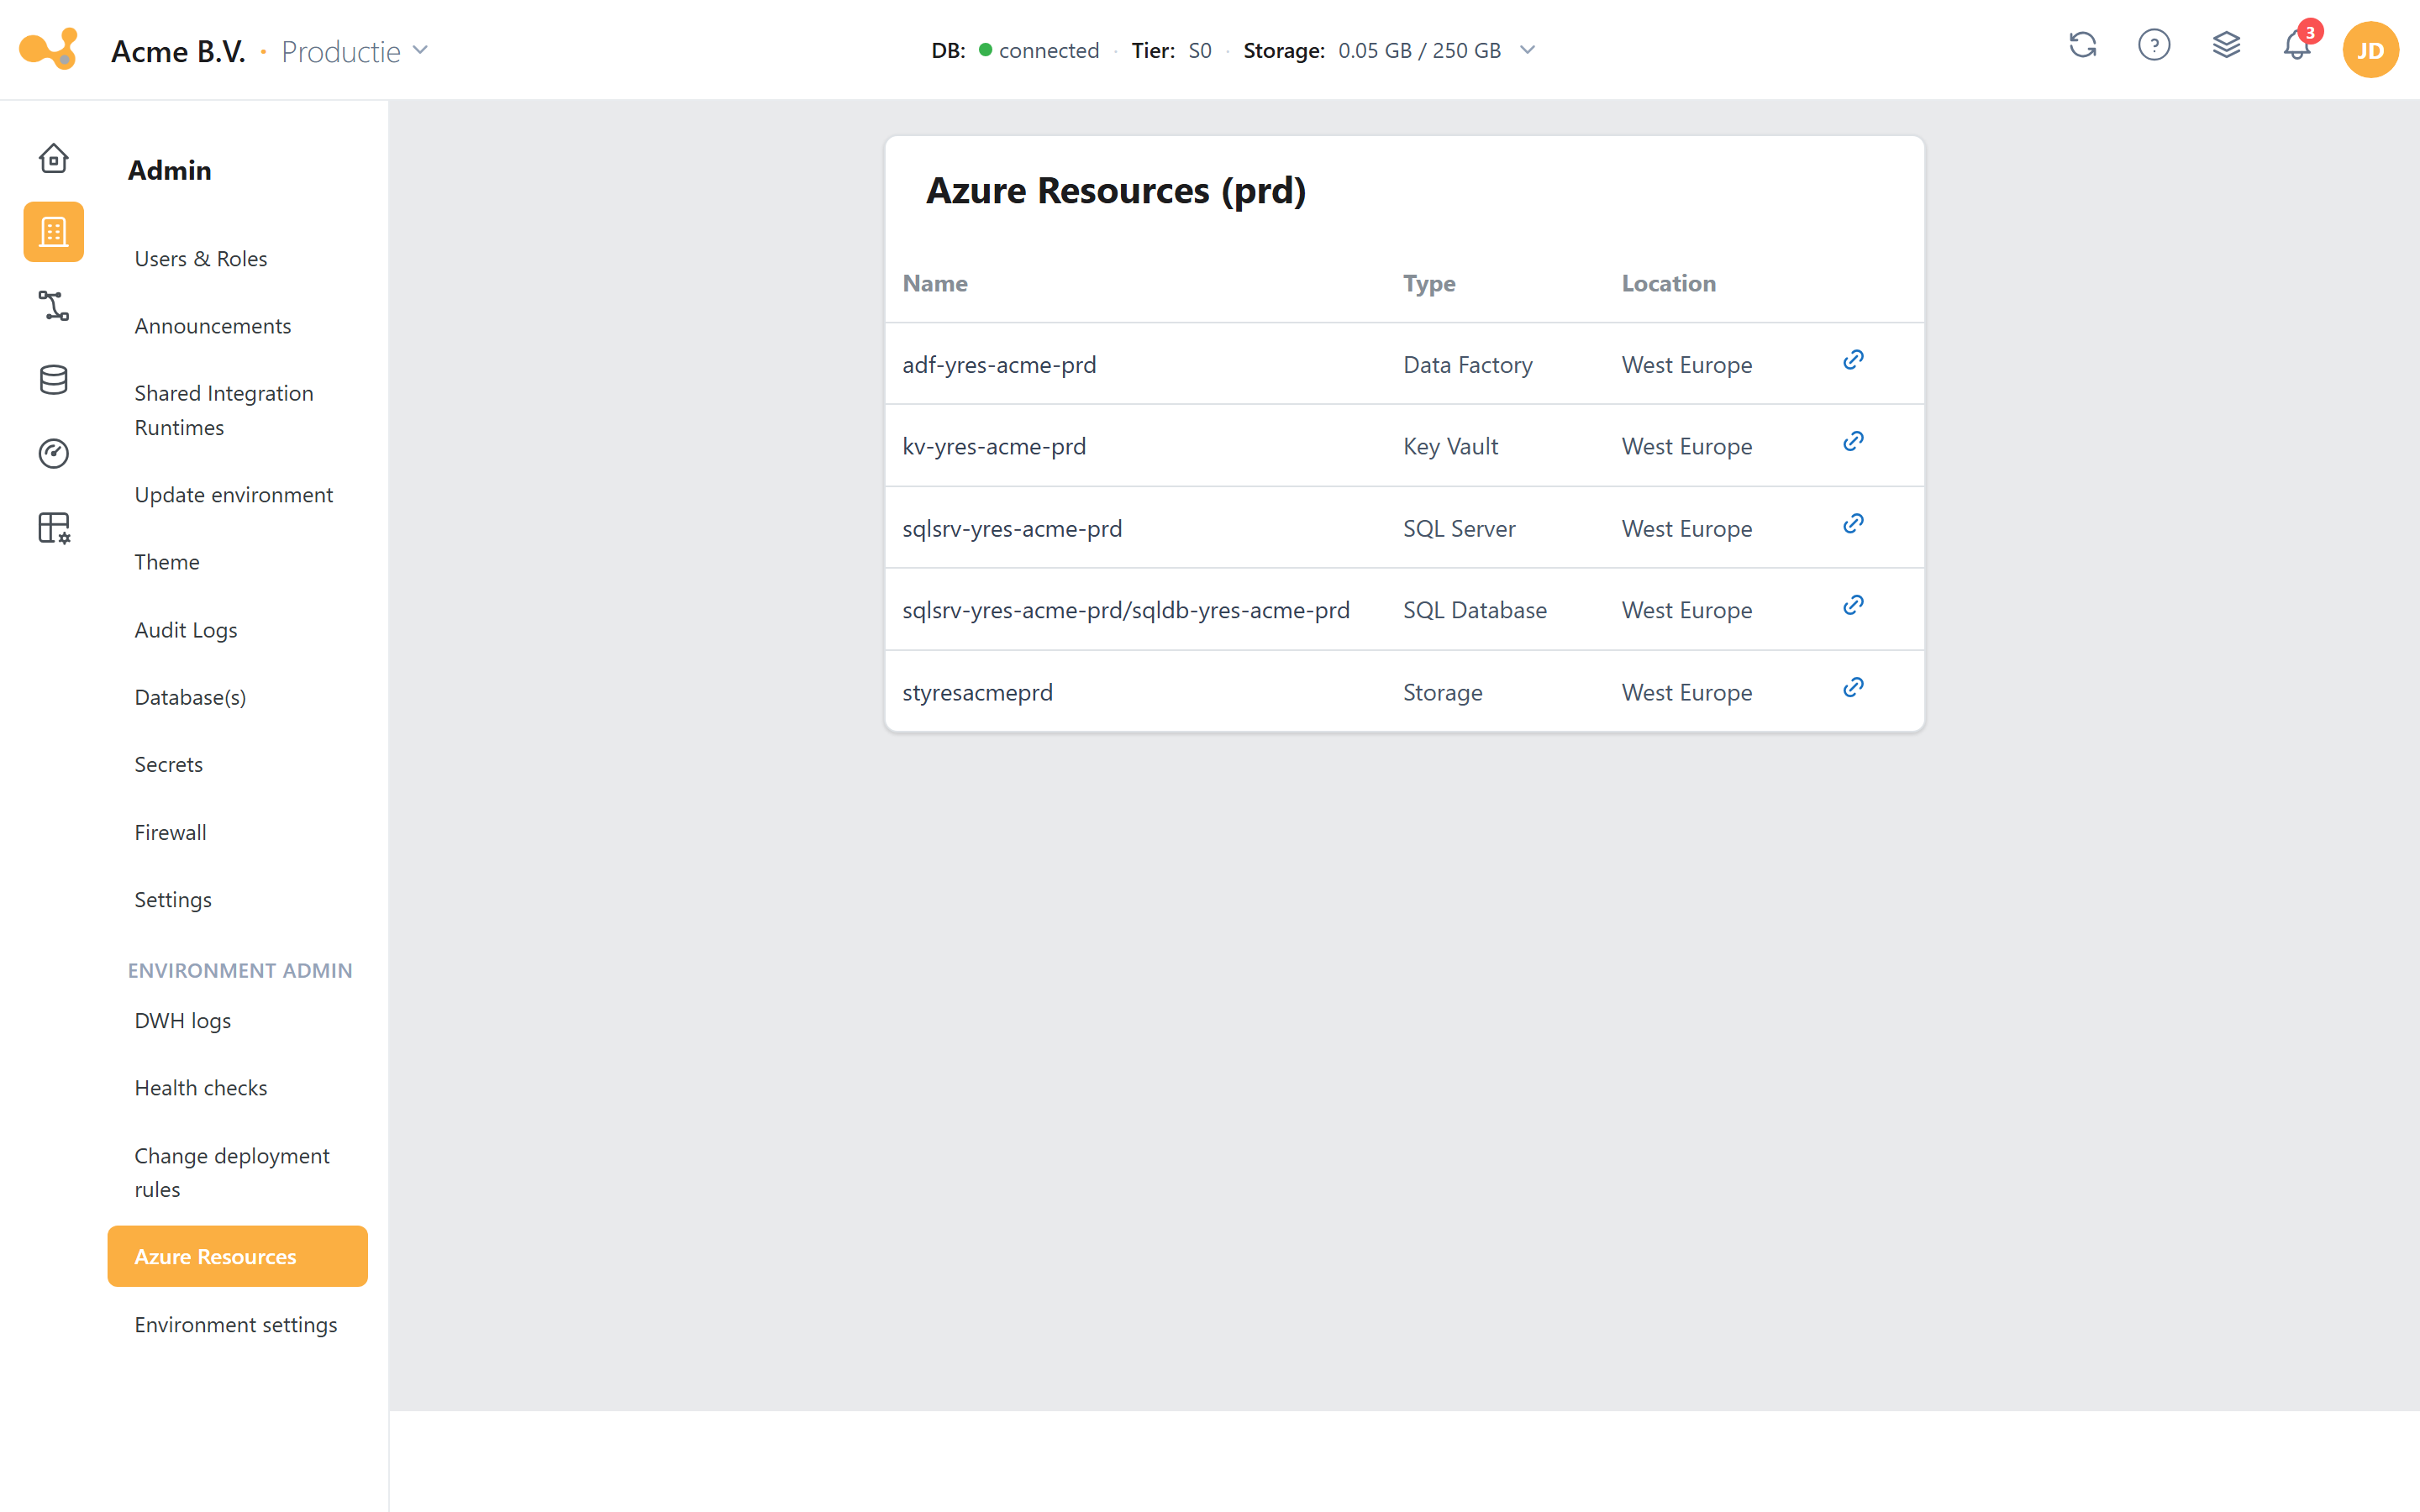
The table shows the provisioned Azure resources for the environment — Data Factory, Key Vault, SQL Server, SQL Database and Storage — each with their type and location.
Change deployment rules (Change overwrites)
Route: /admin/changeoverwrites (only for organizations with multiple environments). Translate object names
between environments, for example ERP_DEV.Product (dev) → ERP_TST.Product (test) → ERP.Product (prod).
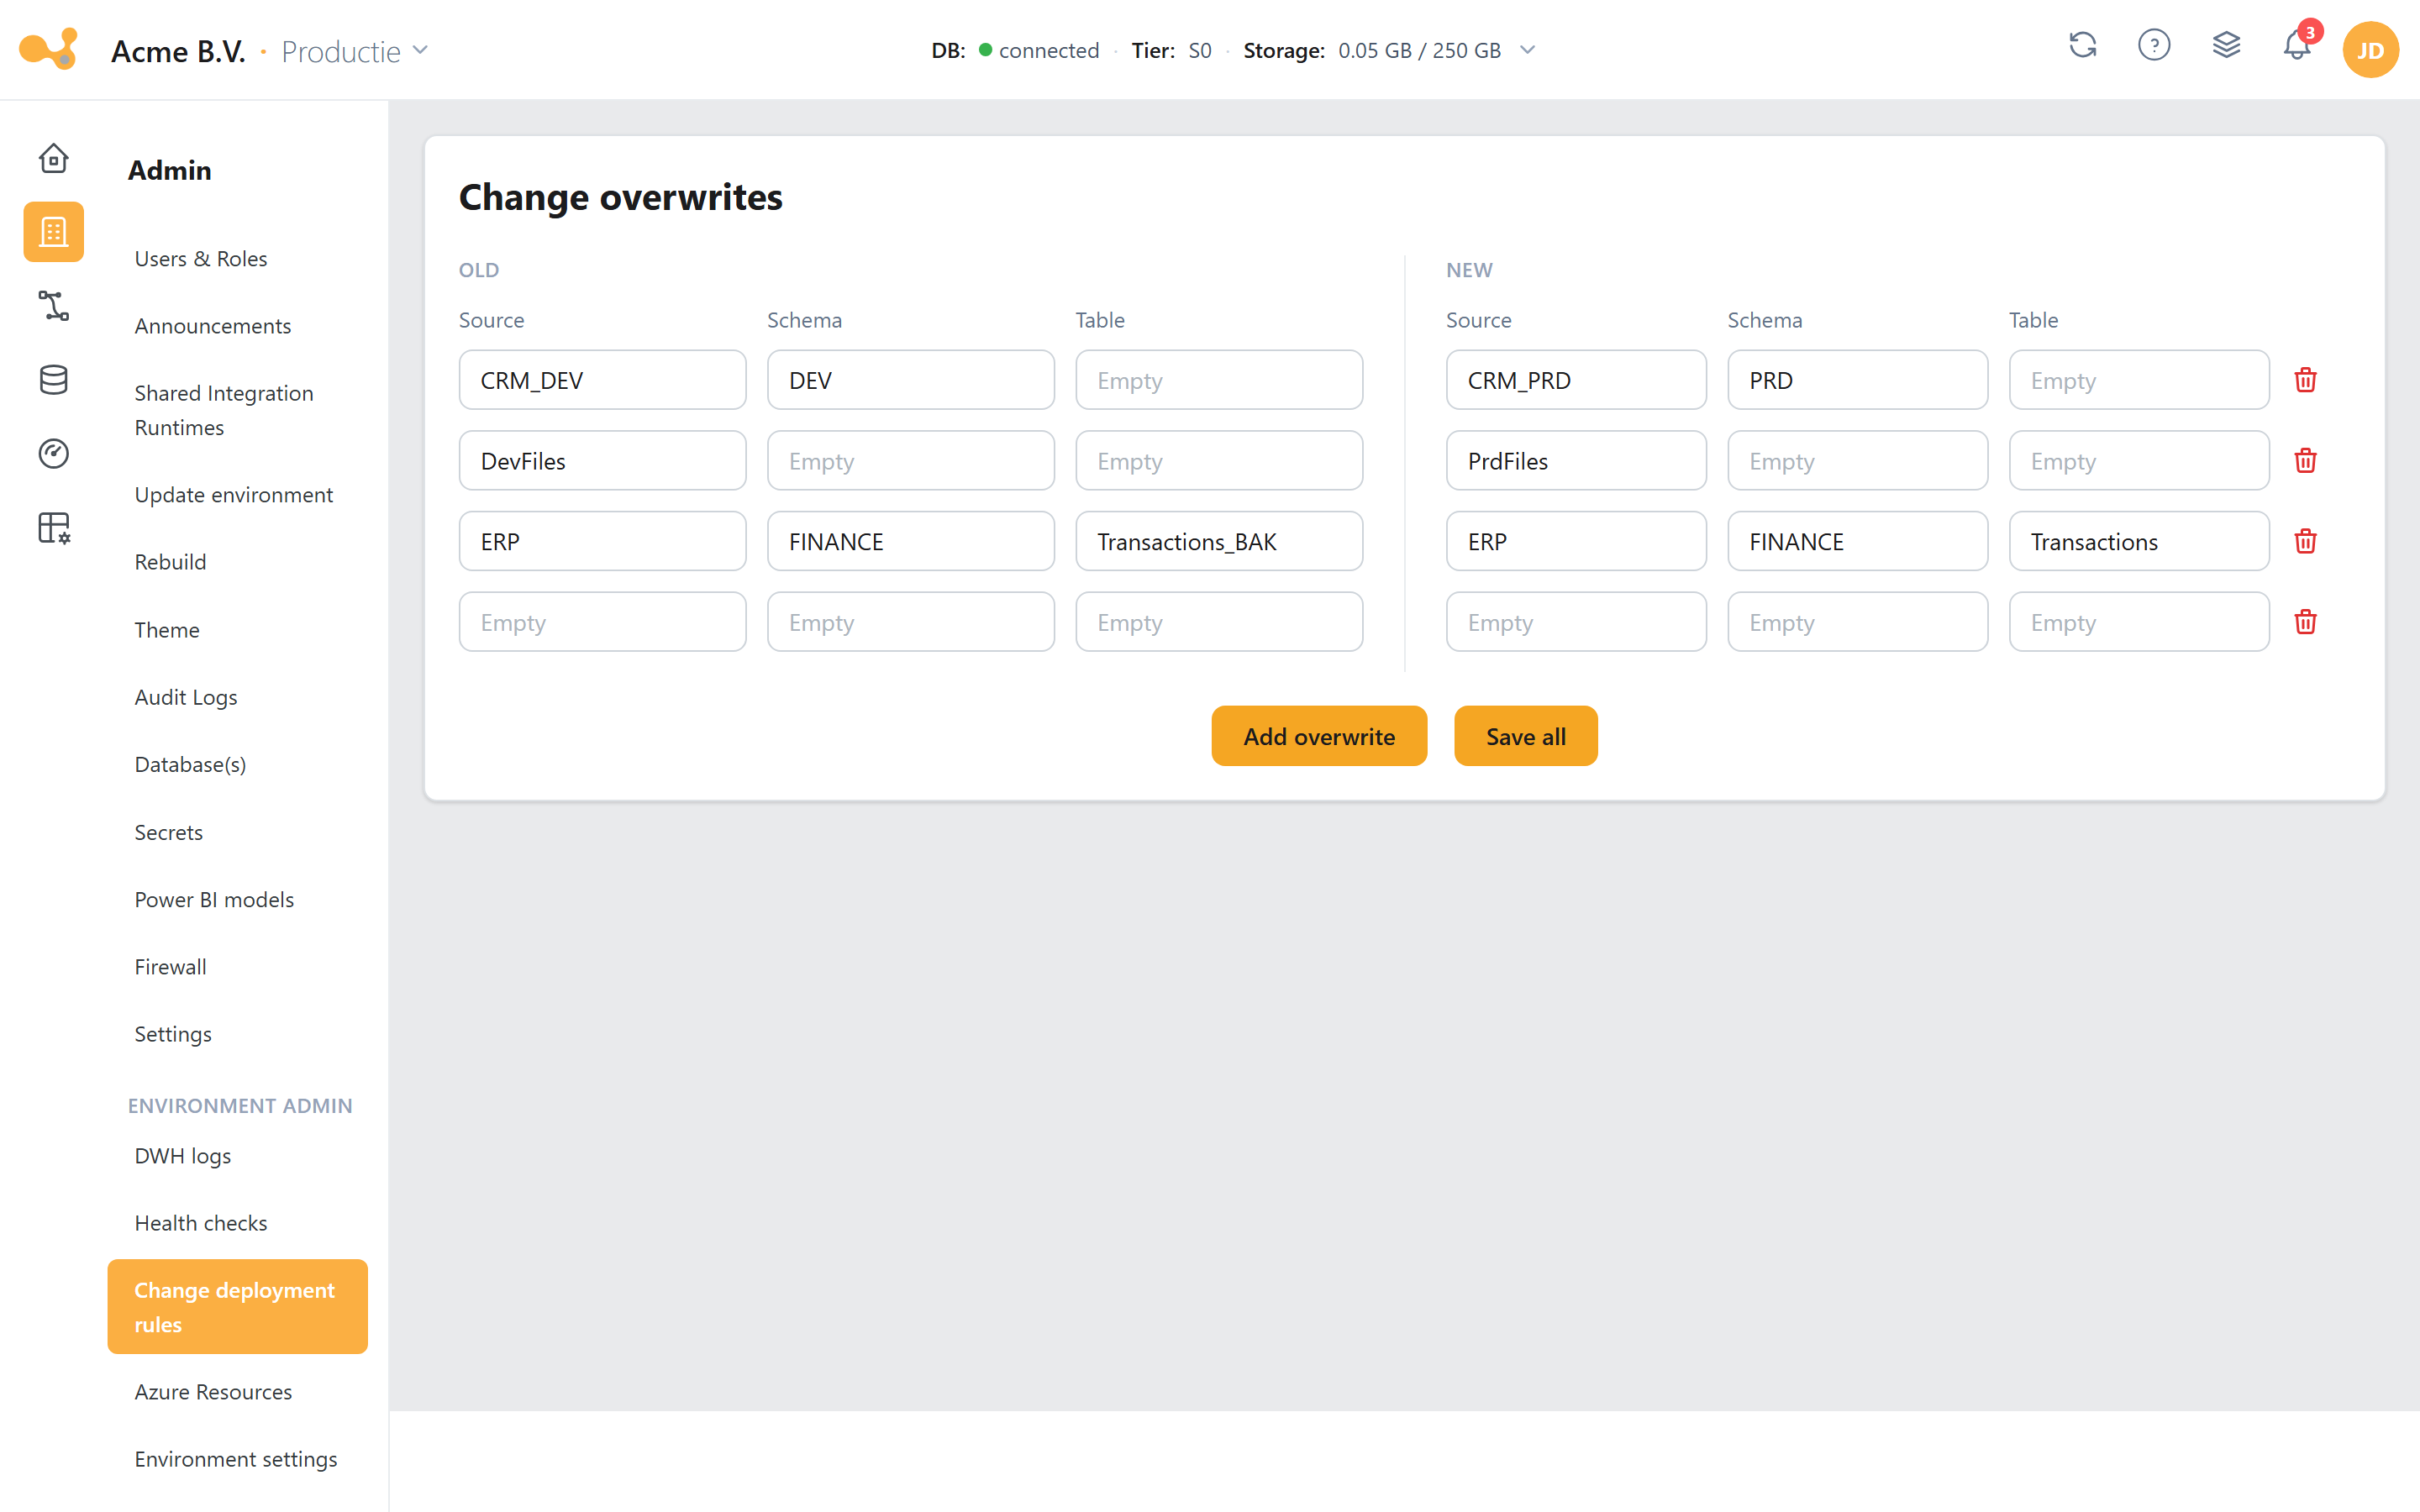
Map object names between environments (OLD → NEW: source/schema/table), e.g. CRM_DEV → CRM_PRD, so a change targets the right physical objects per environment.
Apply these rules before importing a change into the target environment. Often combined with Source/Schema/Table overwrite so the table name stays stable across all environments.
Data Warehouse Logs
Route: /admin/dwhlogs. View and filter the logs with step-by-step actions of executed stored
procedures, by date range, stored procedure type and severity. The log lines come from [Config].[ProcessLog]
in the data warehouse.
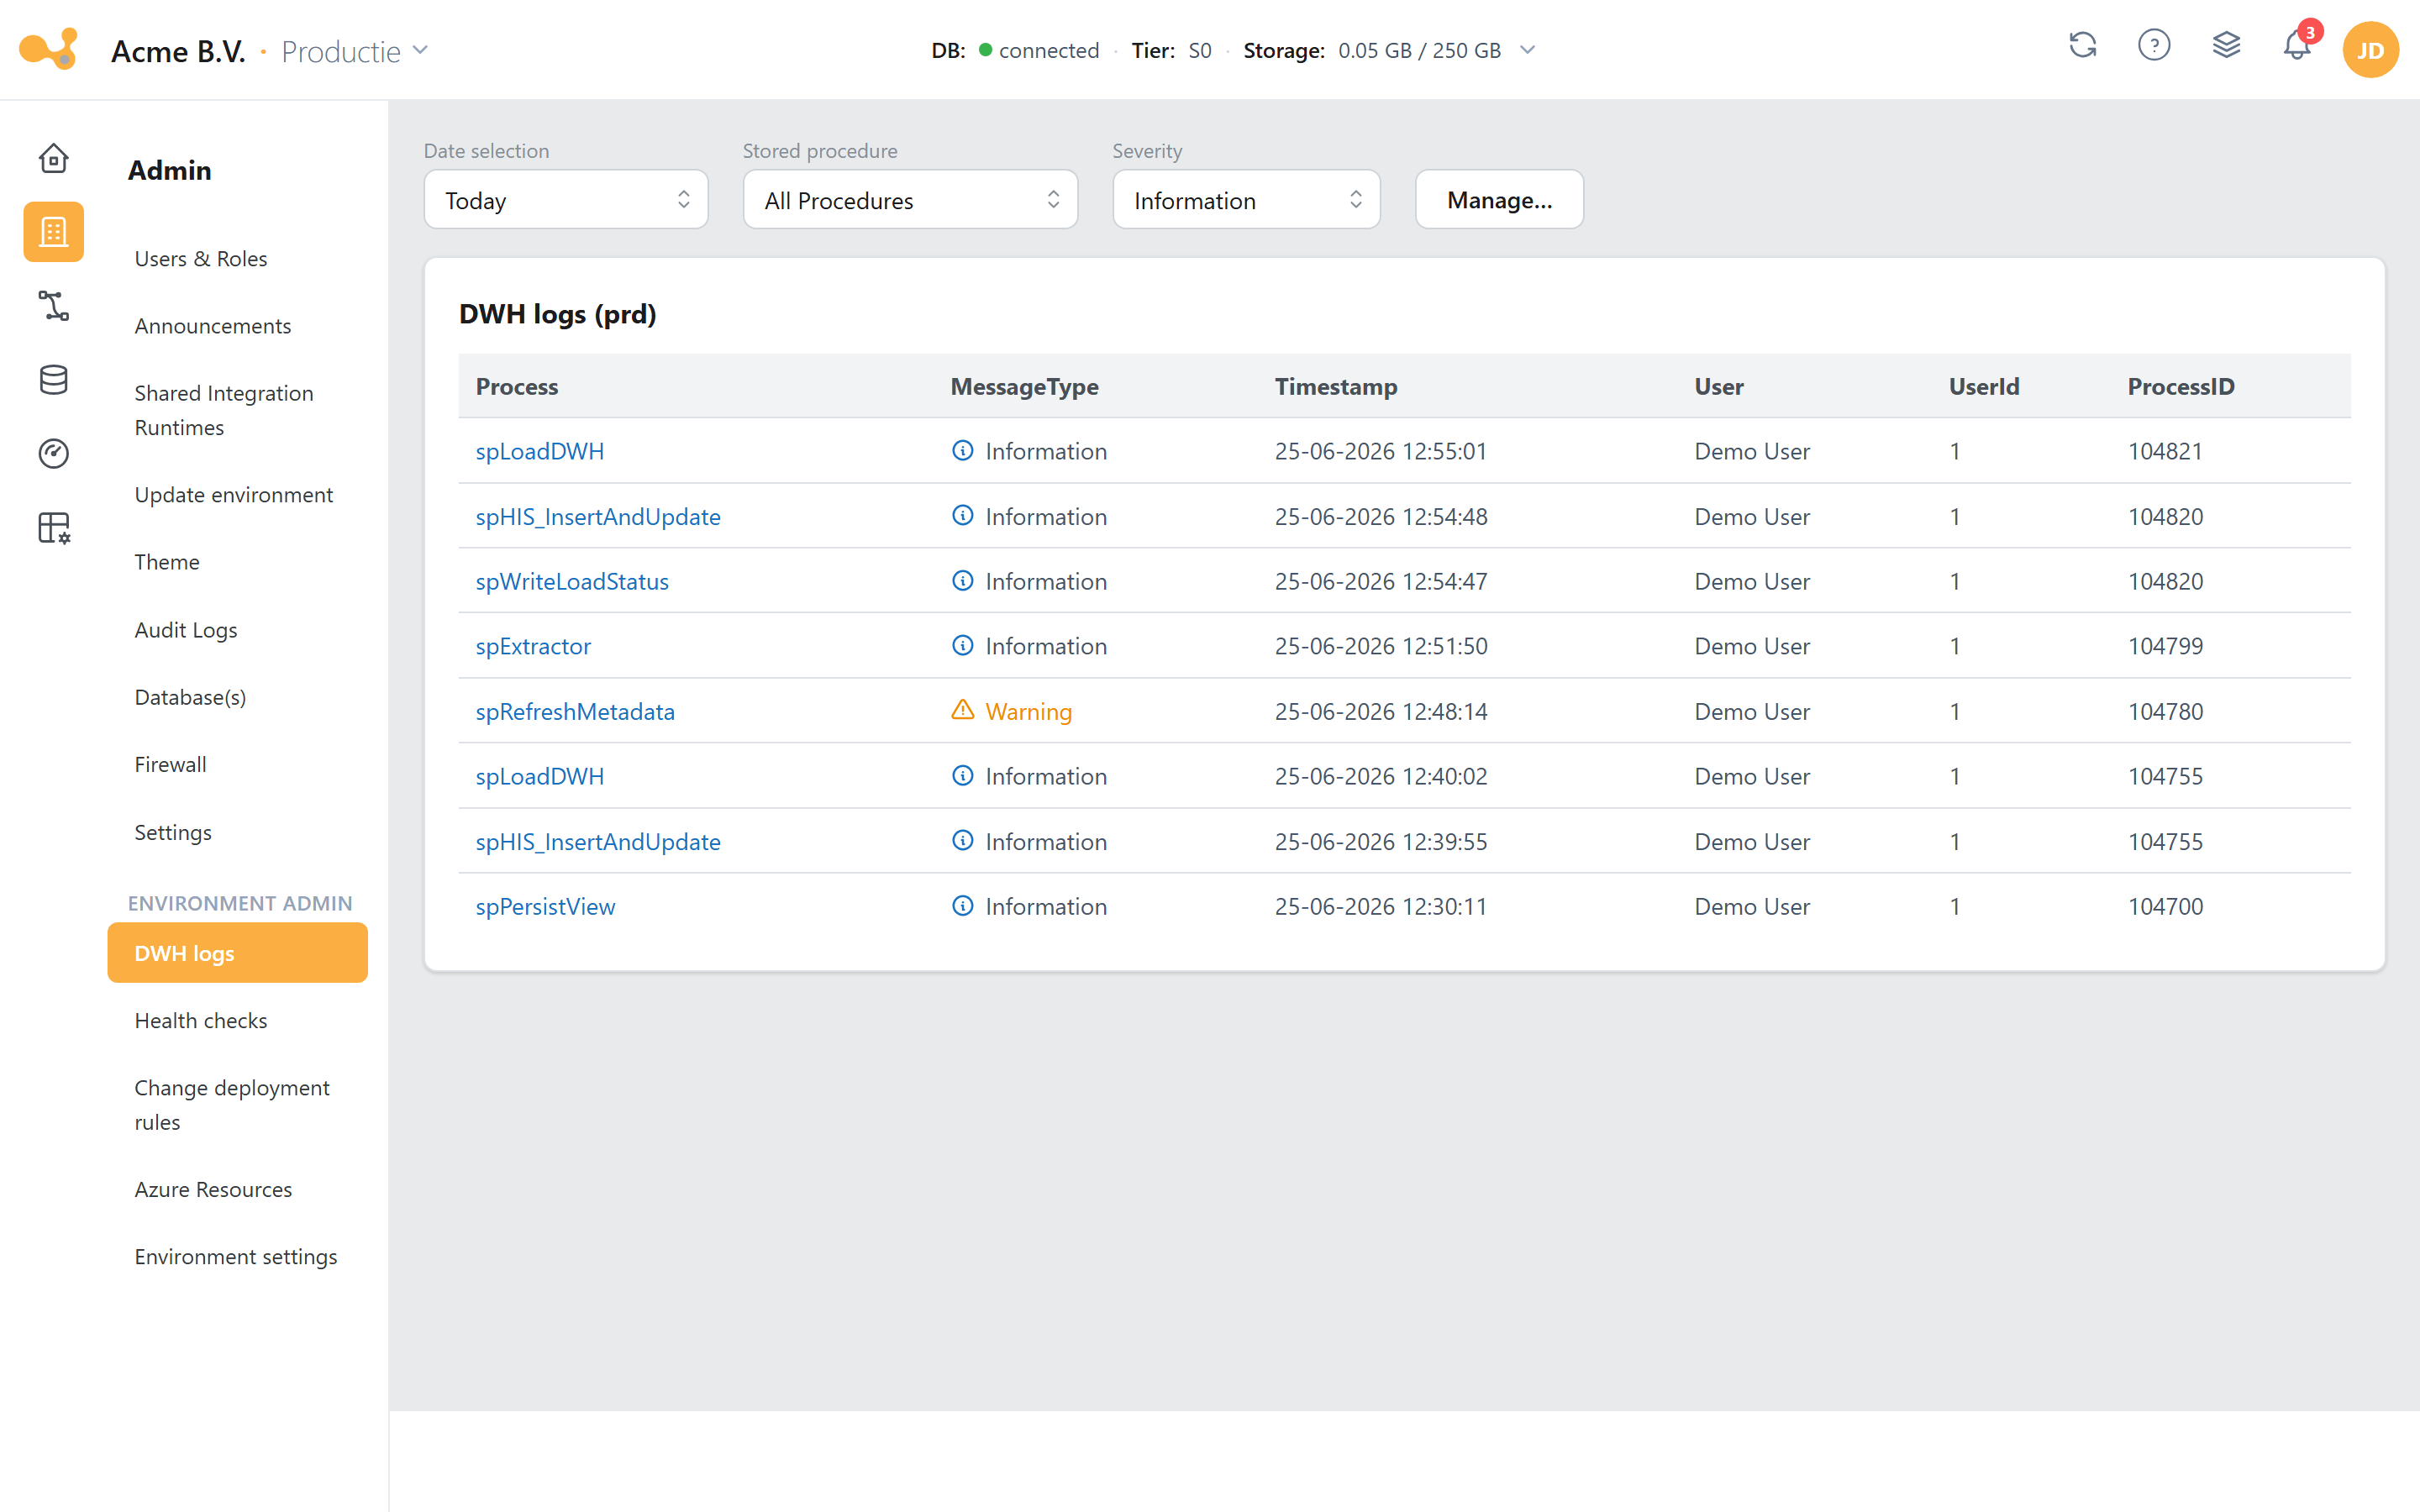
- Date filter — limit the log lines to a period.
- Procedure and log-level filters — filter on a specific stored procedure and on severity
(Information / Warning / Error / System Error / Dump), with an operator
equalorequal and worse. - Clear error count — clears the red error-counter badge that appears next to "DWH logs" in the sidebar as soon as there are DWH errors.
- Info icon — opens a steps modal with the step-by-step execution of the procedure.
- Failed step — the modal shows the status and the error message per step, with a link to the associated run in Azure Data Factory.
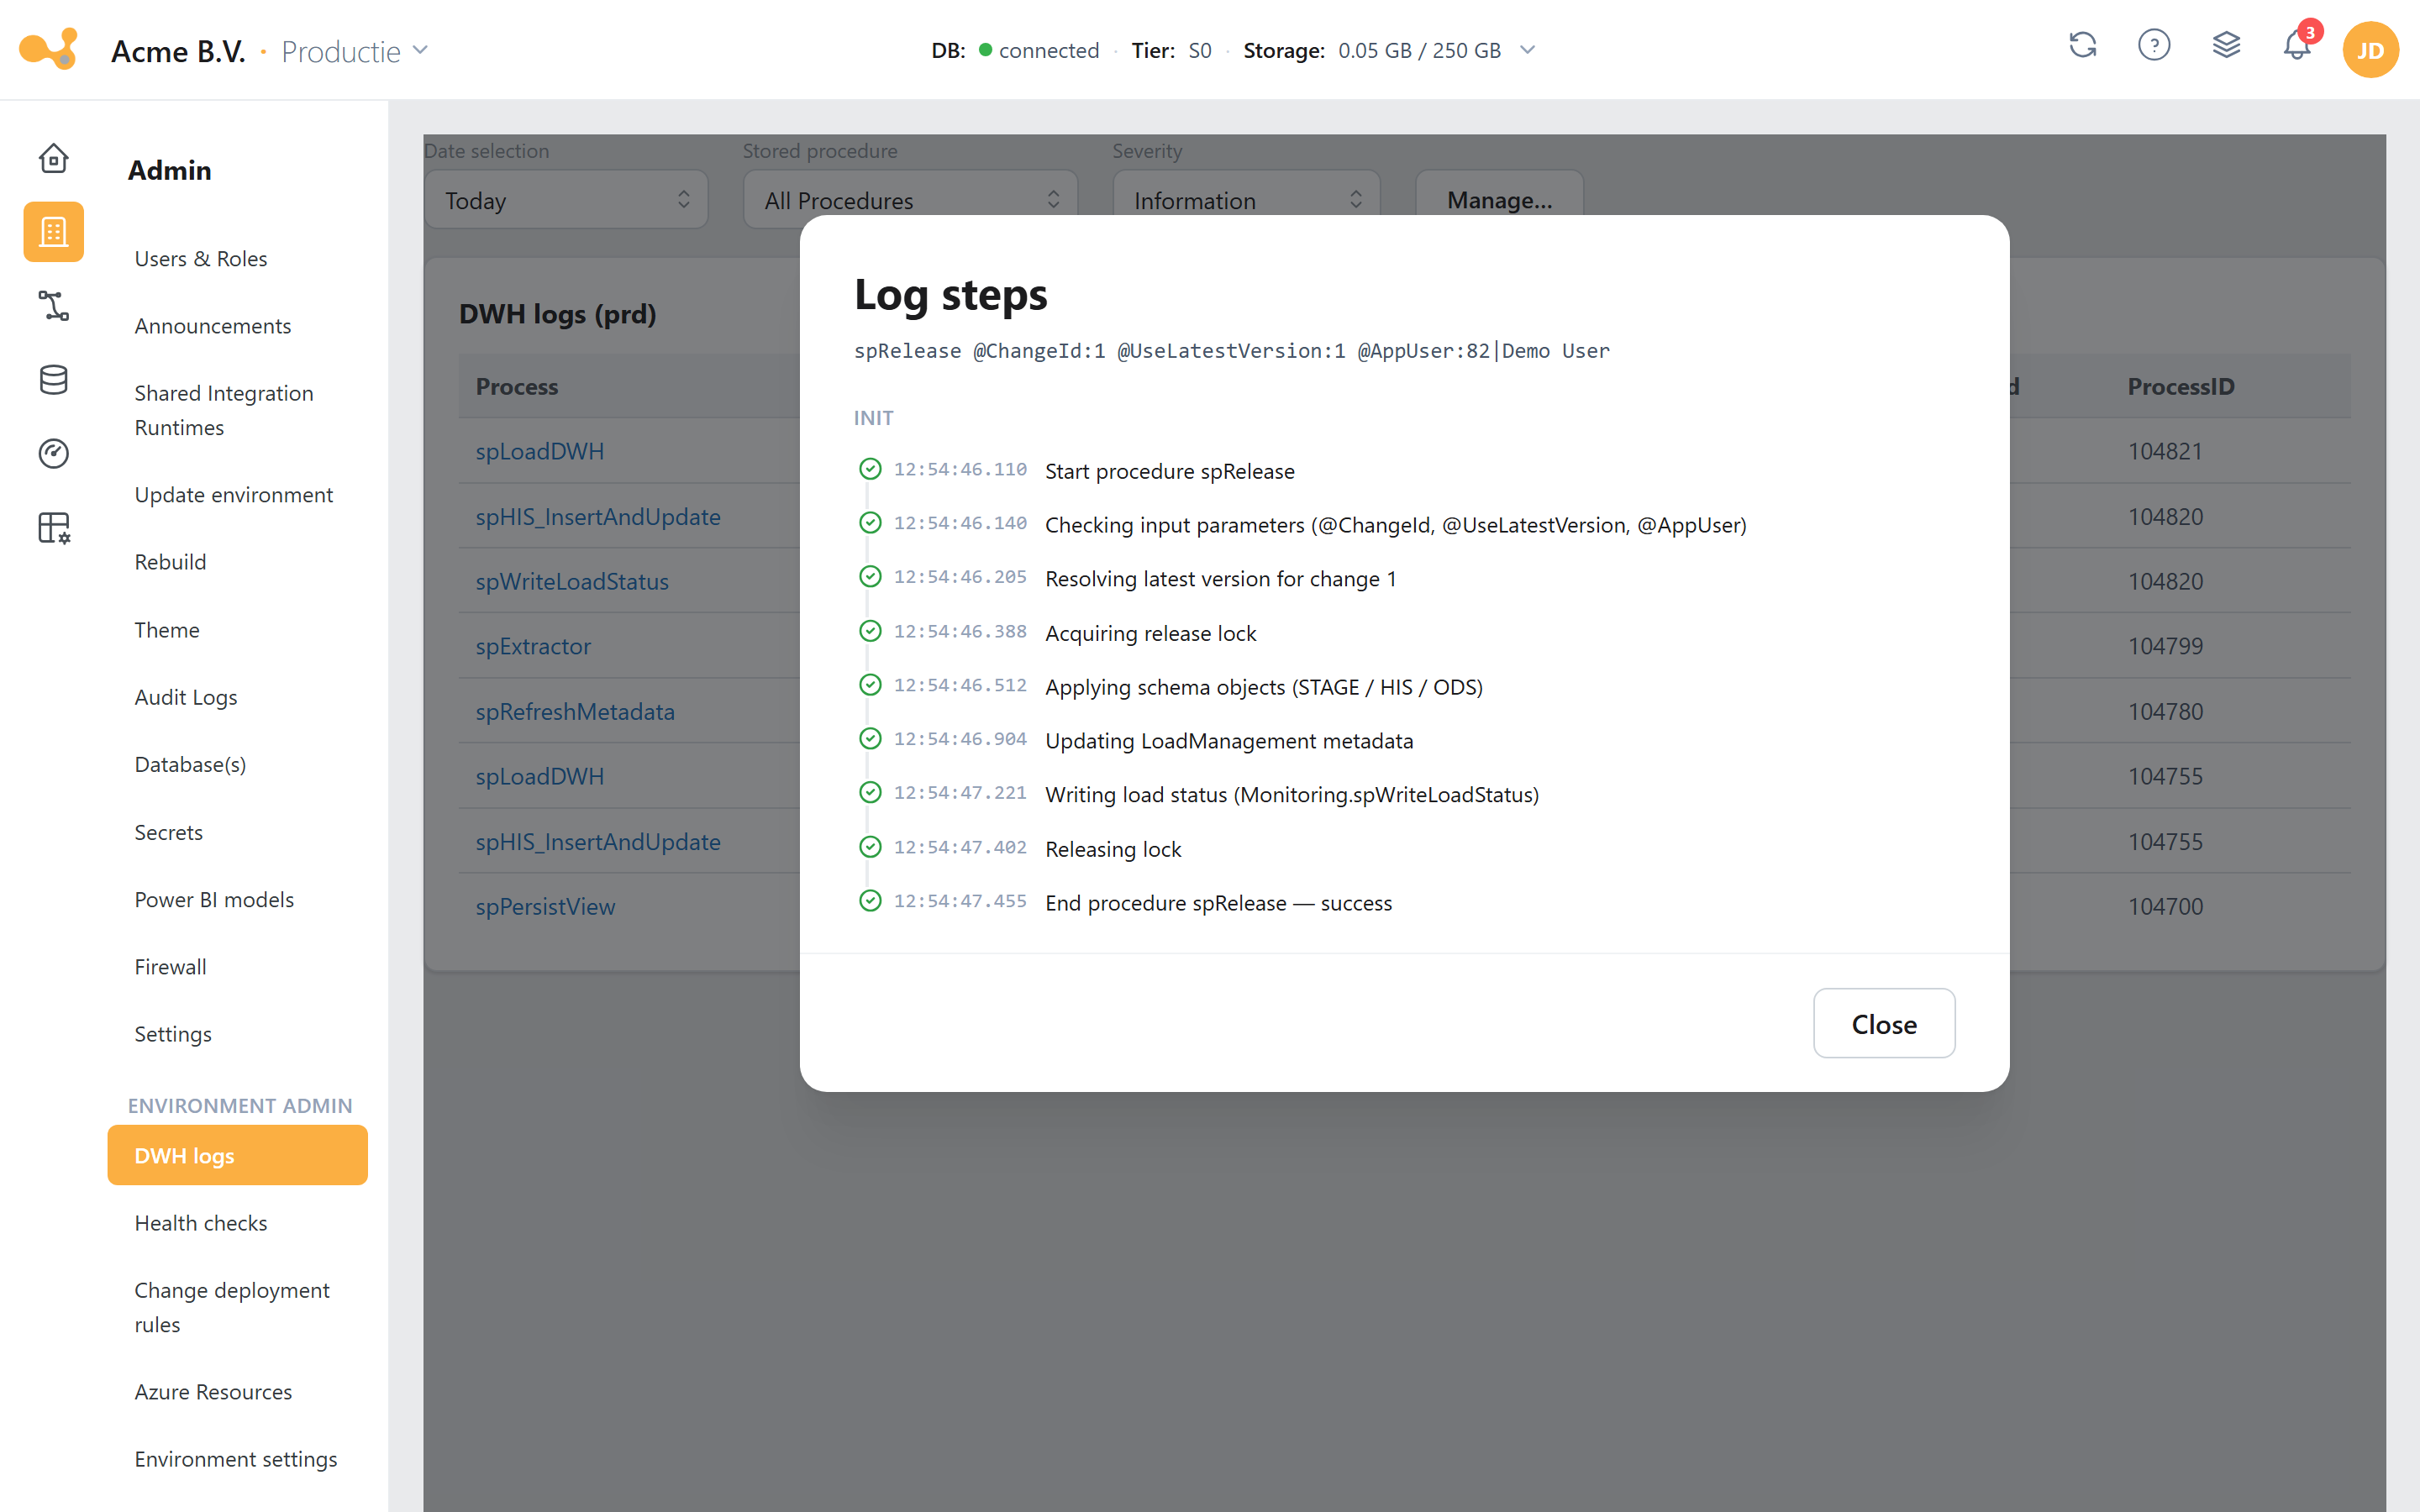 The Log Steps modal: the status and timestamp per step; on failure a direct link to the ADF run.
Data Warehouse Logs are not available on the Development environment. On dev, use the logs under Monitoring and the DWH processes.
Environment Settings
Route: /admin/dbsettings. DWH settings configurable per environment.
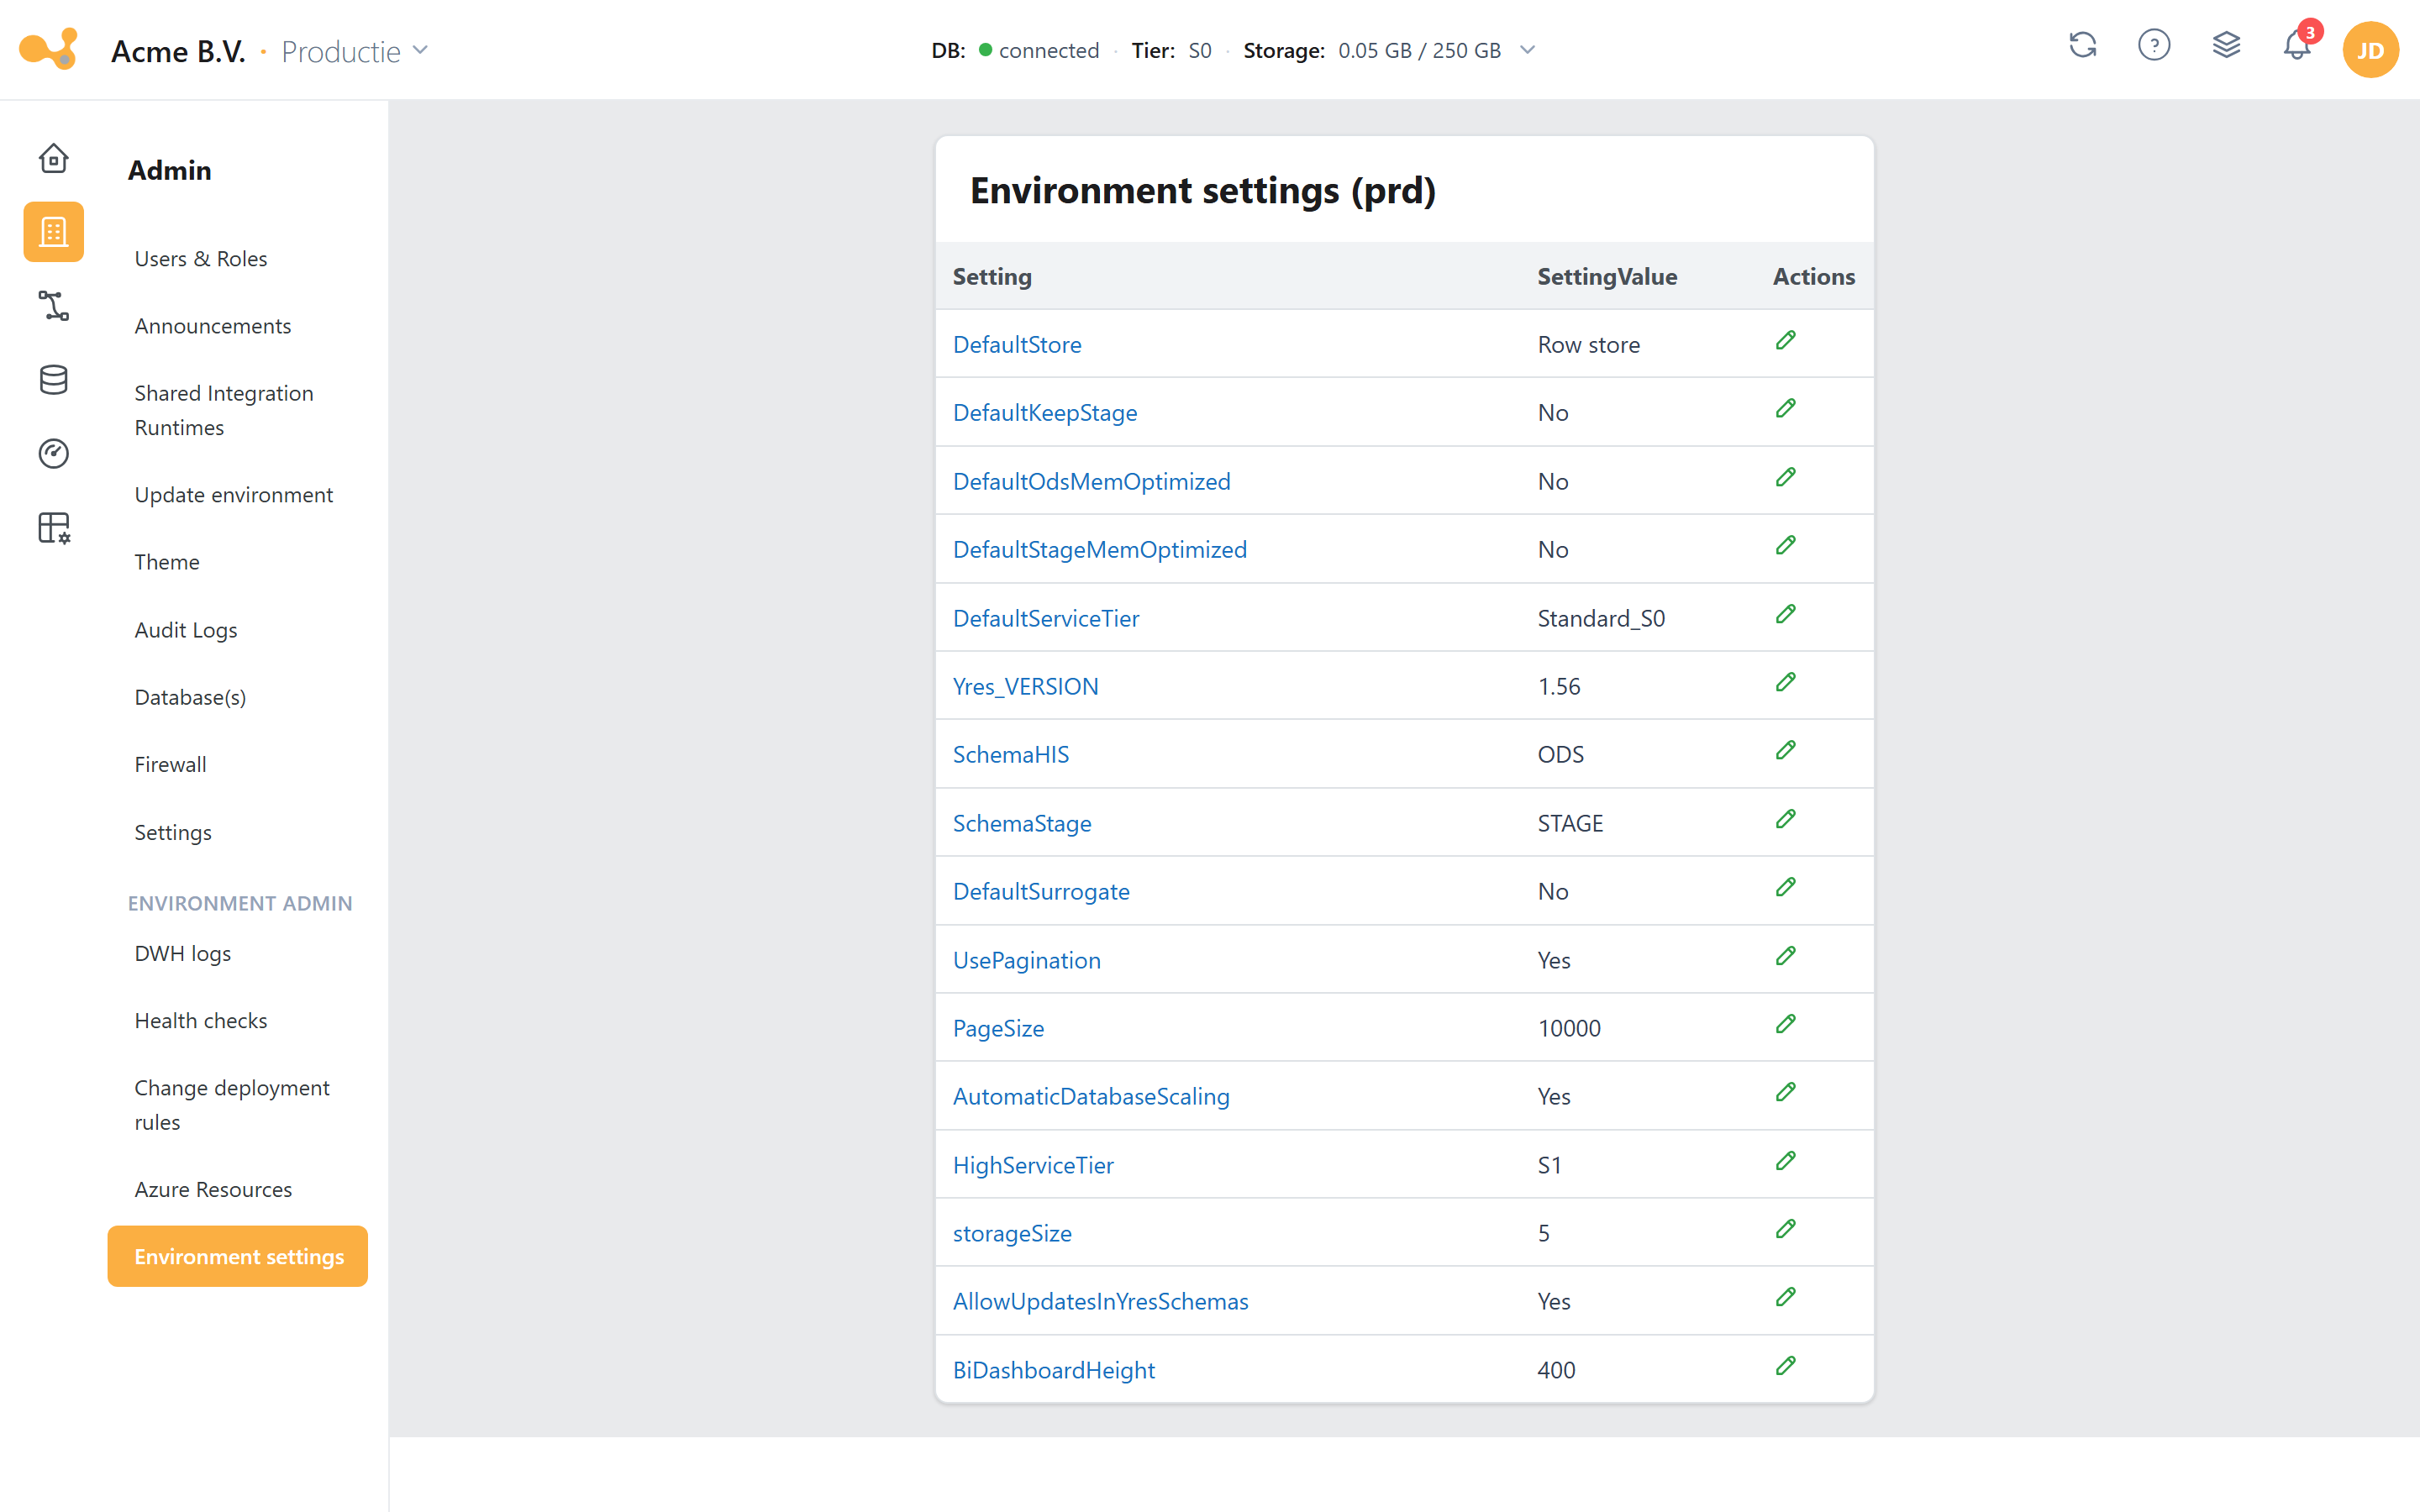
- Settings table — shows the name and a readable value per setting for the selected environment.
- Edit modal — the right input field per setting (combobox for tiers, free text for schema names, number for storage, read-only for versions).
- Tier + storage — the min/max storage (GiB) depends on the selected service tier (S0–P15).
- UsePagination warning — the screen warns on pagination-related settings.
Set these settings before you add the first source, for consistency. The Stage and HIS schema settings must be in sync between environments — otherwise changes won't line up with each other.
The most important settings. The names in the table are the actual names as stored in
[Config].[Settings] (the Yres documentation locally uses a different capitalization; that
is noted in parentheses).
| Setting (stored name) | Default | Meaning |
|---|---|---|
DefaultStore | ROW | Row- (default) or column-oriented storage for STAGE. Row = efficient reading/writing, column = queries. |
DefaultKeepStage | 0 | Truncate the staging table after a delta load (0 = No) or keep the records (1 = Yes). The load engine reads the column keepStage per table; this setting mainly determines the default when adding a table. |
DefaultOdsMemOptimized (doc: DefaultODSMemOptimized) | 0 | Intended to store ODS/HIS tables memory-optimized. See the warning below the table. |
DefaultStageMemOptimized (doc: DefaultStageMemOptimize) | 0 | Store STAGE tables memory-optimized. |
DefaultServiceTier / HighServiceTier | Standard_S0 / standard_S1 | Base Azure SQL service tier and the tier scaled up to under high load. |
AutomaticDatabaseScaling | 1 | Automatically scale the database for managed loads. At 0, scaling up is skipped. |
DefaultSurrogate | 0 | Automatically create surrogate keys for the natural key (stored in [LoadManagement].[SurrogateKeys]; overridable per table). |
UsePagination / PageSize | 1 / 10000 | Process large STAGE→HIS merges in pages. With PageSize = OPTIMAL, Yres determines the page size itself. |
retryCount (doc: RetryCount) | 1 | Number of times a failed page is retried (in the proc an empty value falls back to 3). |
SchemaHIS / SchemaStage | ODS / STAGE | Names of the HIS and STAGE schema. SchemaHIS defaults to ODS, not to HIS. |
storageSize (doc: StorageSize) | 5 | Maximum storage in GiB (depending on the service tier). |
BiDashboardUrl / BiDashboardHeight (doc: BIDashboardUrl/Height) | NULL / 400 | Embed URL and height of the PowerBI dashboard. |
AllowUpdatesInIrisSchemas, AllowDeletesFromDB, AllowSettingsUpdates, AllowLogManipulation | 0 | Whether users may directly change / delete / configure / edit logs in the database. |
EnvironmentType | — | DTAP type of this environment (DEV / TST / ACC / SND / PRE / PRD). |
Two settings behave differently in the current DWH code than their name suggests (verified against the code):
DefaultOdsMemOptimizedis effectively not read by the fallback functionfxGetOptimized(both branches reference the STAGE setting). The per-table columnodsMemOptimizeddoes work. Whether this is a bug or intentionally disabled cannot be derived from the repository.- The setting is seeded as
AllowUpdatesInIrisSchemas(with "Iris"), while the health check expects the nameAllowUpdatesInYresSchemas(with "Yres"). As long as the names are not aligned, the health check can mark this setting both as missing (9.03) and unknown (9.04).
Health Checks
Route: /admin/healthchecks (available from version 1.51). Shows the status of the DWH side of Yres
from the webapp. The checks are based on the view [Maintenance].[vwYresChecks] (the source file
is still called vwIrisChecks.sql). The view contains the expected list of objects and settings and flags
common issues, often with an error message and sometimes with a SQL script to fix it.
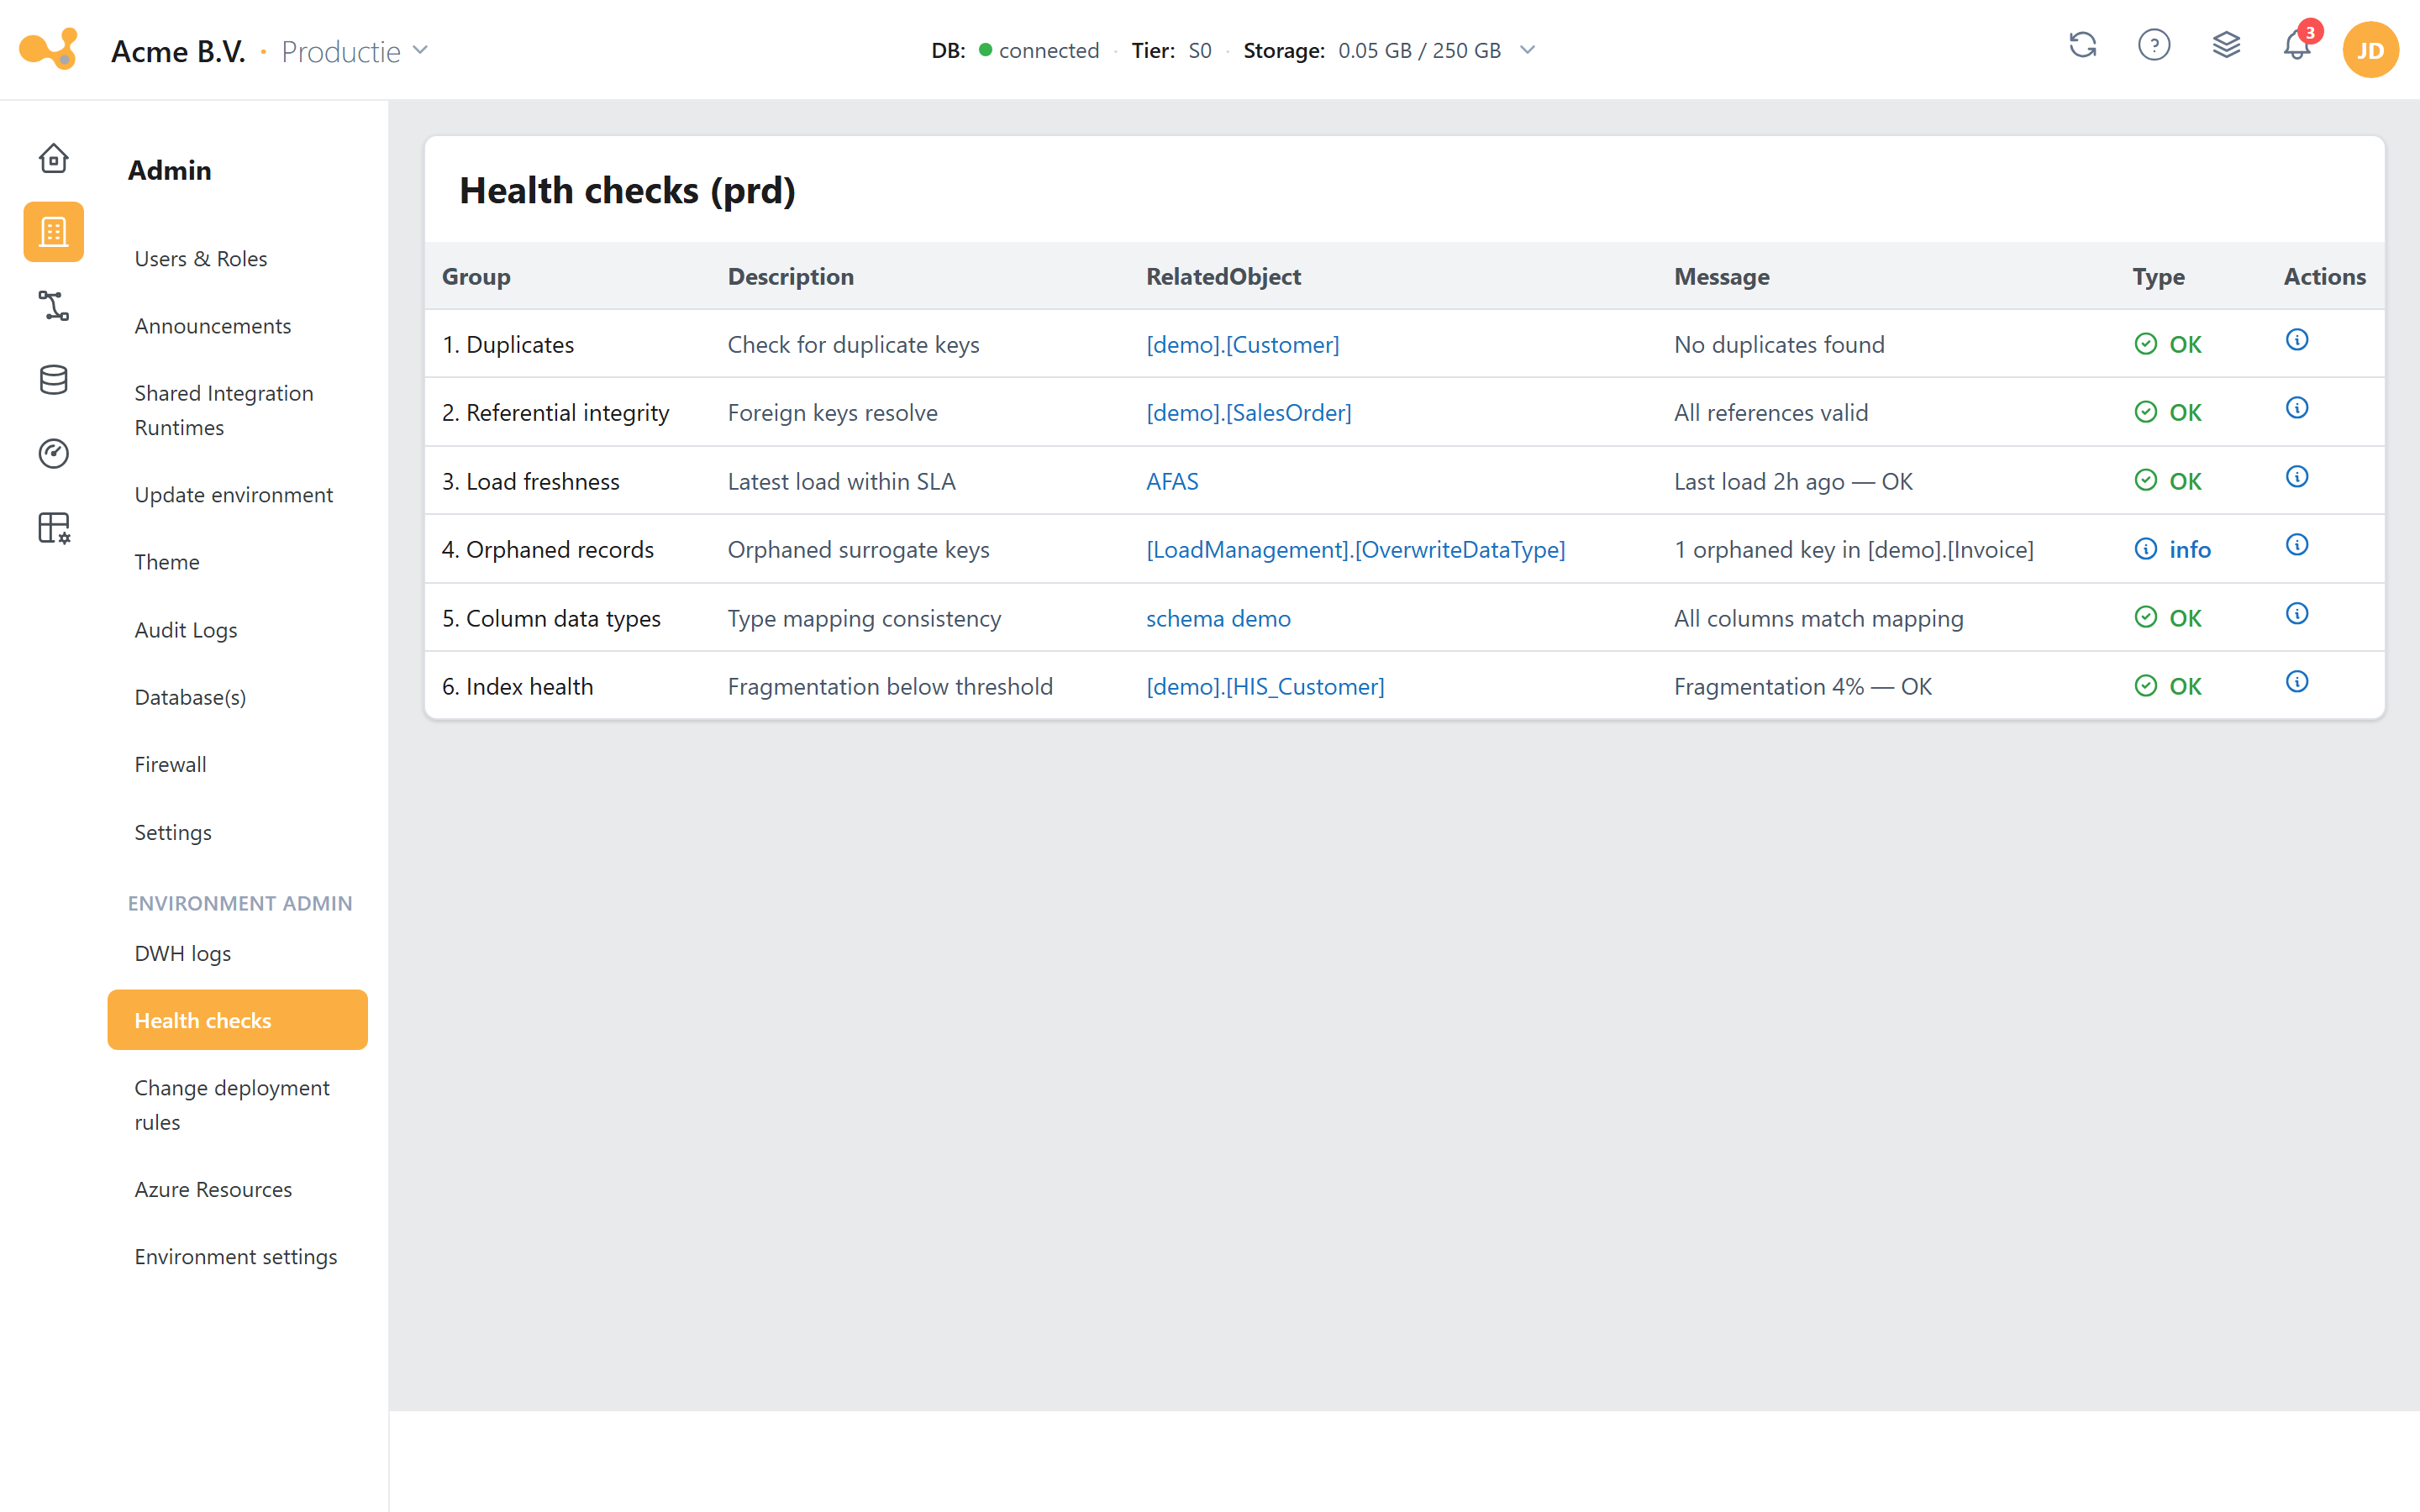
- Status per check — each check is OK, Warning or Error.
- Error message — on a deviation the check shows a description of the problem.
- SQL fix script — some checks offer a ready-made script to resolve the issue.
- Run with care — only run a script if you understand it.
A generated fix script changes the database directly. Only run it if you are sure what it does and consult a Yres admin if in doubt.
PowerBI Dashboard
Route: /admin/powerBiDashboard. Shows a PowerBI report within the webapp via an embed URL (set
with the setting BiDashboardUrl).
More admin screens
Besides the above, the Admin section also contains:
- Global type mapping (
/admin/globaltypemapping) — the org-wide default data type mapping (LoadManagement.GlobalTypeMapping). - Theme (
/admin/theme) — upload logo and background, blur, primary color and the default light/dark mode. - Power BI credentials (
/admin/powerBiCredentials) — manage the PowerBI tenant credentials.
See Webapp screens for the full list of routes and fields.